UniFi 101: How to configure Paypal Payments Pro with Hotspot
- Megan
- Latest News
- 0 likes
- 10291 views
- 0 comments
Did you know that UniFi Hotspot can now be integrated with Paypal Payments Pro?
Below is a step-by-step guide on how to set up guest payment portal with Paypal Payments Pro, this service requires a monthly subscription fee paid to Paypal.
Step 1: How to prepare a Paypal test account
Use the Paypal article How do I test my integration with the Payflow Gateway using the hosted pages? to set up the Paypal account. Follow the steps closely, as some steps provide important information.
Part 2 of the Paypal guide prompts you to sign in ( or sign up) for Paypal.
- Sign Up
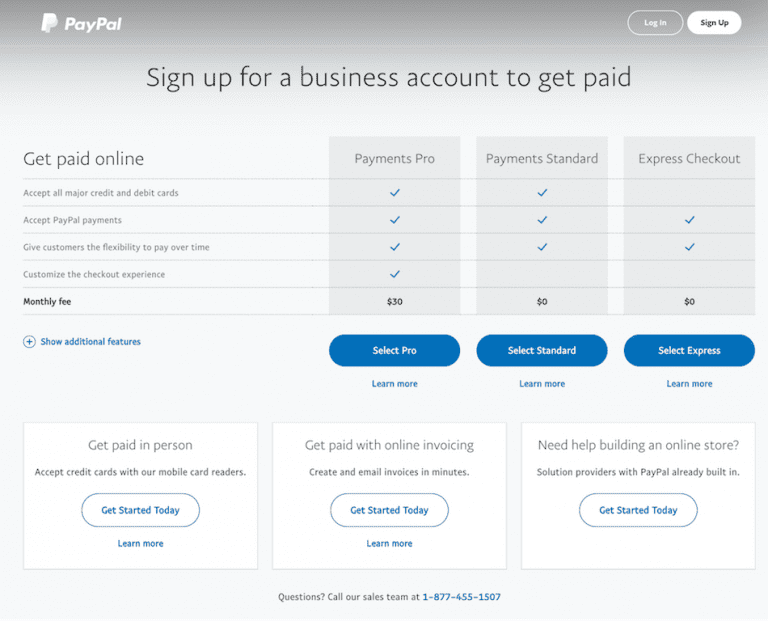
Click Log In>Sign Up> Business Account
- Select account type
You will be prompted to select an account type.

- Enter your business information
You will be prompted to enter your email and business information. Once all information is entered, you will be taken to the Paypal homepage. To continue, go back to Paypal Developer and log in, then continue to follow part 2 of the Paypal guide.
Note: Part 3.6 of the Paypal guide prompts you to change the payment confirmation from Show Confirmation page to On my website. Enter your controller subdomain here.
Step 2: How to prepare the UniFi Controller
- Enable Guest Portal
In the UniFi Controller, enable Guest Portal, and select Hotspot Authentication. In order to use Paypal, your controller must be run on a fully qualified domain name (FQDN) with an active SSL certificate.

- Enable payment-based authorization
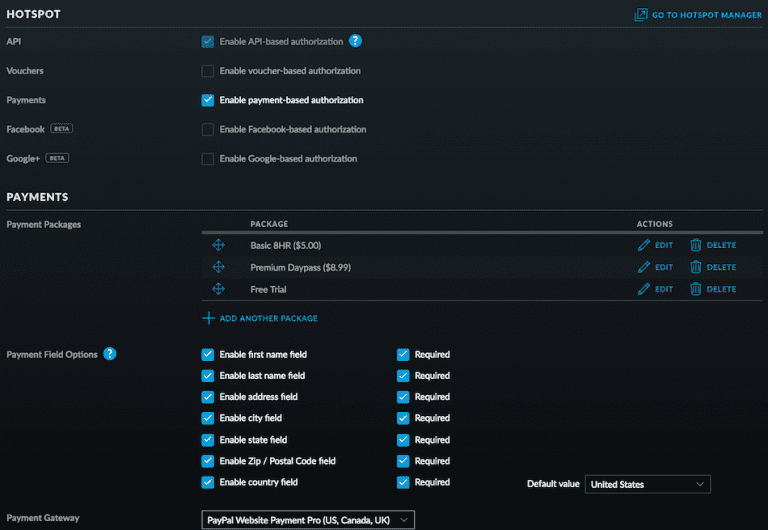
Scroll to the Hotspot section, and select enable payment-based authorization
- Select field options for final users
Under Payments, select the payment packages and field options that users will be required to fill out. Choose Paypal Website Pro as the payment gateway.

- Enter Paypal credentials
Under Paypal Website Payment Pro, enter your Paypal account credentials. You can find your credentials by logging in to the developer page, then doing the following:
- Click Dasboard
- Click Accounts under sandbox in the sidebar
- Click on your test account, then select Profile
- Click the API Credentials tab to see your credentials

Step 3: Testing
Use a client device to connect to the guest network and verify that you are able to connect to the guest portal and that the pay with credit card button directs the client to a payment page.
Step 4: How to activate Paypal Payments Pro
Once you have verified that the payment portal is properly configured, activate your Paypal Payments Pro account by logging in to the Paypal Manager and clicking Activate Your Account, which will prompt you to set up billing for the Pro account.


Comments
View Comments