Shopping Cart
There are no more items in your cartGrandstream Hotspot and Voucher Management: Simplified guest network setup
- Karabo Mawela
- Technical Tips & Guides
- 0 likes
- 6241 views
- 0 comments

Setting up a guest network doesn’t have to be complicated, especially with Grandstream’s innovative solutions like the GWN series of Access Points and cloud platforms. Whether you’re managing a coffee shop, hotel, or any other customer-facing environment, Grandstream’s hotspot and voucher management feature makes it effortless to control guest internet access while ensuring security and flexibility.
In this guide, we’ll walk you through how to set up a guest network with voucher-based authentication, explore the available options, and discuss potential integration with local payment gateways to streamline your business operations.
Why voucher-based authentication?
Voucher-based authentication allows businesses to control how guests access their network by issuing unique codes for internet access. This approach provides several benefits:
- Controlled access: Limit access by duration, bandwidth, or data usage.
- Enhanced security: Keep your private network separate from guest users.
- Customised experience: Tailor access speeds and durations for different user groups, such as VIP customers.
For instance, a coffee shop can offer free Wi-Fi to customers with a voucher that lasts two hours, while a co-working space can provide daily access to paying clients.
Supported Grandstream devices
Before we dive into the setup process, ensure you have a compatible device from the GWN series. All models in the GWN series are supported and integrate seamlessly with GWN Cloud or on-premises controllers, providing you with complete control over your network.
How to set up a guest network with voucher authentication
Step 1: Configure the Captive Portal
- Log into GDMS (Grandstream Device Management Software)
- Navigate to Profiles under the “Settings” menu.
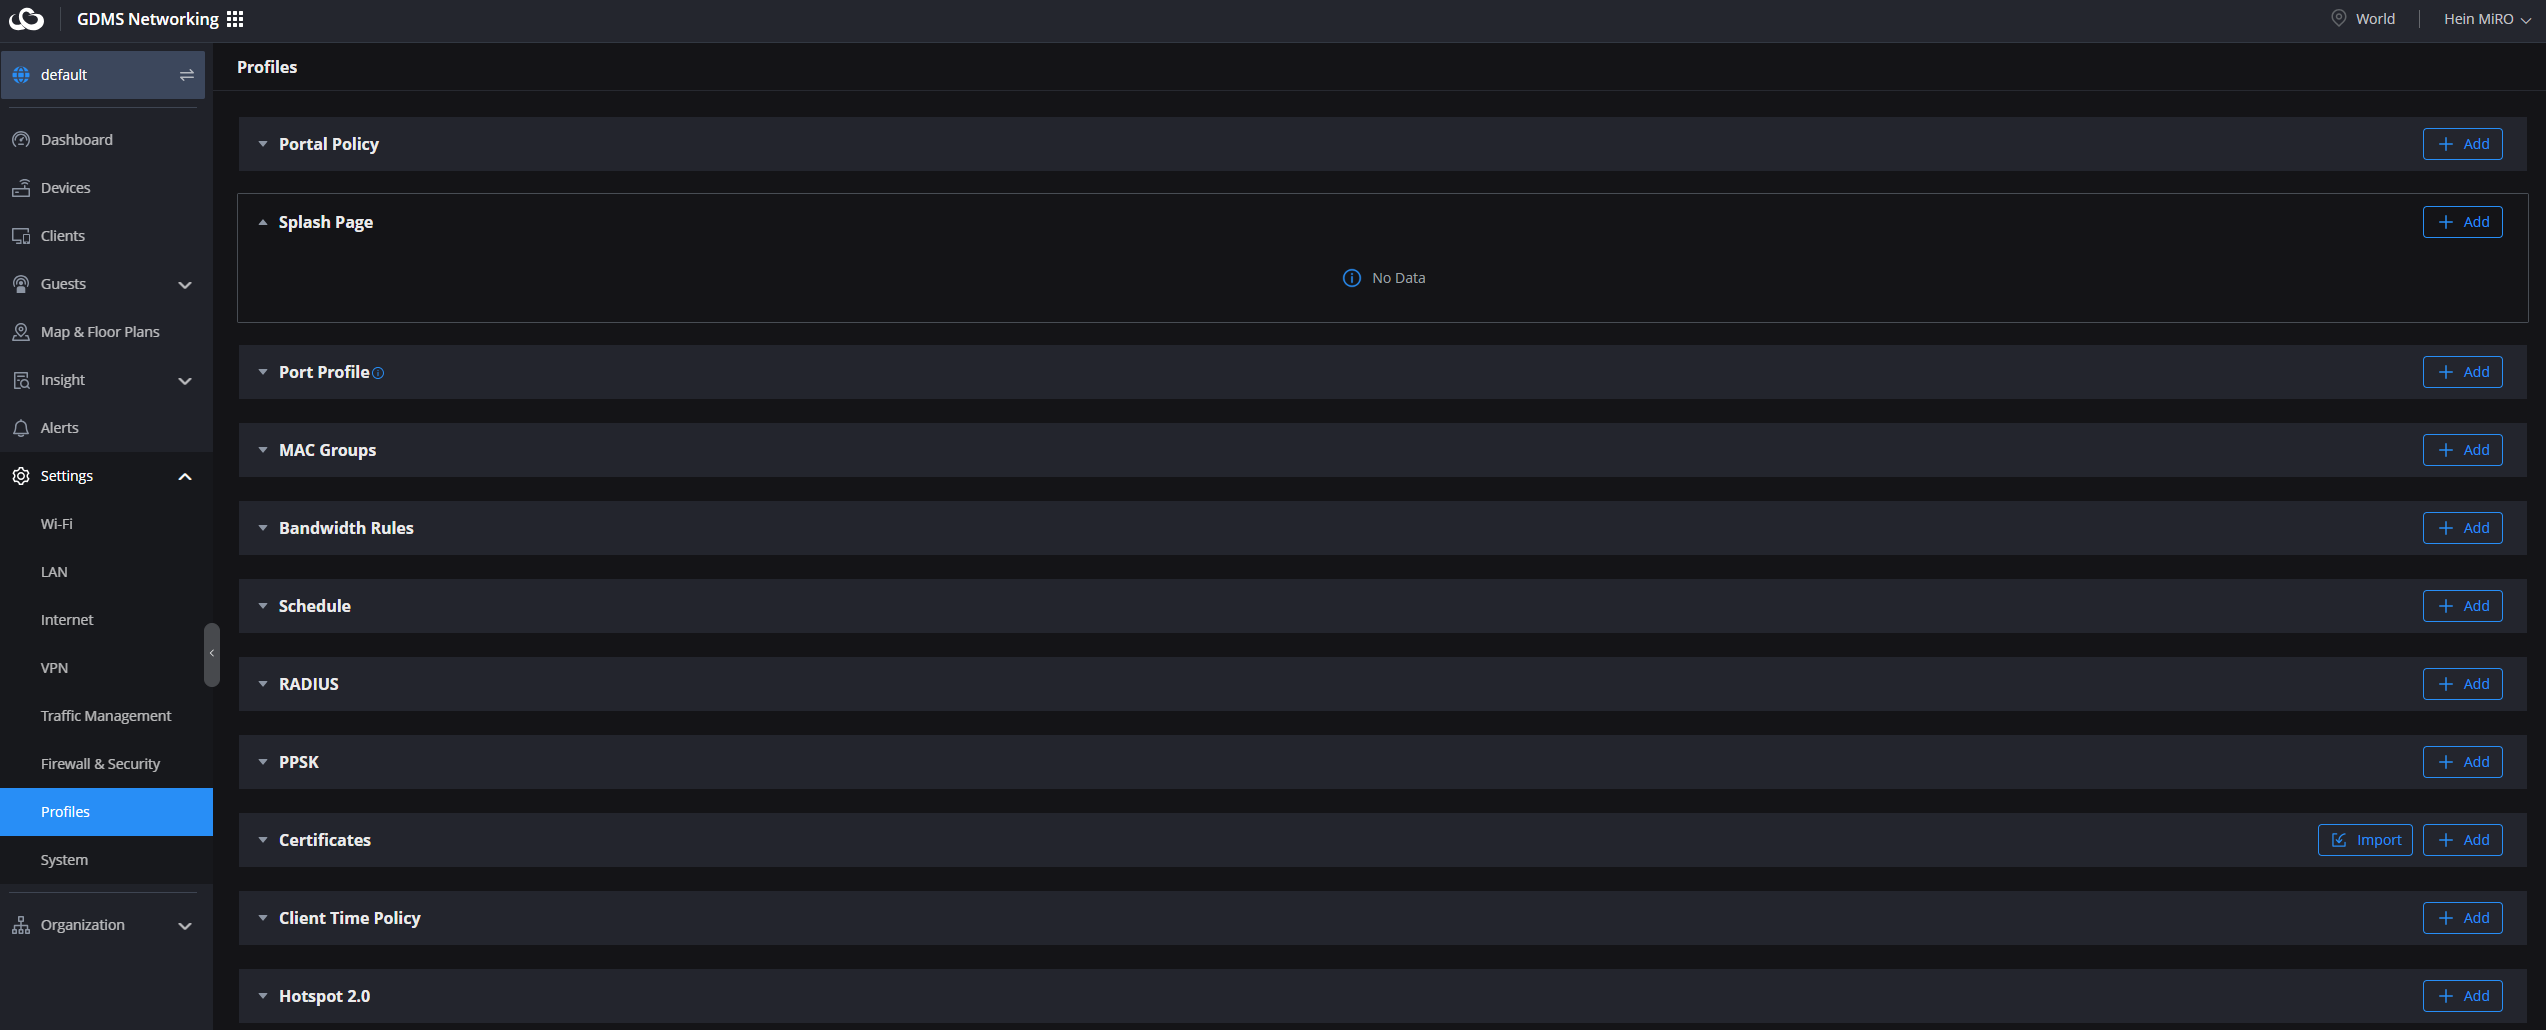
3. Navigate to the Splash Page submenu and click on the + add button
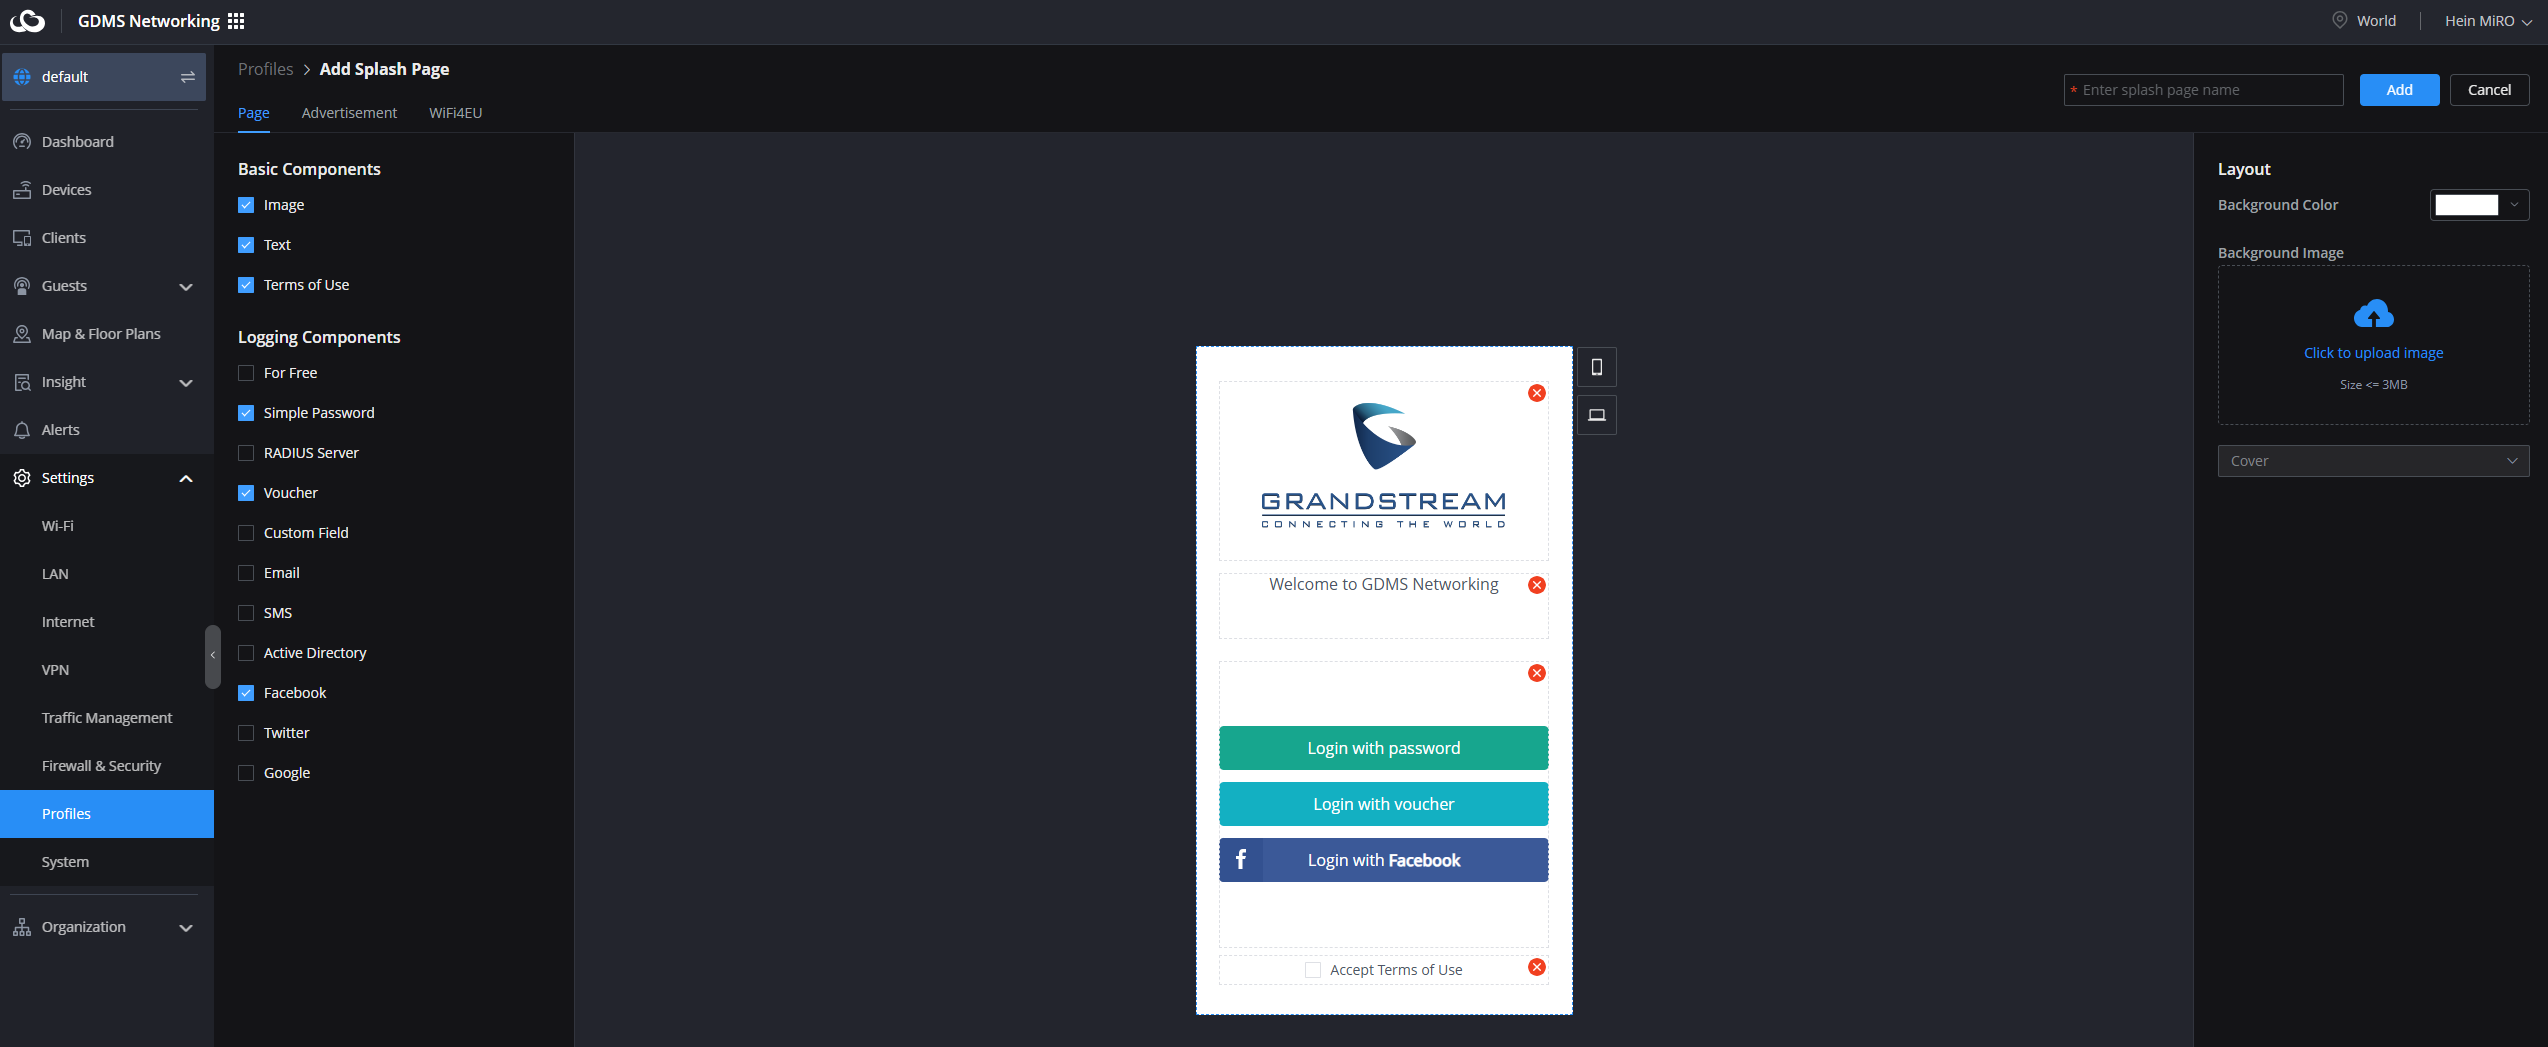
The Splash Page submenu offers a comprehensive tool for personalising the splash page users see when connecting to an SSID's Wi-Fi network via the captive portal. This page can be tailored with custom images, text, terms of use, background colours, and various login components to suit your needs.
- Select the Voucher logging component (Alternative login components are also available)
- From here you can edit each component
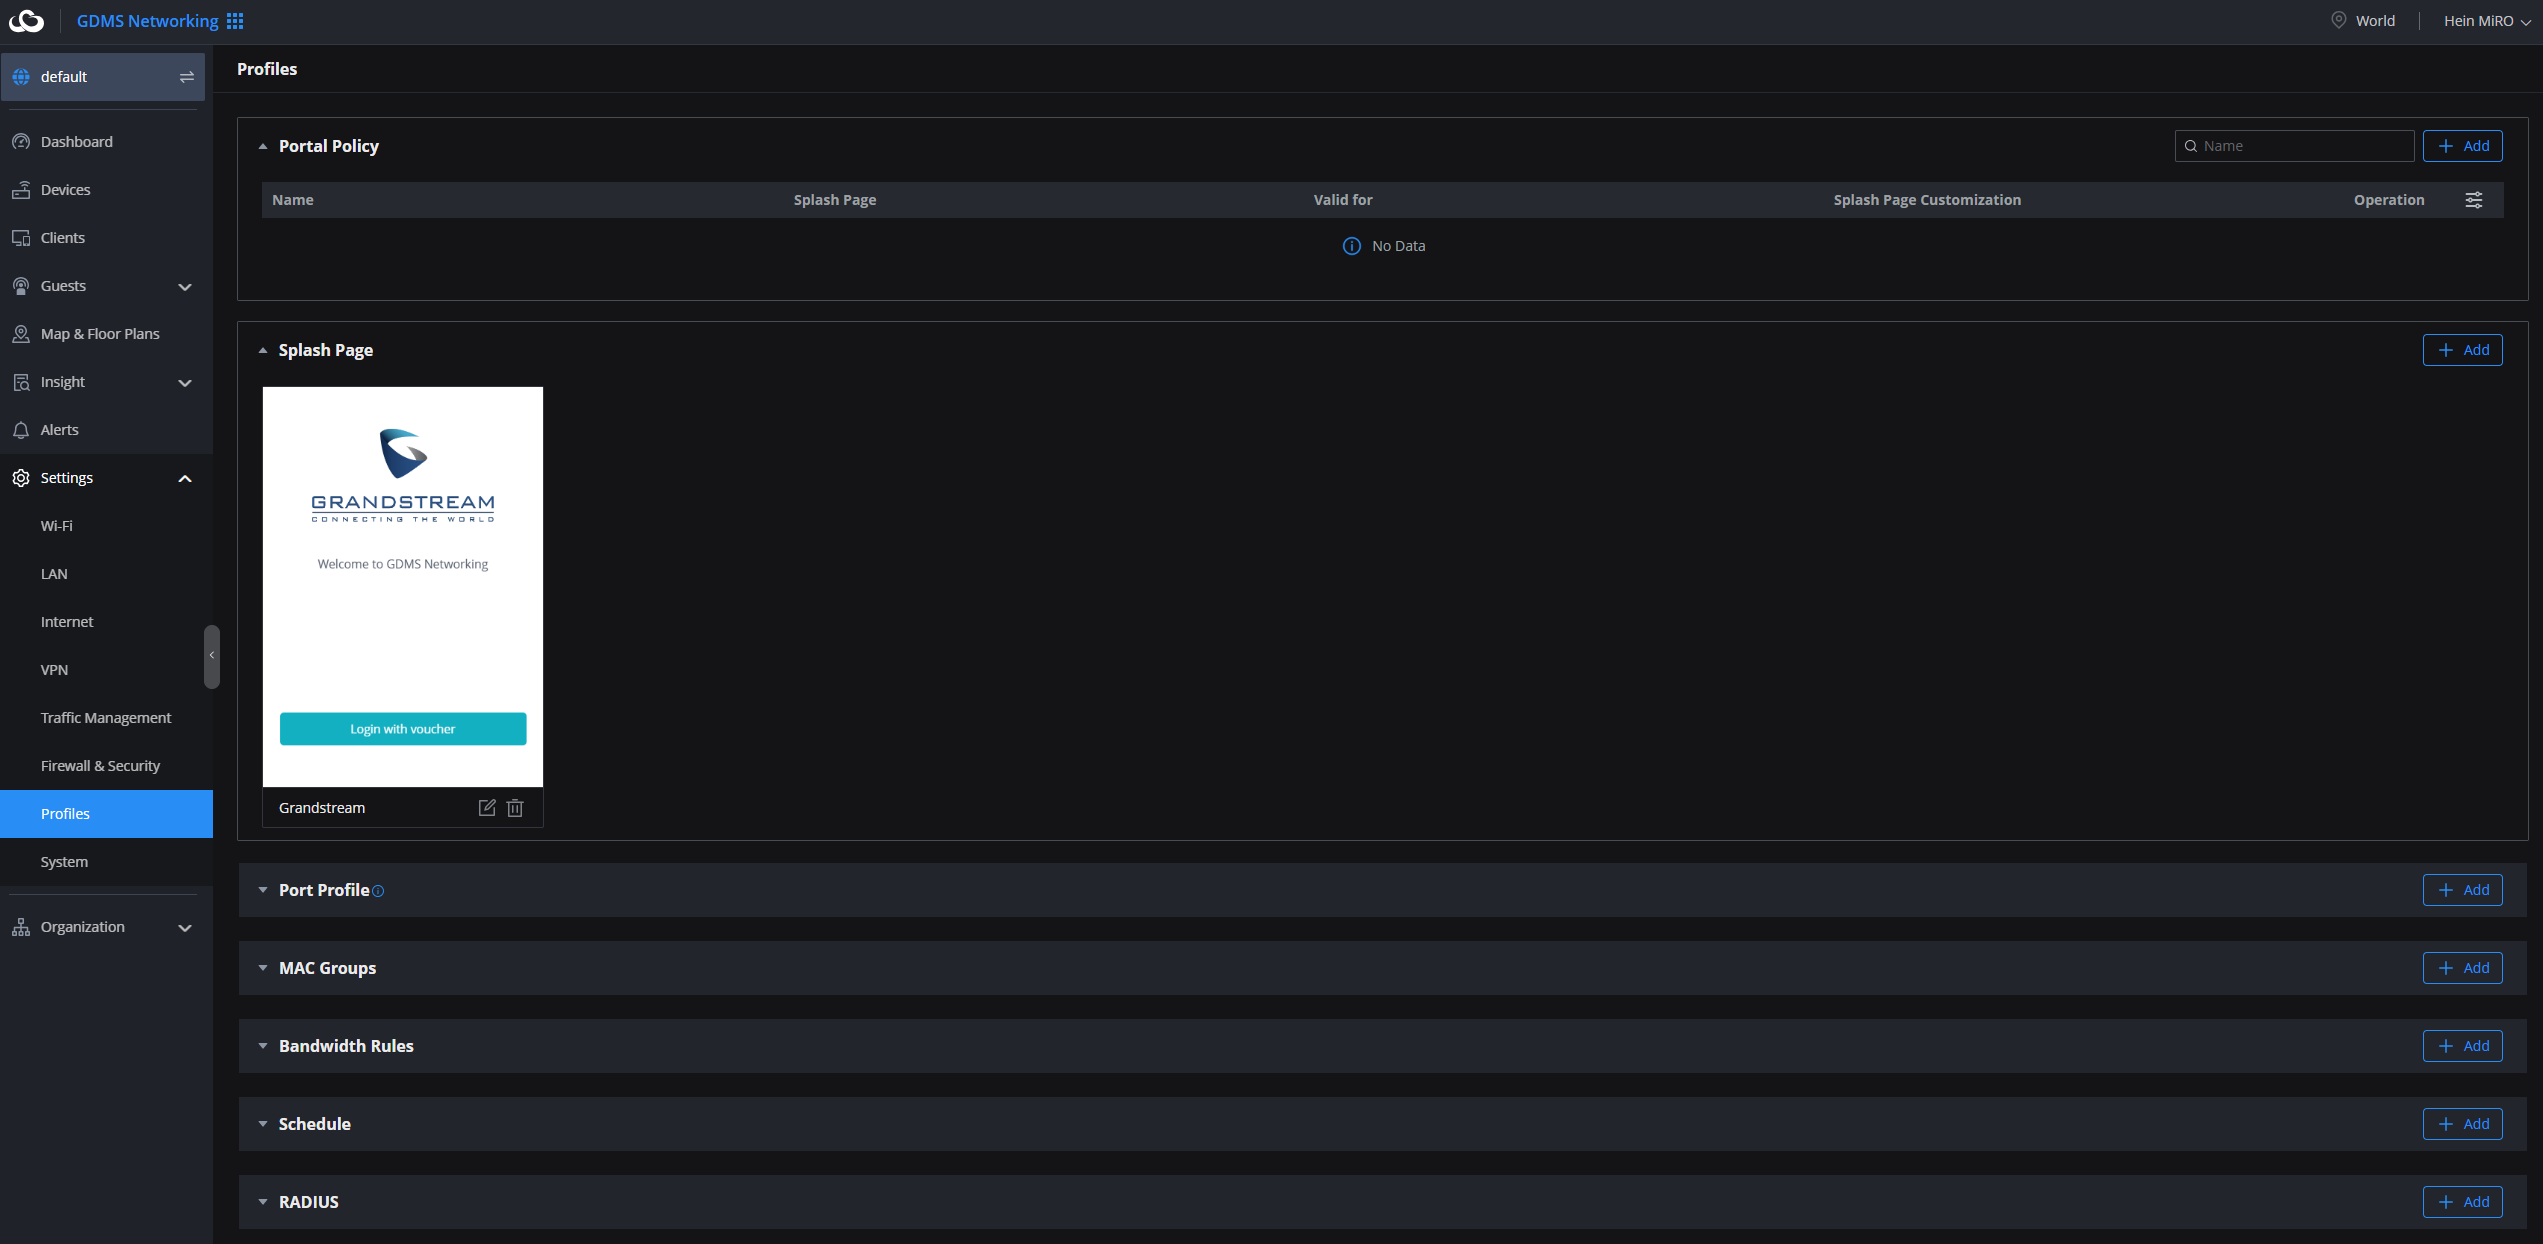
- Give the splash page a name and add
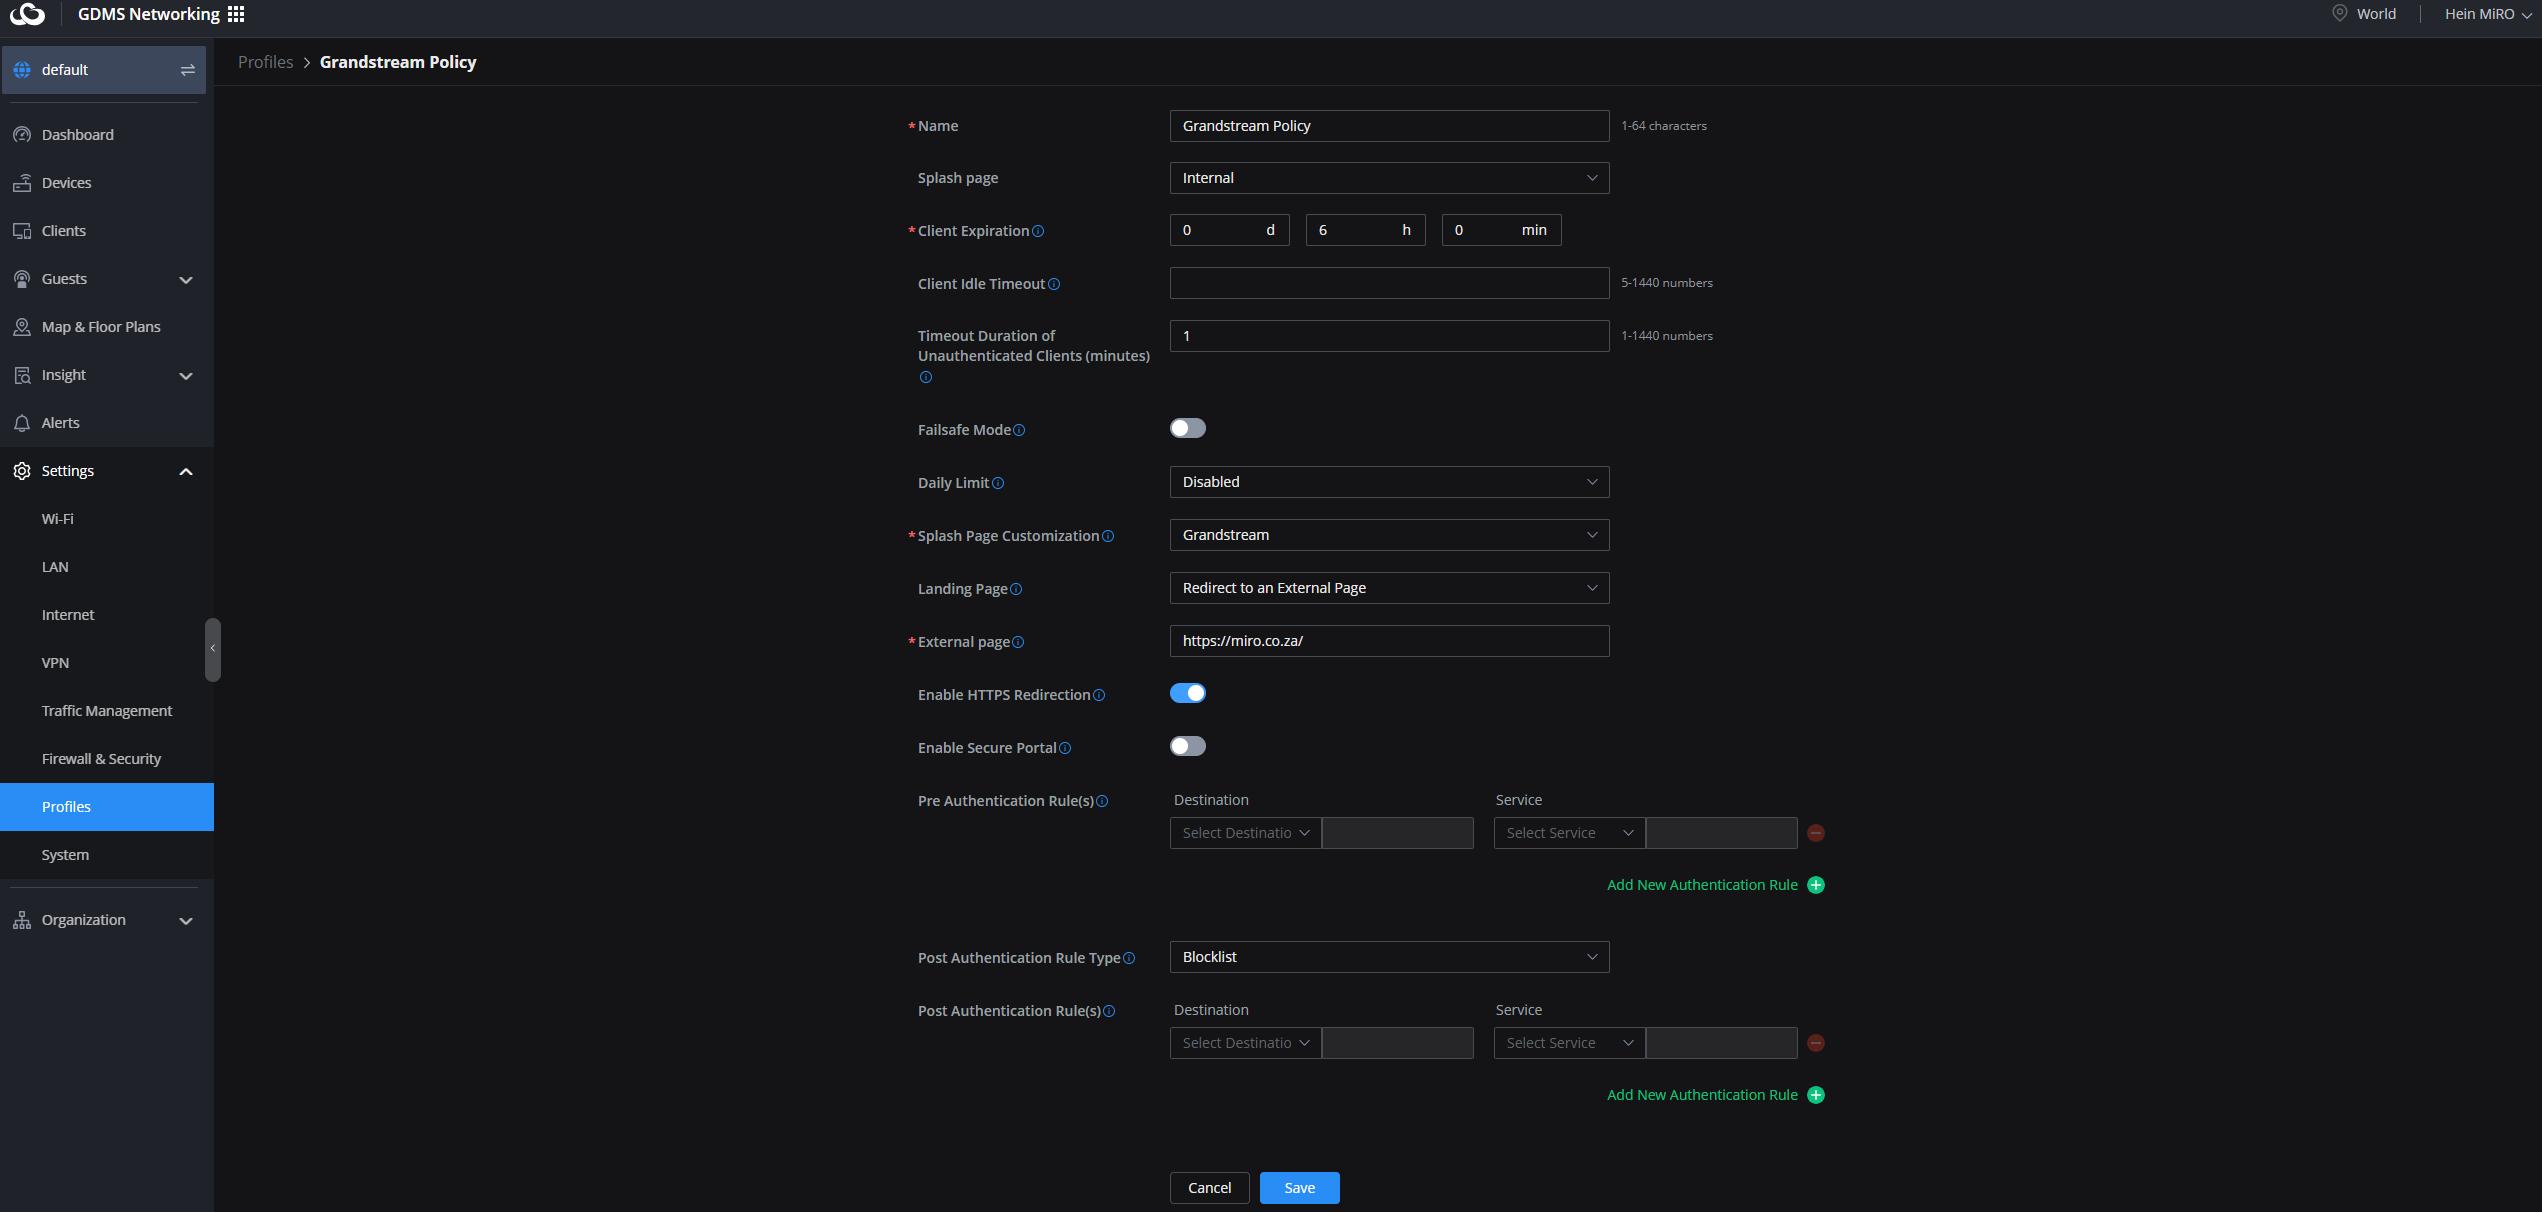
4. Setup the Portal policy:
- Navigate to the Portal Policy submenu and click on the + add button
- Enter a name for the policy
- Set the expiration time
- Select the Splash page that was created in the previous step
- Setup a Landing page (After the voucher has been authenticated the browser will redirect to an external page)
- Enable HTTPS for secure connections.
Step 2: Generate vouchers
- Go to Guests > Voucher.
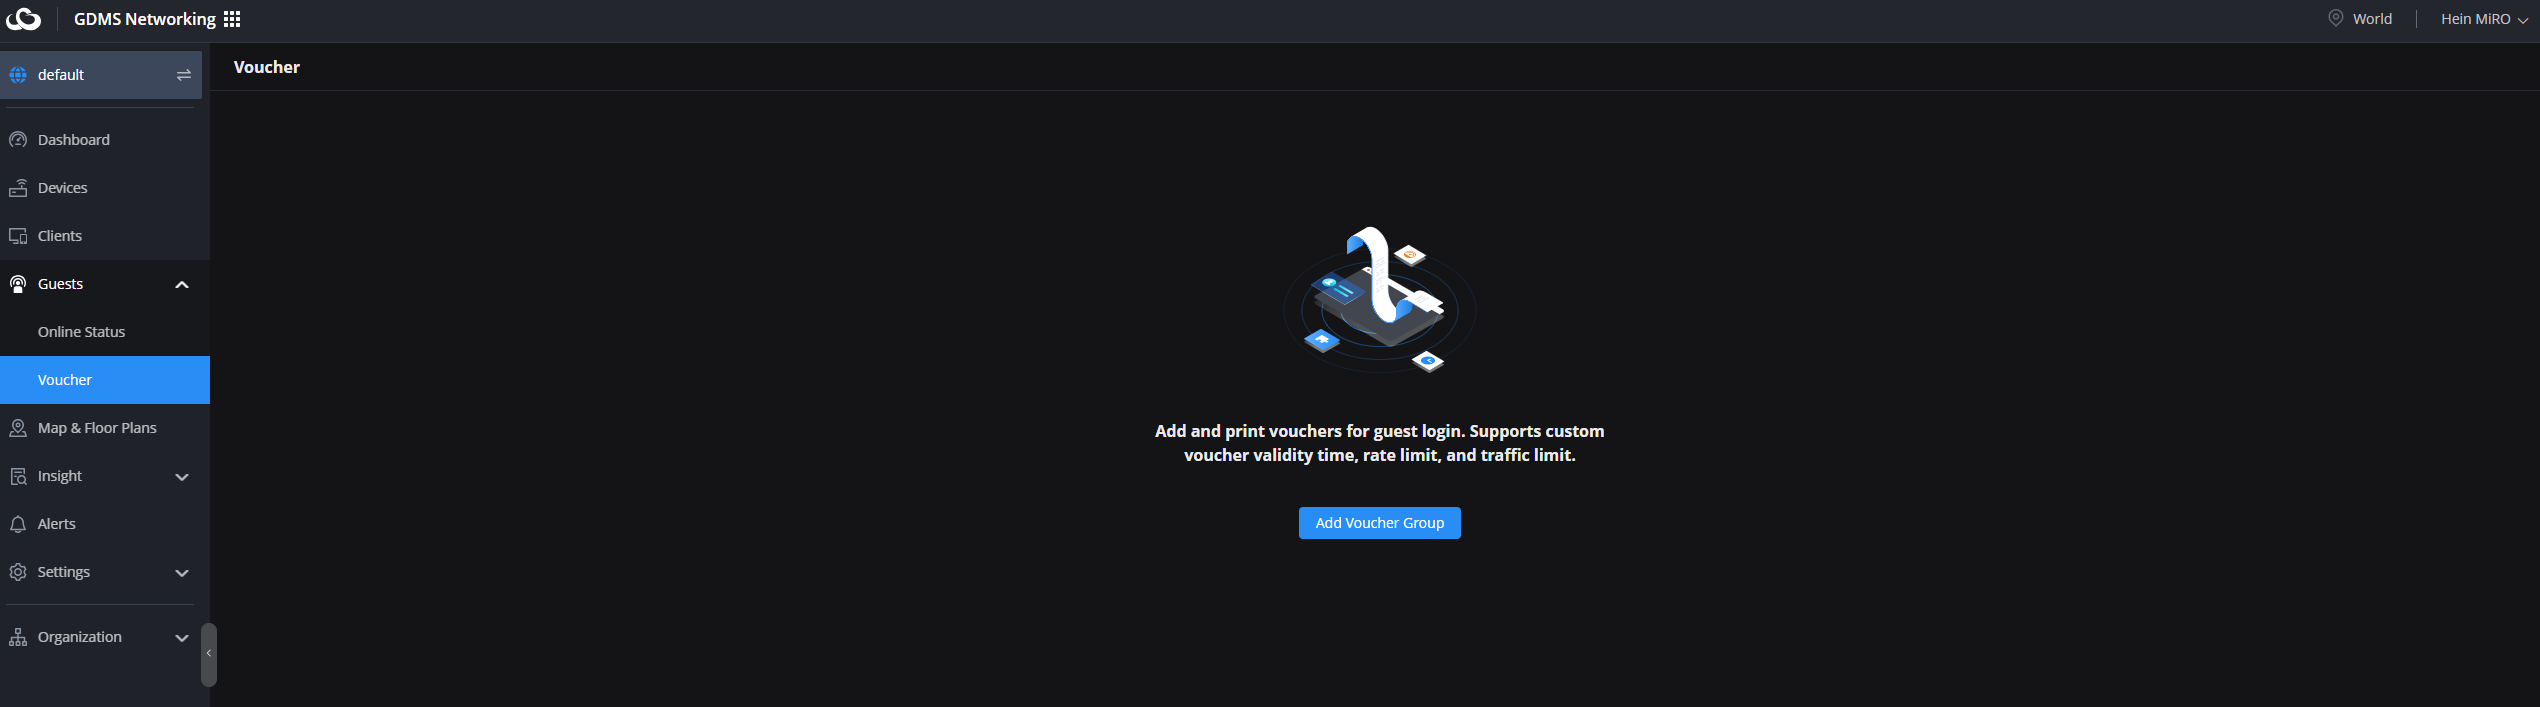
2. Click Add voucher Group and configure the parameters
- Quantity of vouchers: (Up to 1000 vouchers)
- Device quota: Limit how many devices can use the same voucher.
- Duration: Set the time limit (e.g., 1 hour, 1 day).
- Bandwidth limits: Restrict upload/download speeds.
- Byte Limit: (Set the available MB per voucher).
- Validity: (Up to 1095 days).
3. Save and print the vouchers for distribution.

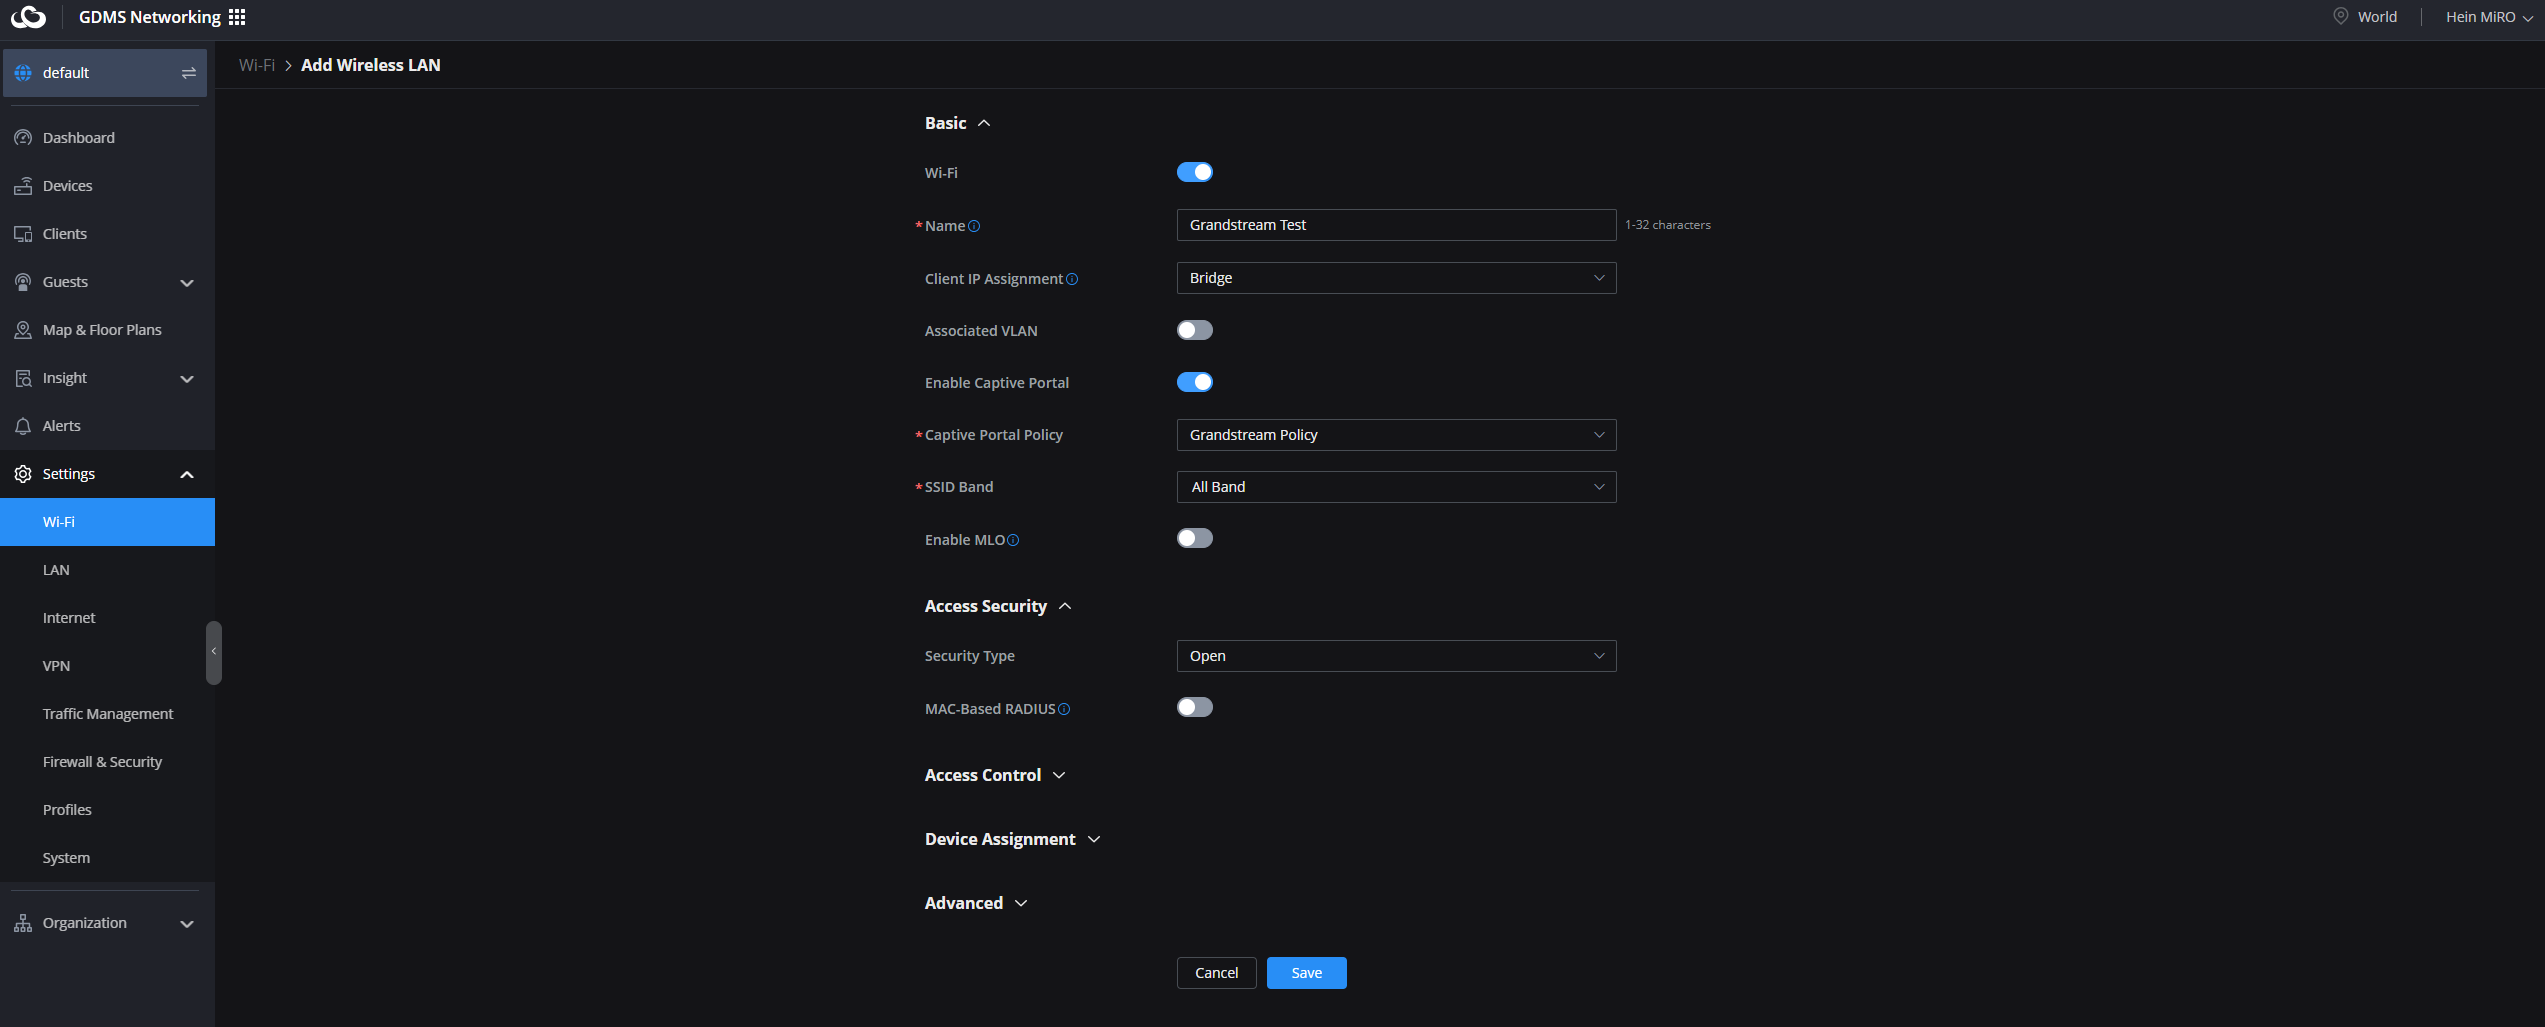
Step 3: Assign the Captive Portal to an SSID
- Navigate to Wi-Fi under the “Settings” menu.
- Select your SSID, Enable Captive Portal and select your voucher policy.
- Change Access security to Open
- Save the settings and broadcast your Wi-Fi network.
Advanced options: Integrating local payment gateways
To further simplify your operations, you can integrate local payment gateways with your voucher system. This allows guests to purchase internet access directly through the captive portal. Here’s how:
- Use a custom portal page and embed payment options via APIs or third-party integrations.
- Link the payment gateway to automatically generate and deliver vouchers upon successful payment.
- Test the workflow to ensure seamless user experience.
This approach is particularly beneficial for co-working spaces, hotels, or any venue offering premium internet services.
Real-life example: Transforming guest Wi-Fi in a coffee shop
Imagine a coffee shop where customers receive a free one-hour voucher with their purchase. The admin configures the portal to provide 10 Mbps speed for regular users and 20 Mbps for loyalty members. Multiple users can share a single voucher, ensuring families or groups can connect with ease.
Expert tips for optimising your guest network
- Monitor Usage: Use the GWN’s built-in analytics to track bandwidth and user activity.
- Tailor Policies: Create separate policies for different user groups to optimise network performance.
- Keep it Updated: Regularly update firmware to leverage the latest features and security patches.
- Test the Experience: Regularly connect as a guest to ensure the process is smooth and intuitive.
Grandstream’s hotspot and voucher management feature simplifies guest network setup while offering robust control and customisation options. Whether you’re an ISP, MSP, or integrator, this solution is a game-changer for delivering seamless connectivity to your clients.
With the GWN series, including models like the GWN7664E and GWN7630, you can create a secure and user-friendly network that caters to diverse needs. Pair this with local payment integration, and you’ve got a scalable solution ready to meet the demands of modern businesses.
For a more detailed explanation of the Grandstream creative portal, feel free to reach out to our product manager, Hein@miro.co.za, via email. If you're interested in making a purchase, visit our website on www.miro.co.za or contact our dedicated sales team at 012 657 0960
Comments
View Comments