
Shopping Cart
There are no more items in your cartHow to configure your Grandstream CloudUCM
- Ben Grobler
- Technical Tips & Guides
- 1 likes
- 2385 views
- 0 comments

Grandstream recently released their CloudUCM platform for customers who require additional remote functionality. After extensive testing, we are proud to announce that the Grandstream CloudUCM is active and ready for deployment. For any pricing or quotation requests, you can reach out to our sales team on sales@miro.co.za.
Grandstream integrated GWN Cloud accounts with GDMS and with that, CloudUCM was also added. All of your Grandstream products can now be managed from a single pane of glass. Once your CloudUCM has been linked to your GDMS account, you can head over to https://account.gdms.cloud.
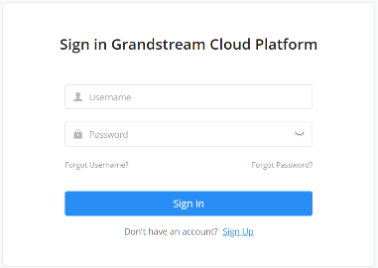
Login to your GDMS account to get started:
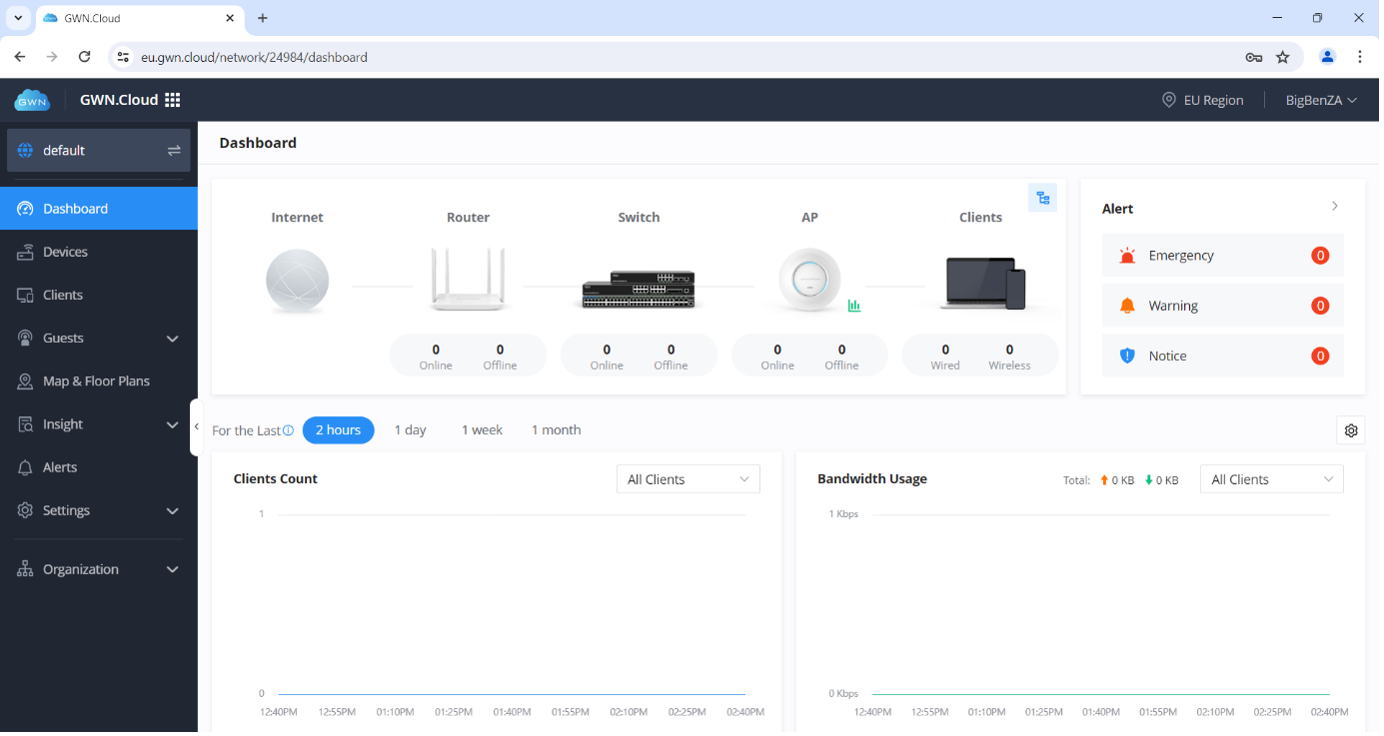
Once you are logged in, you will be presented with the GWN Cloud dashboard:
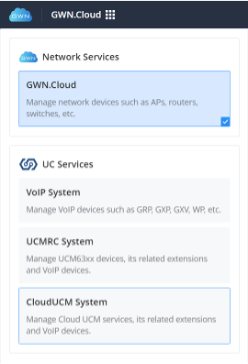
To find the CloudUCM page, simply click on the GWN.Cloud Menu in the Top Left corner and select CloudUCM System:
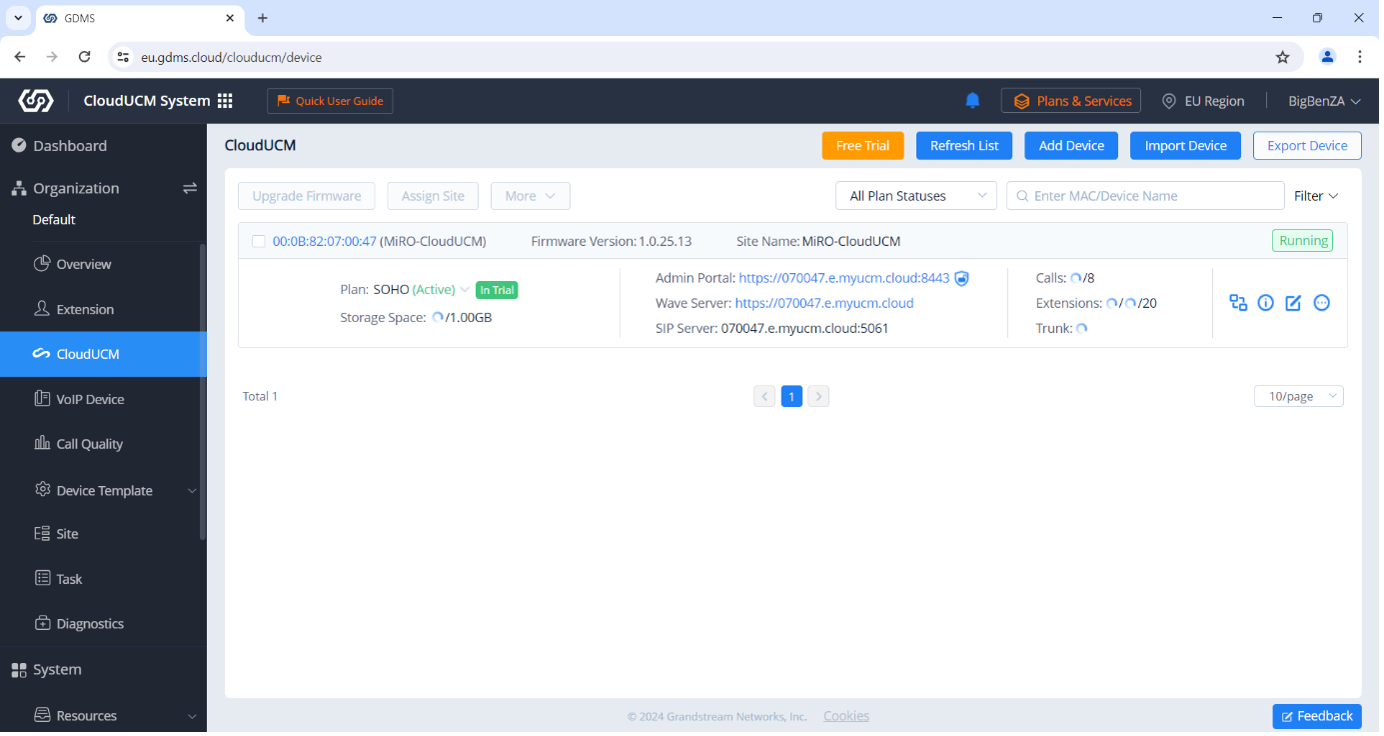
You will be presented with the CloudUCM dashboard. To manage your CloudUCM, simply click on CloudUCM in the menu on the left:
To access the CloudUCM platform, click on the Access Admin Portal Icon on the right:
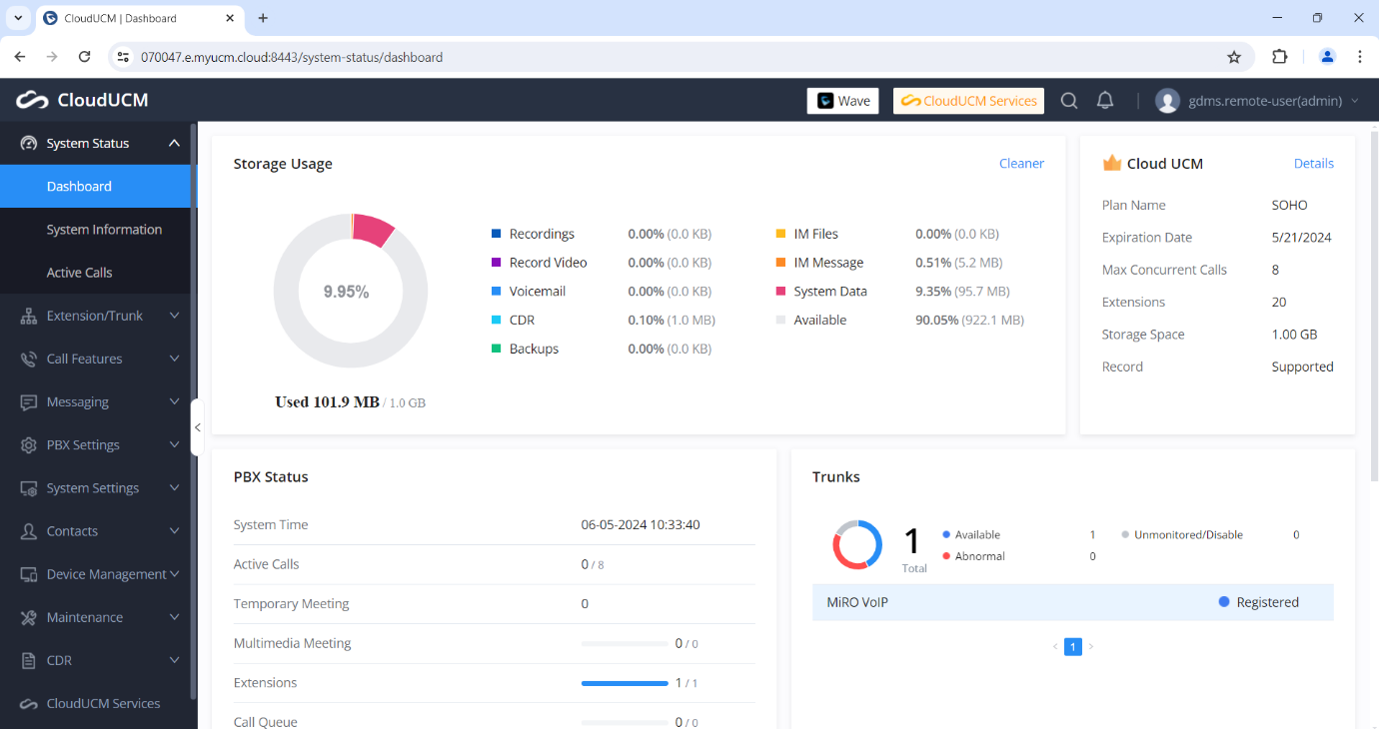
The system will take some time to initiate a connection to the CloudUCM and once completed, you will see your CloudUCM dashboard:
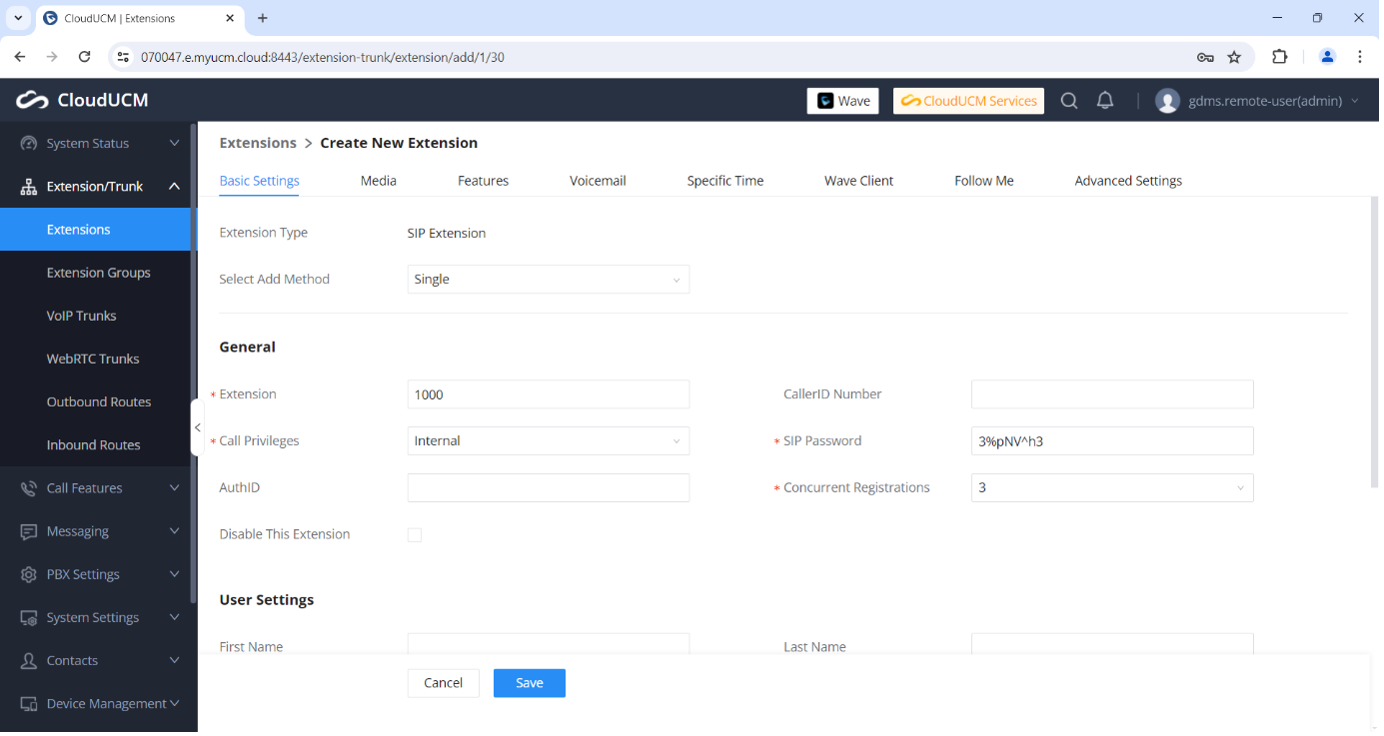
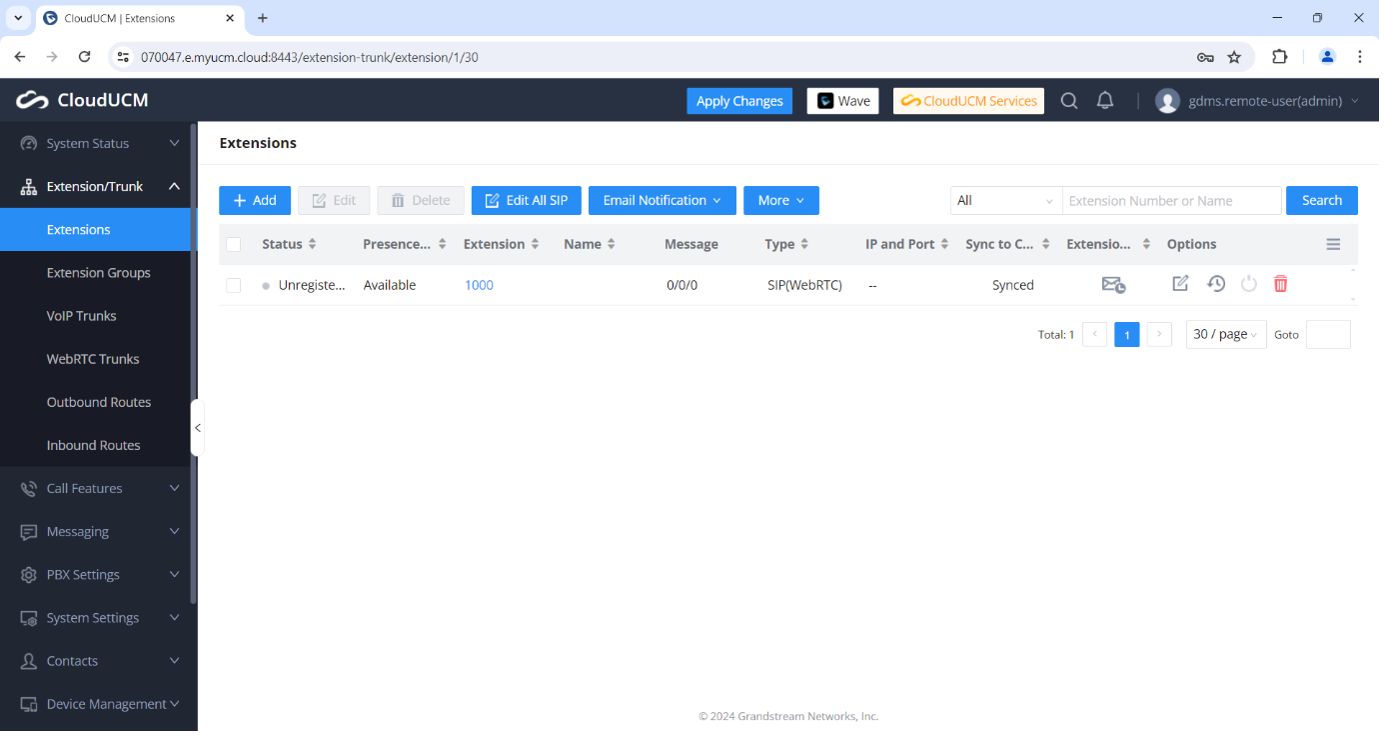
Let’s start by adding an Extension. Navigate to Extension/Trunk in the menu options on the left, click on Extensions and then click on Add:

Here we are going to setup a very basic extension. You will have options to create a single extension or batch extensions, add user details like Names and email addresses. For now, we are just going to add one extension and leave our passwords as generated.
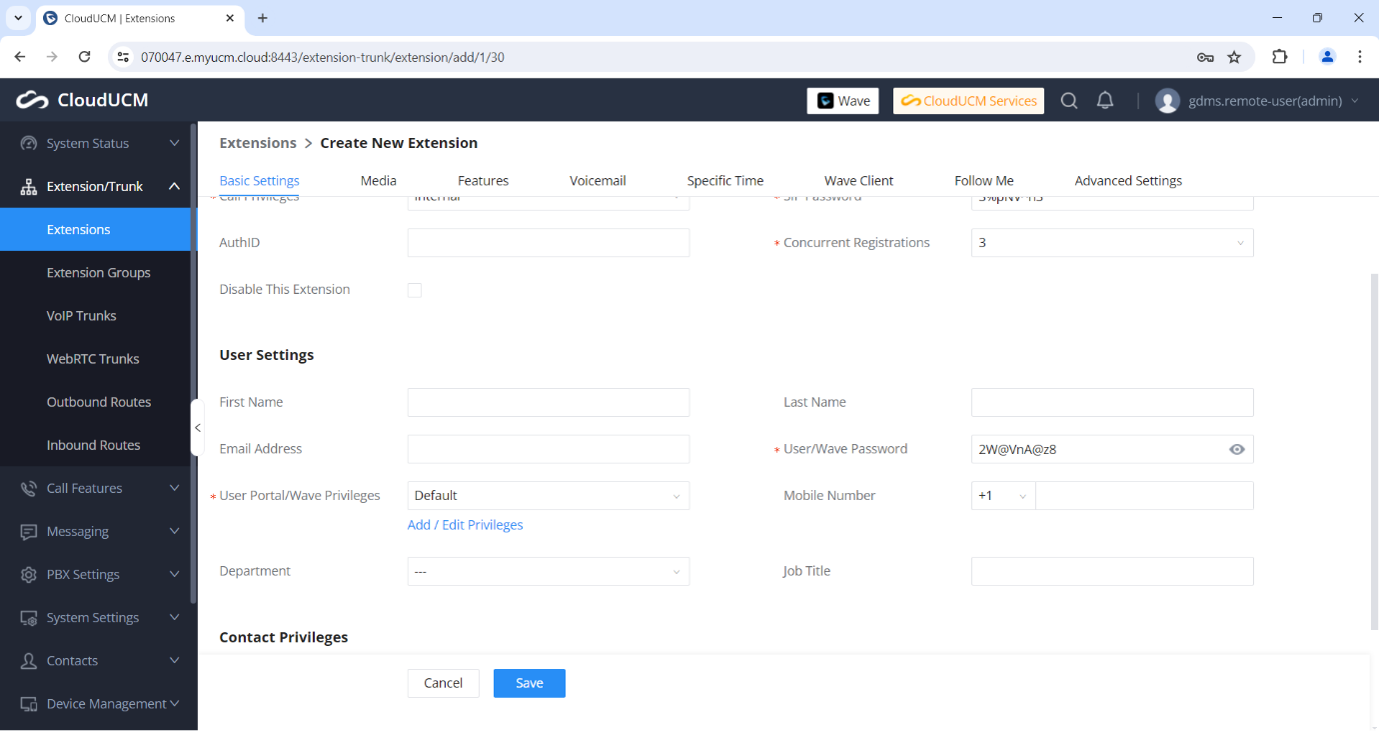
We would like to setup our extension with the Grandstream Wave application. So, remember to scroll down and take note of the User/Wave password:
Once you are done setting up the extension, click on Save. You will be returned to the extensions dashboard to confirm your extension is setup. At the top of the screen, click on Apply Changes:
You can visit the Google Play Store or Apple App Store to download the Grandstream Wave application. Once downloaded and installed, you will be presented with the login screen. Click on Login:

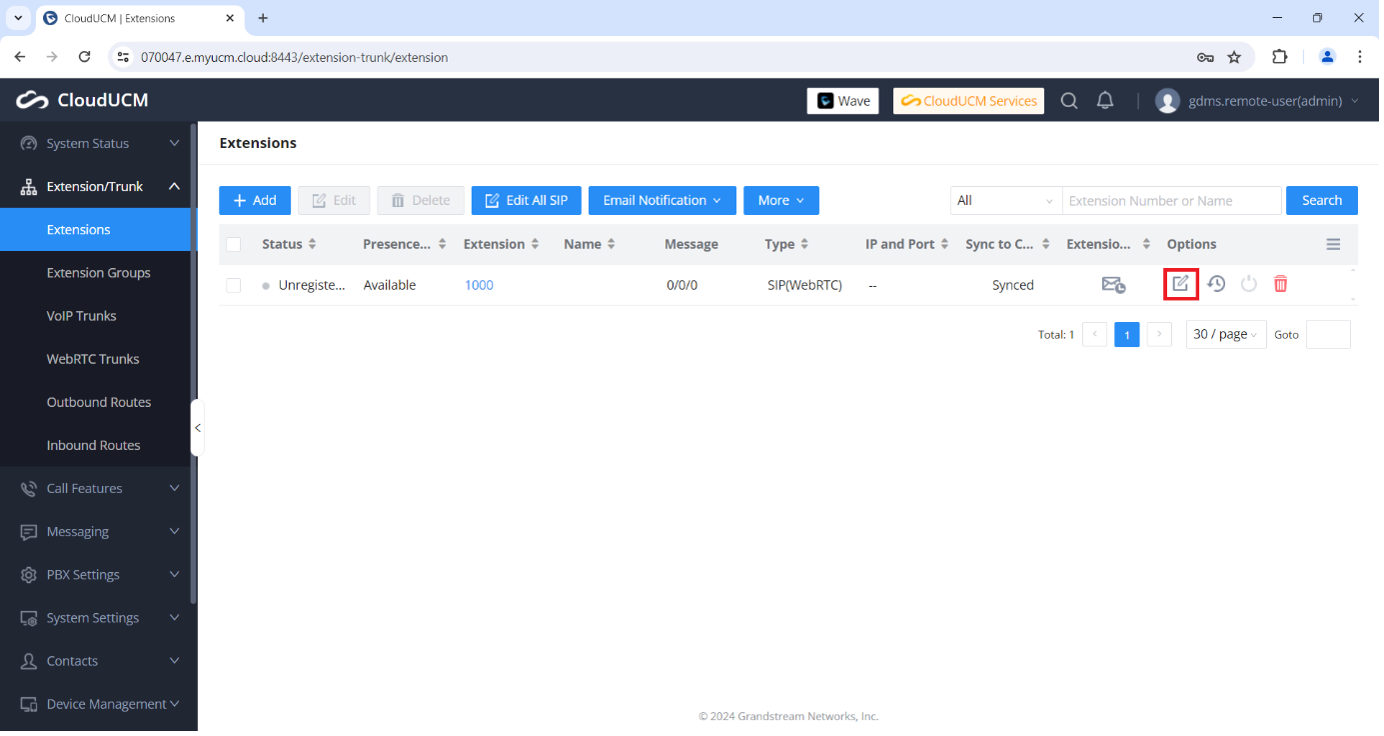
Here you can type in your Domain/Server, Account and Password. We already have the Account (Extension number) and password. All we need is the Server. To find the server, open the extension that we have setup and on the right under Options, click on Edit:
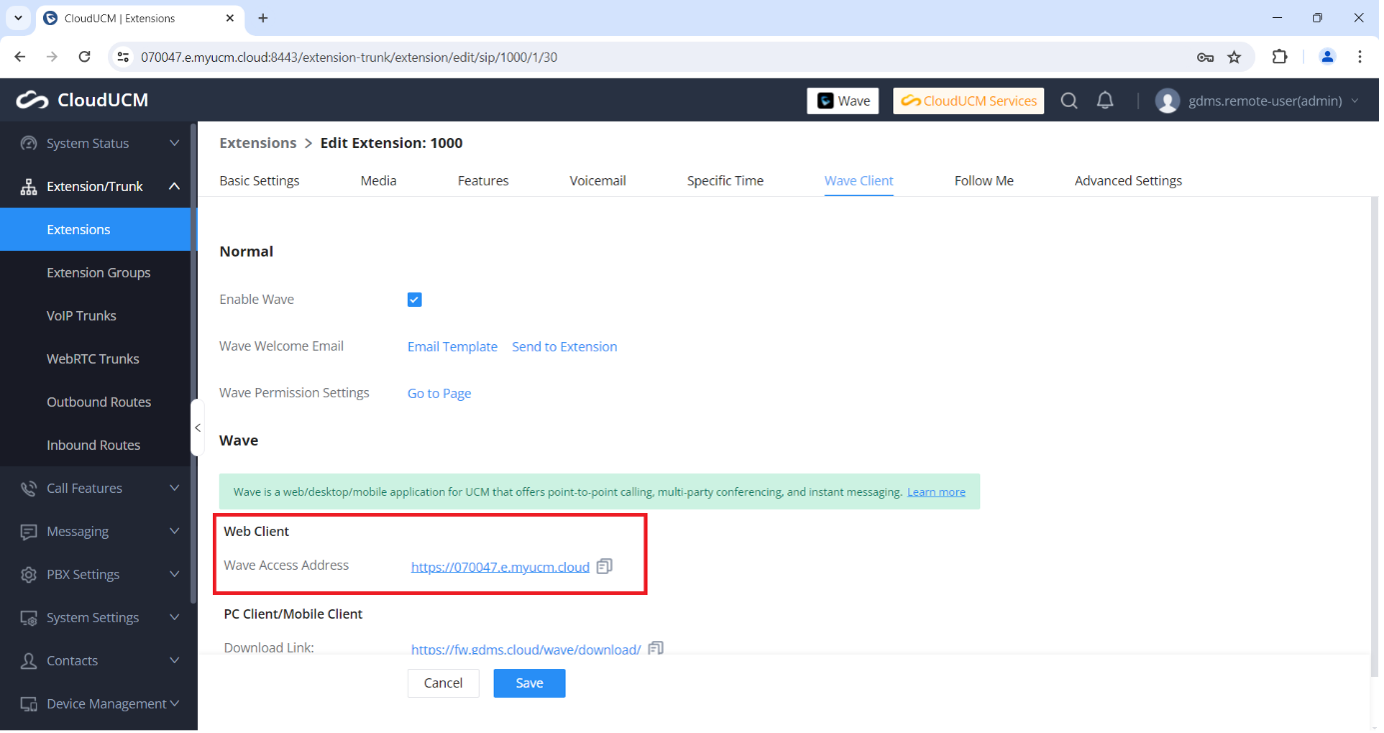
Once open, navigate to Wave Client in the top menu and you will find the Server under Wave Client > Wave Access Address:
Your Wave setup should look something like this. Once complete, click on Login:

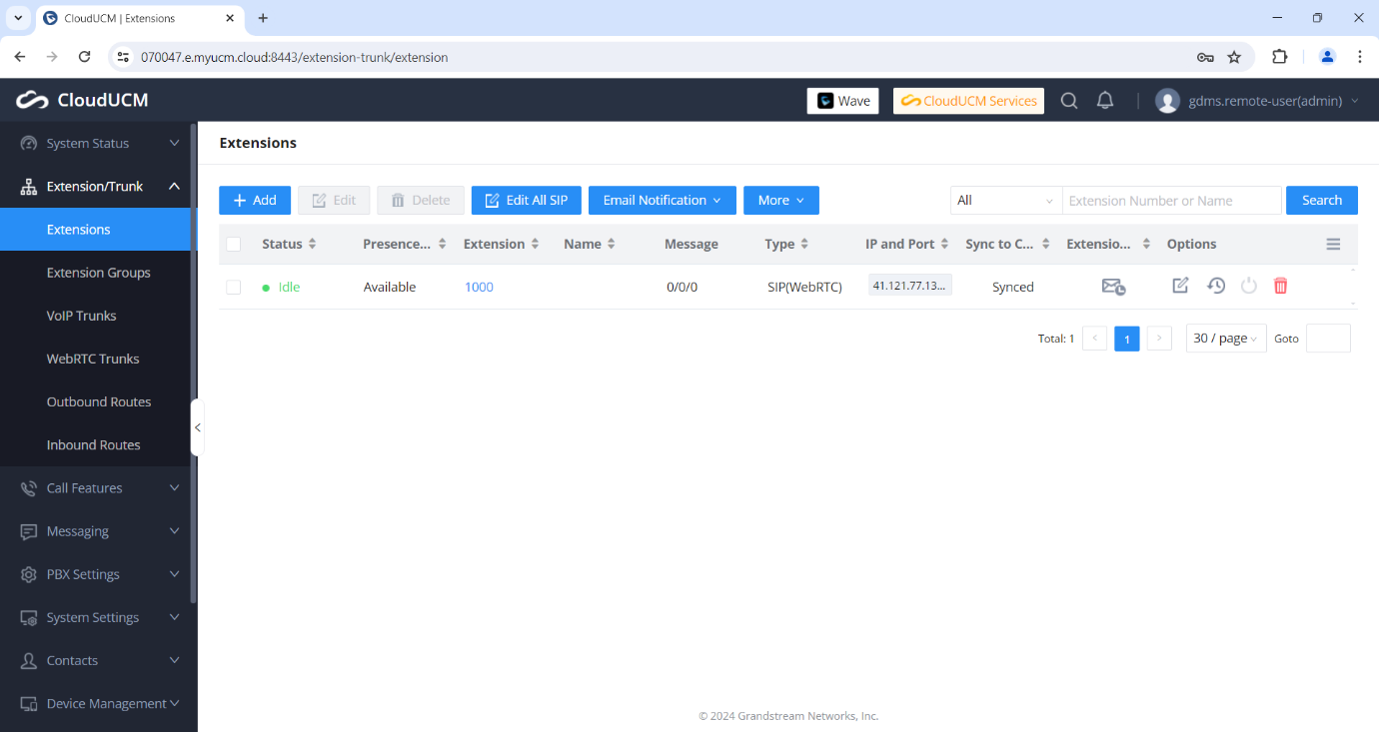
If all your details are correct, you will be logged into the extension and it will be ready to use. You can confirm the registration by going back to the CloudUCM and opening Extensions. You should see a Green Idle Status:
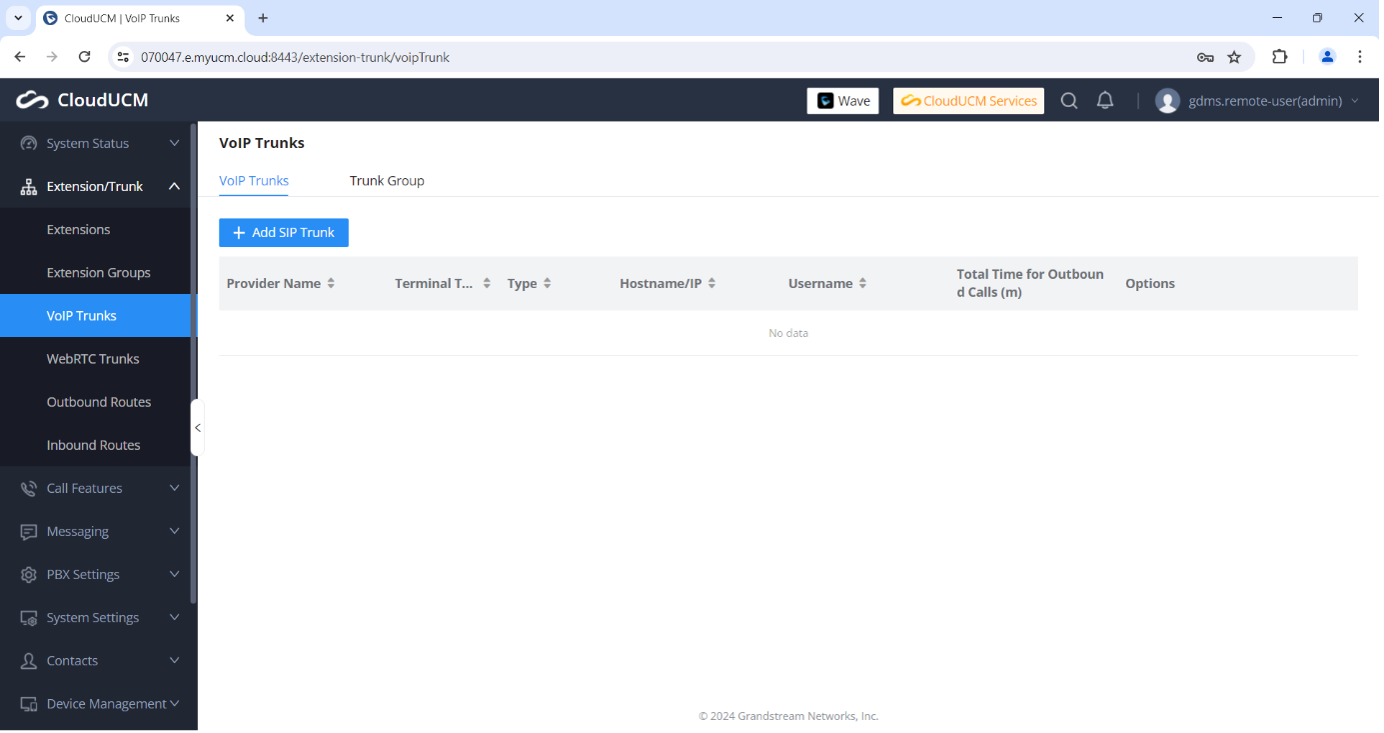
Now that we have our Extension ready, we can continue to setup our SIP Trunk. A SIP trunk is the registration details you receive from your provider. It normally has a Server Address, Username and Password. Let’s head over to Extensions/Trunk and open VoIP Trunks and click on Add SIP Trunk:
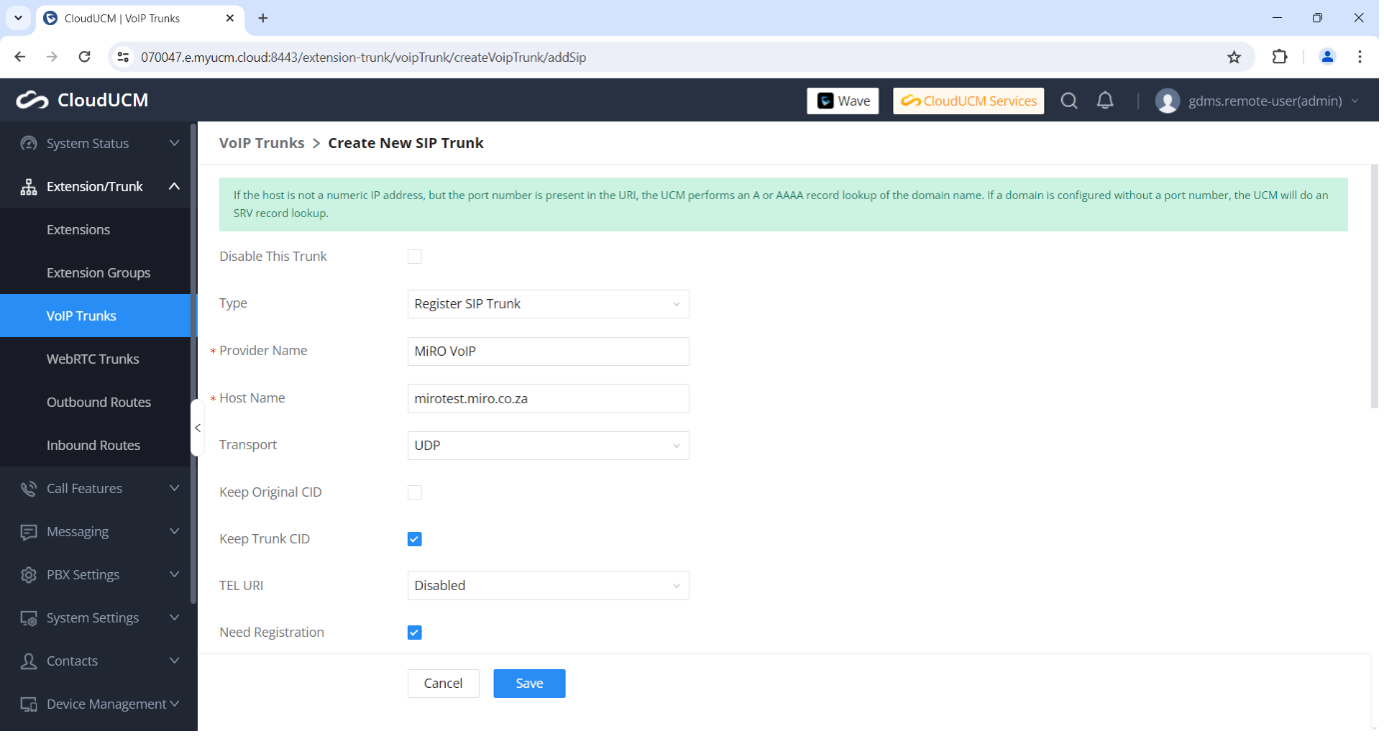
Under Trunk Type select Register SIP Trunk. Then enter your Service Providers name, in our case we will use MiRO VoIP as the provider. Enter the Host Name (SIP Server Address) that you received from the provider and select the Transport that your provider supports. Generally, UDP will be used here unless your provider specifically uses TCP or TLS. From here you can scroll down:
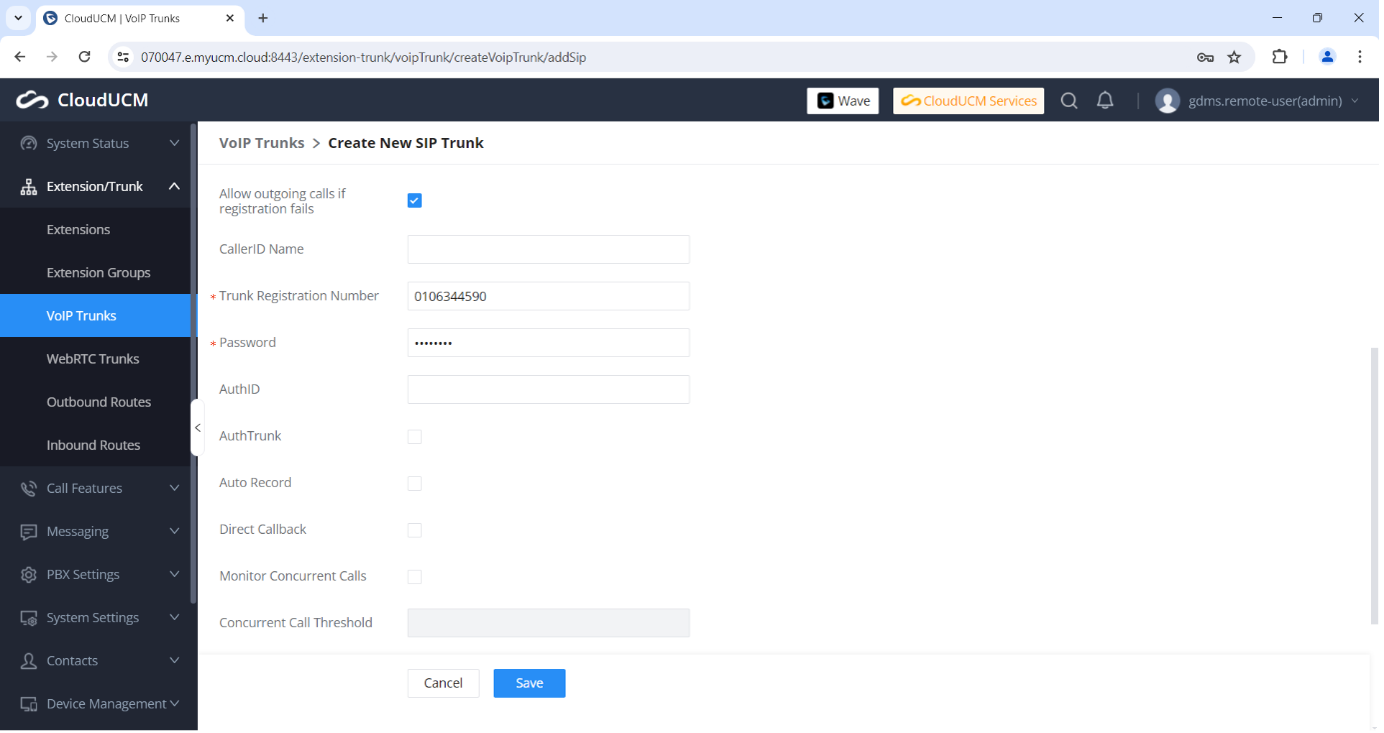
The Trunk Registration Number and Password will be the Username and Password as received from the provider. Some providers might give you a specific CallerID Name but if you have not received this info, you may leave this blank. Once complete, click on Save:
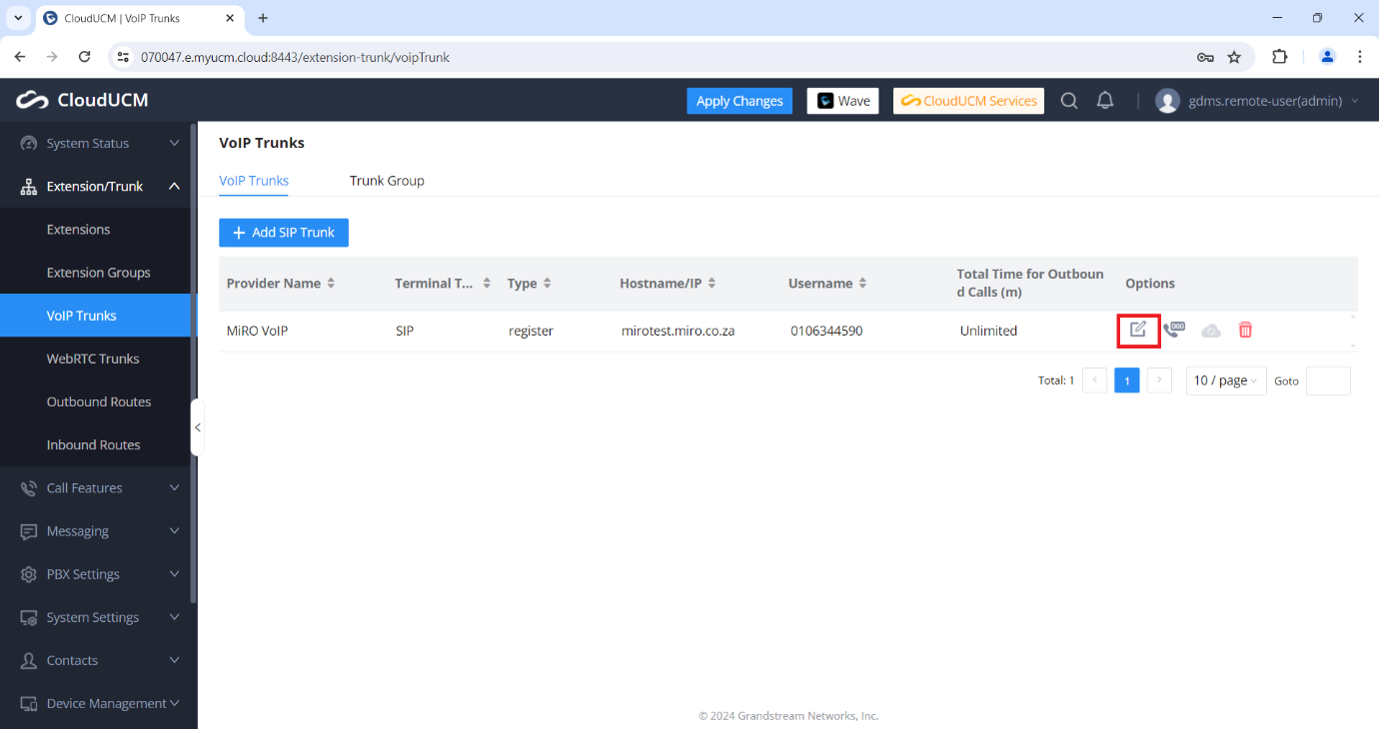
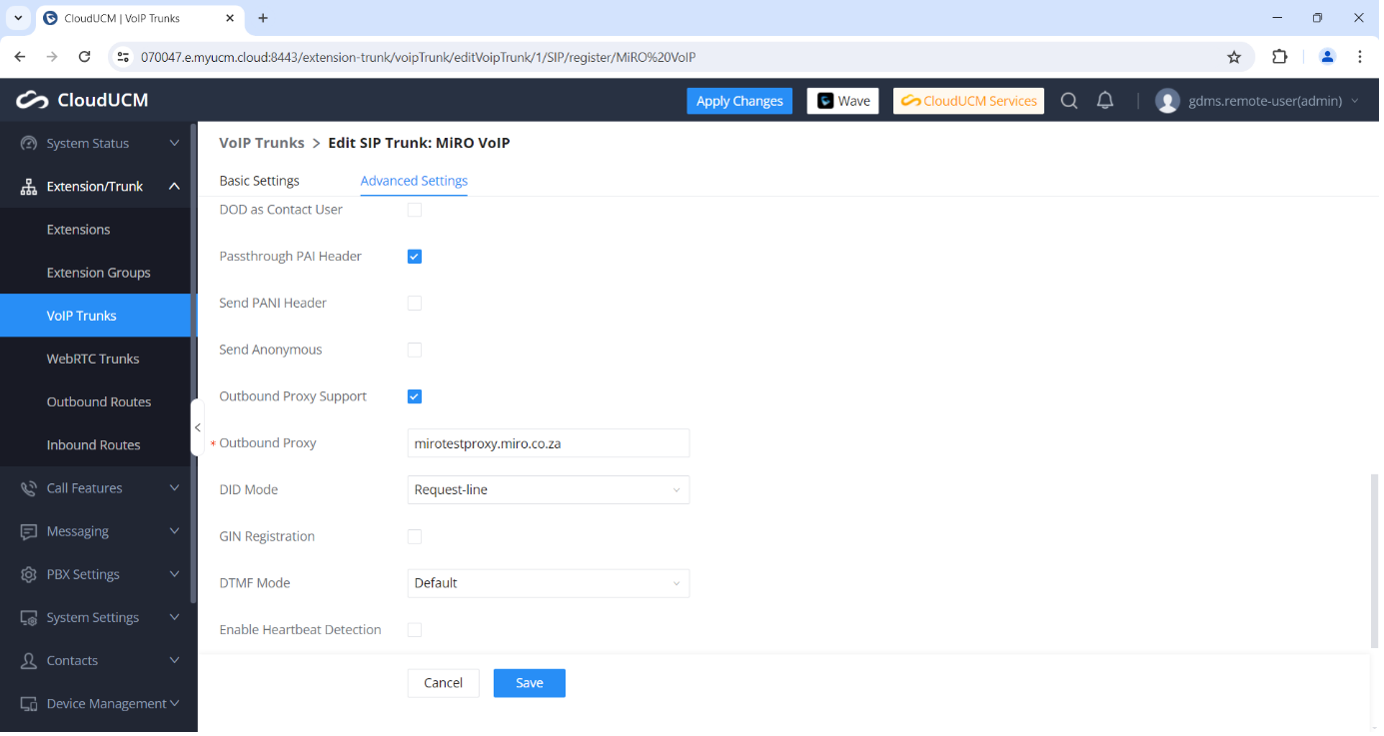
Once you have clicked on Save, you will be returned to the Trunk dashboard. Before we Apply Changes, some providers may give you a specific Outbound Proxy. To find this setting, open the trunk again by clicking on Edit under Options:
Once the trunk is open, at the top click on Advanced Settings, then scroll down until you find Outbound Proxy Support and enable the setting. Then type in your Outbound Proxy as needed:
Once done, click on Save. You will be returned to the Trunk dashboard and then click on Apply Changes. To confirm if the SIP Trunk is registered, let’s go to the main dashboard under System Status > Dashboard. In the bottom right corner, you will see your new SIP Trunk should be registered and ready to use:
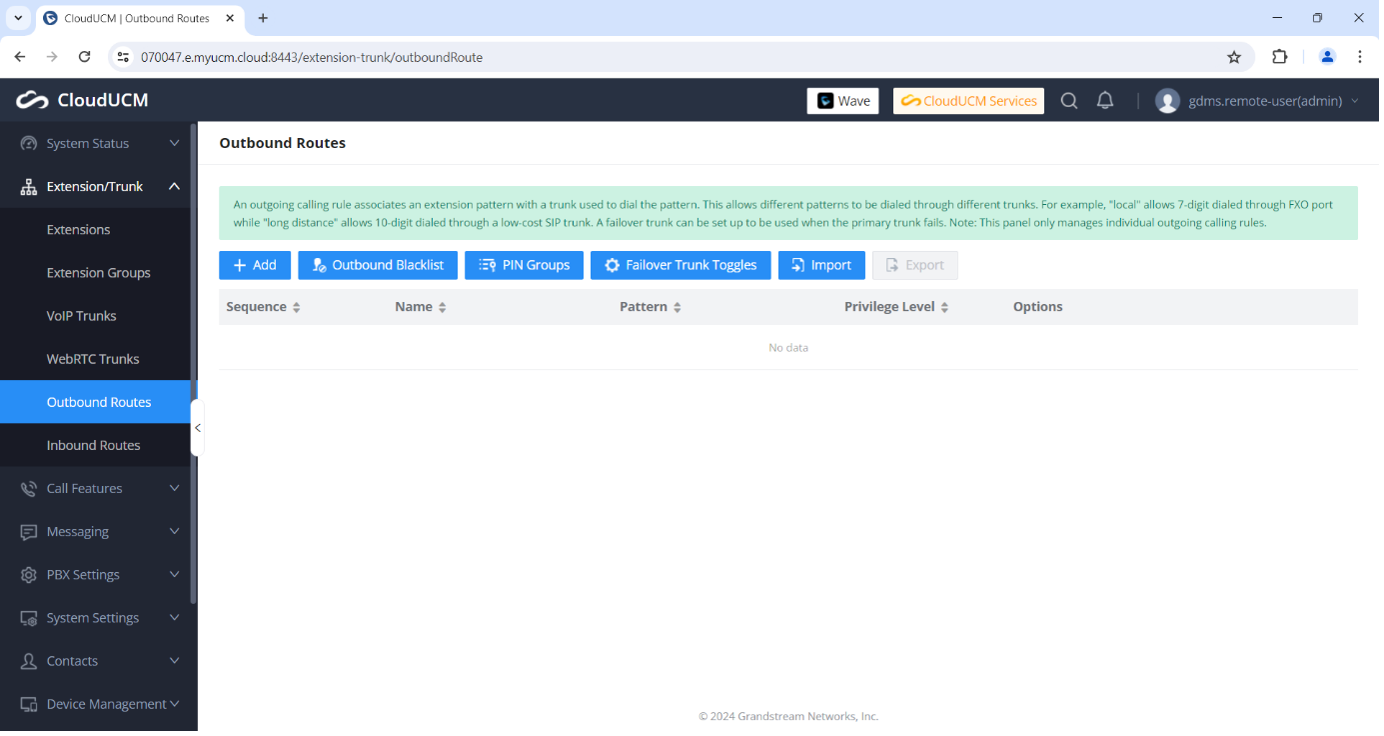
Now we can continue to setup our Inbound and Outbound routes. These routes allow us to make outgoing calls and receive incoming calls. Navigate to Extension/Trunk and open Outbound Routes and click on Add:
First, we can give our Outbound Route a name, preferably the name of the provider since it’s possible to have multiple trunks with multiple providers. The important part is the Pattern. The pattern will determine what numbers may be called. X means any number from 0 – 9 and a dot (.) means any amount of numbers. For this example, we will use X. as our pattern. You can also add a privilege to this route to only allow internal calls, national or international. We will set our privilege level to National:
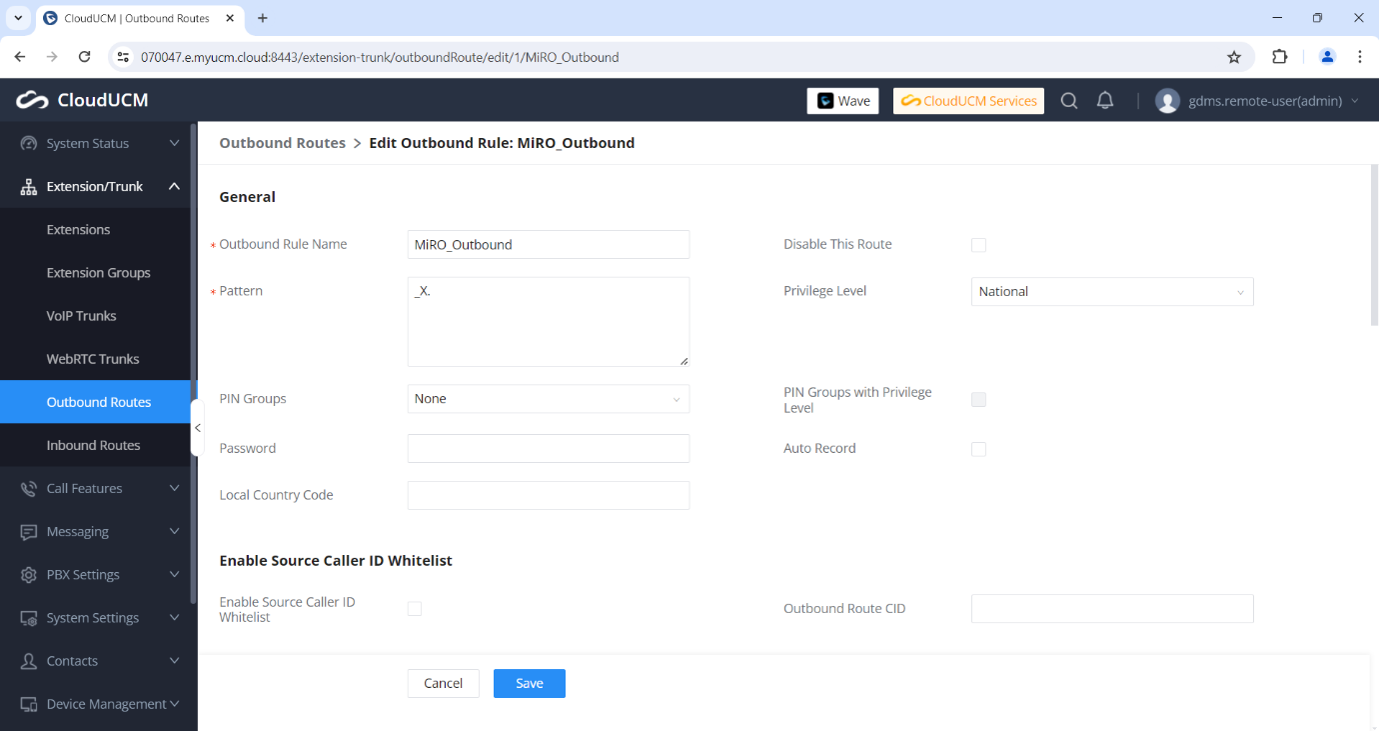
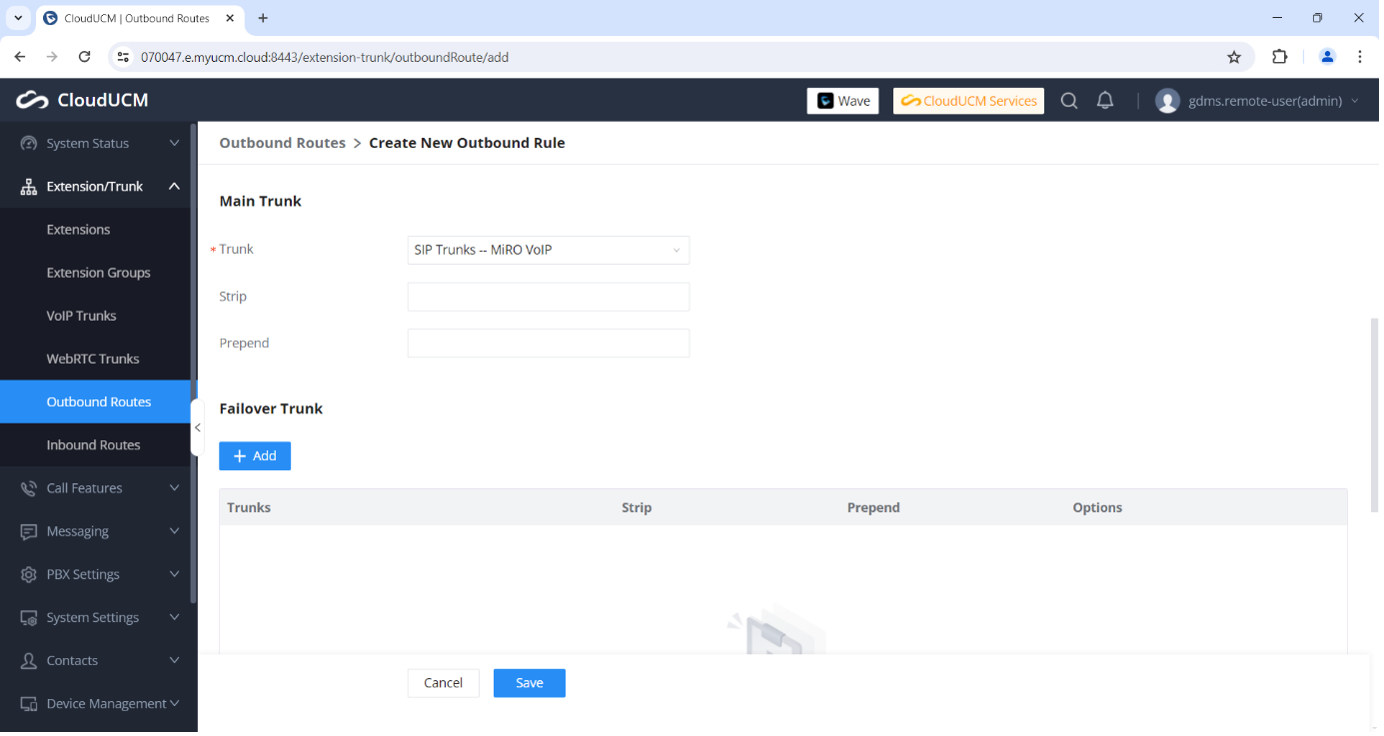
Let’s scroll down until we find Main Trunk. Here we can select the trunk this route will use. We can also Strip and Prepend digits.
This is used when we call a specific prefix but still have an international prefix. For example, in South Africa we call a number with a zero (0). But our international prefix is 27. If your provider only allows 27, but you would like to call the number as 0, then you can skip 1 – Because zero is the first digit and prepend 27 after 0 is stripped. For most providers, you can leave this blank and click on Save and Apply Changes:
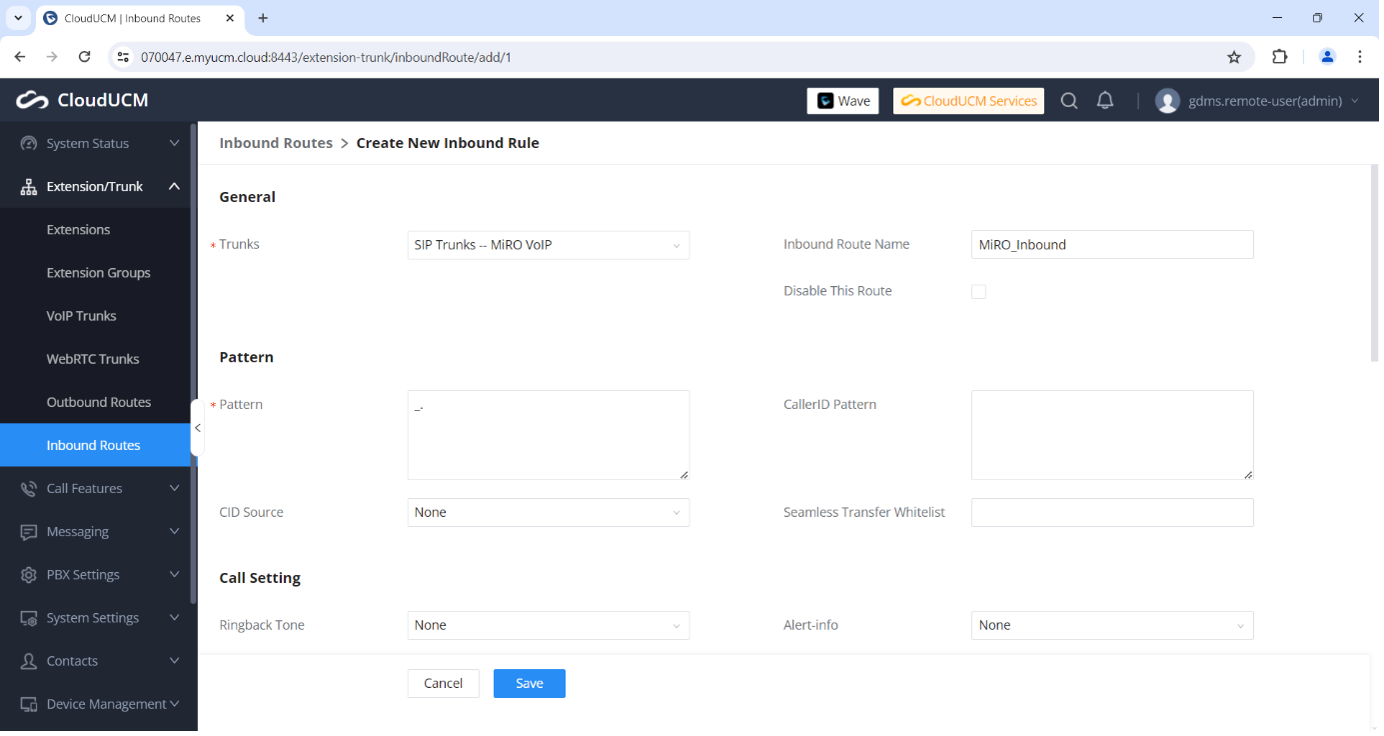
Now that we have an Outbound Route, we can create an inbound route. Let’s add one:

First, ensure that the correct Trunk is selected for this inbound route and give the route a name. Again, it’s all about the Pattern but in this case, it will determine which numbers can call in. Generally, we would like to allow any number to call us. For that, we can use a dot (.) Again where the dot (.) means any amount of numbers:
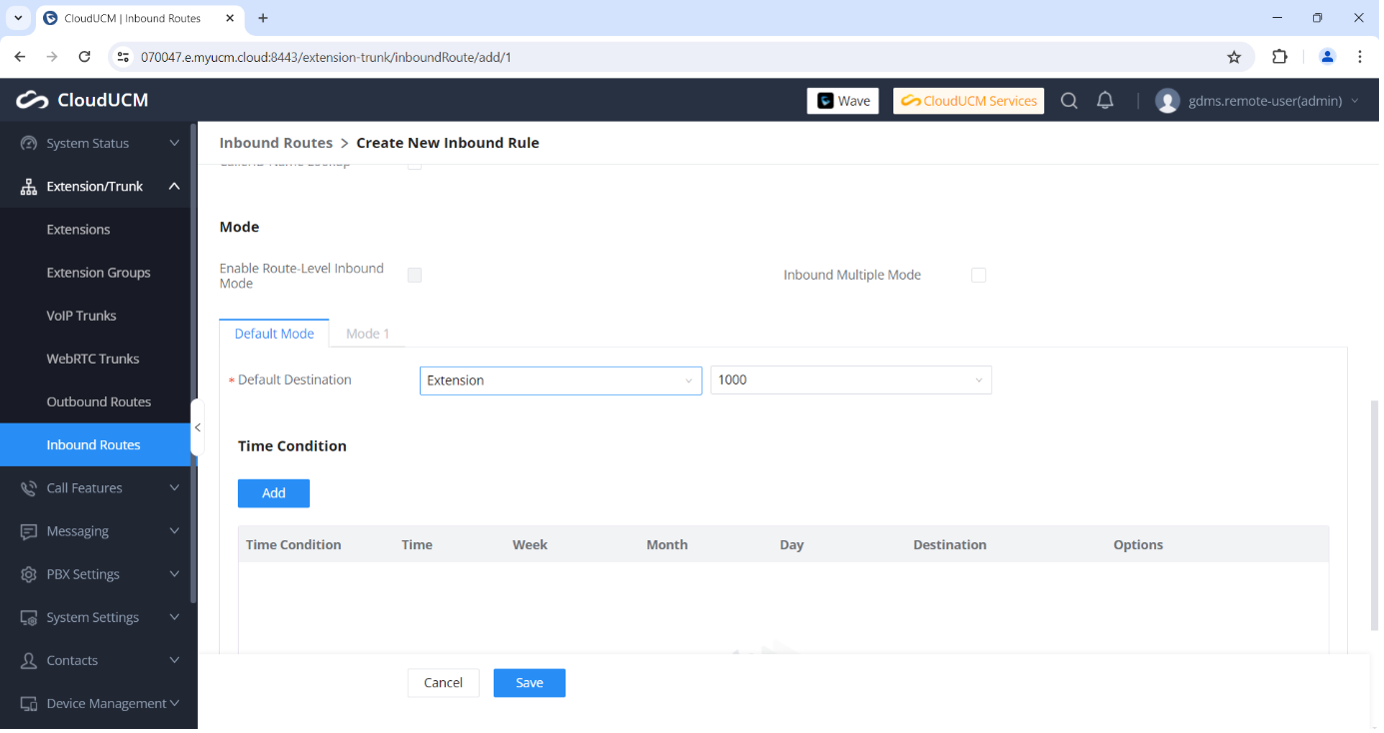
Scroll down until you find Mode. Here we would like to tell the inbound route what to do when a call comes in. You might have multiple extensions with Ring Groups, or perhaps an IVR system that automatically answers the call with Options to choose but for this example, we can tell the inbound call to simply go to extension 1000. Once you have selected your preferred option, click on Save and Apply Changes:
Alright, we are ready to start testing calls. First, let’s test an inbound call from the MiRO Office. If you would like to monitor this test call, you can navigate to System Status > Active Calls while testing:
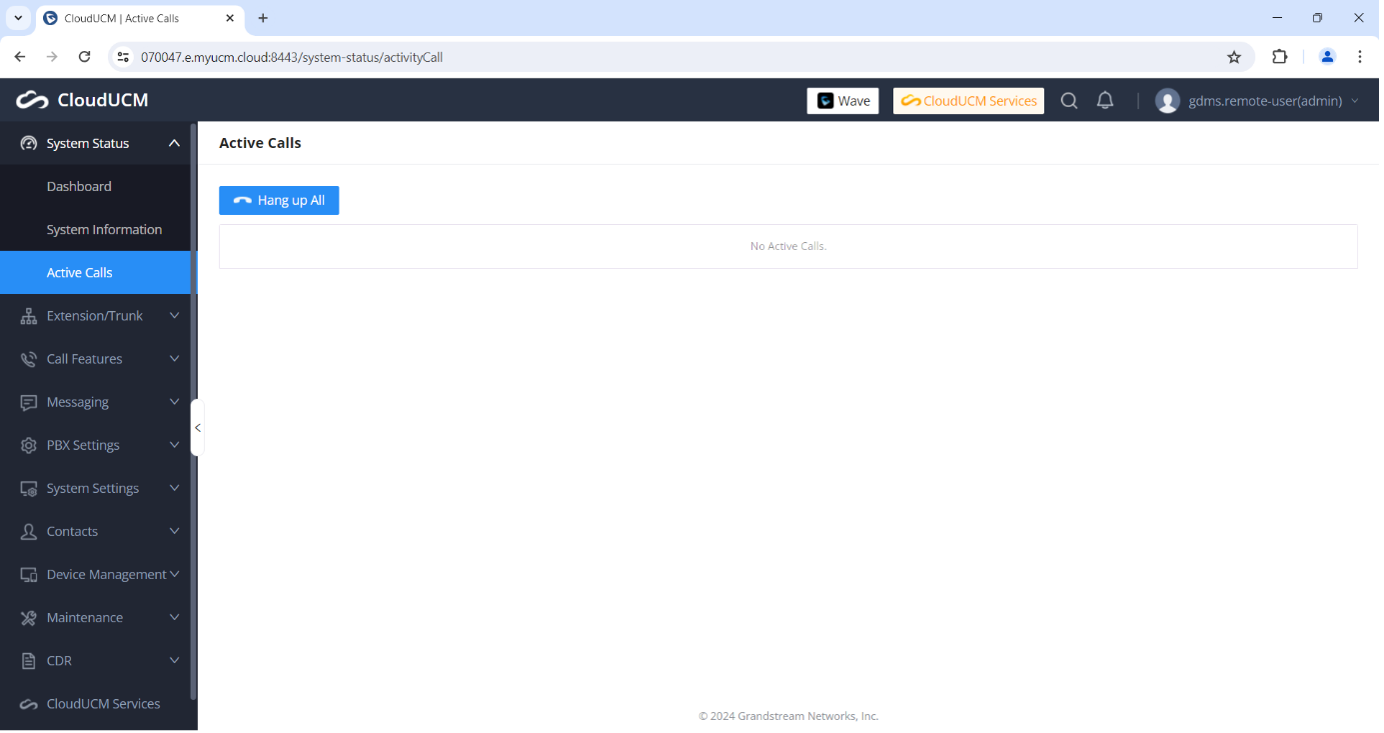
Here you can see that the incoming call was active and ringing from MiRO to Extension 1000:

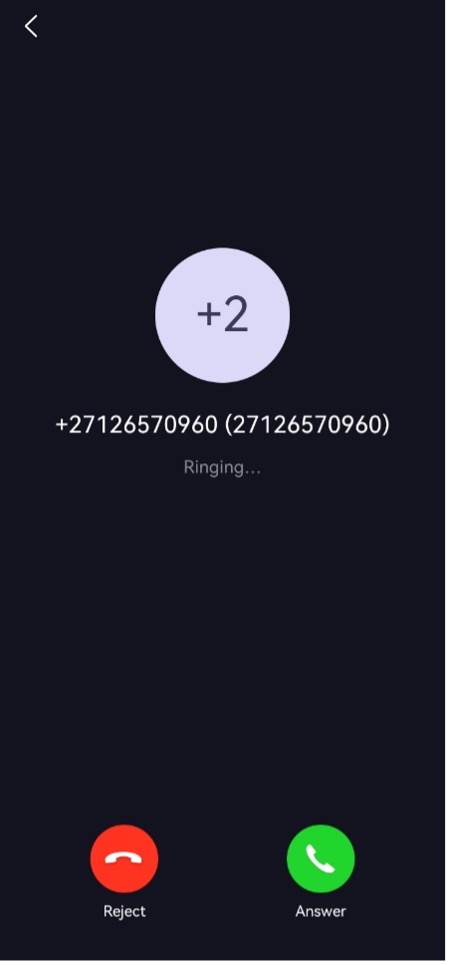
And here you can see on the Grandstream Wave Application, the extension was receiving the call:
Now from the Wave app, let’s make an outbound call and monitor it in Active Calls. Here we can see that extension 1000 is calling MiRO:
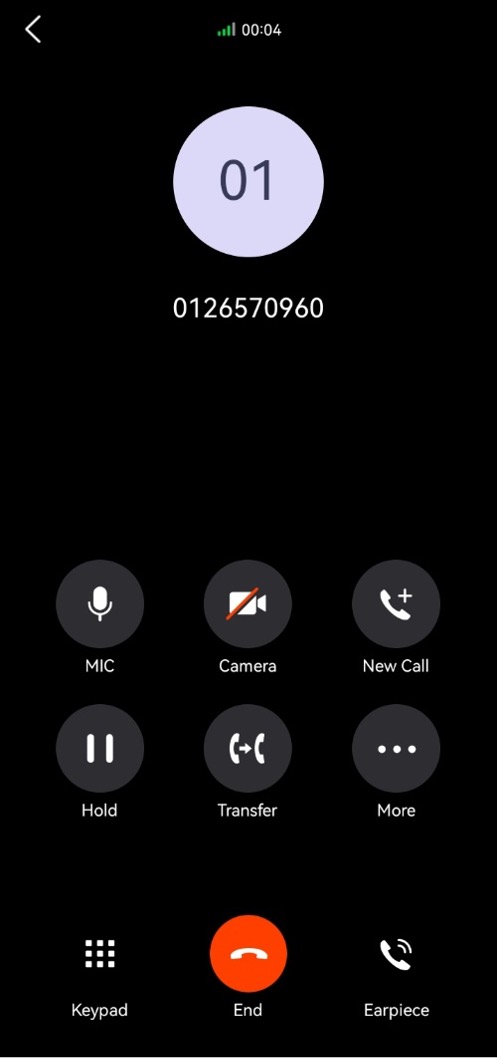
And on our Wave App, we can see that the call is active:
That’s it! We have successfully setup our CloudUCM. It is important to keep in mind that different providers use different methods for SIP Trunks, Inbound and Outbound Routes, etc.
If you need any assistance to setup your SIP trunks, kindly reach out to our support team. You can log a support ticket by sending an email to support@miro.co.za. We will be happy to help you get online.
Comments
View Comments