Map and floor plan now available in GWN.Cloud
- Technical Tips & Guides
- 2 likes
- 3697 views
- 0 comments
Grandstream’s GWN.Cloud now supports floor plans and Google Map integration for optimised planning on network Access Point placement.
In this guide, we will give you a step-by-step on how to import a floor plan, set the scale, add walls for attenuation, and place virtual access points for a visual representation of the RF environment for both 2.4 and 5GHz bands.
1. Log into GWN.Cloud and navigate to Maps and floorplan – toggle to floor plan.
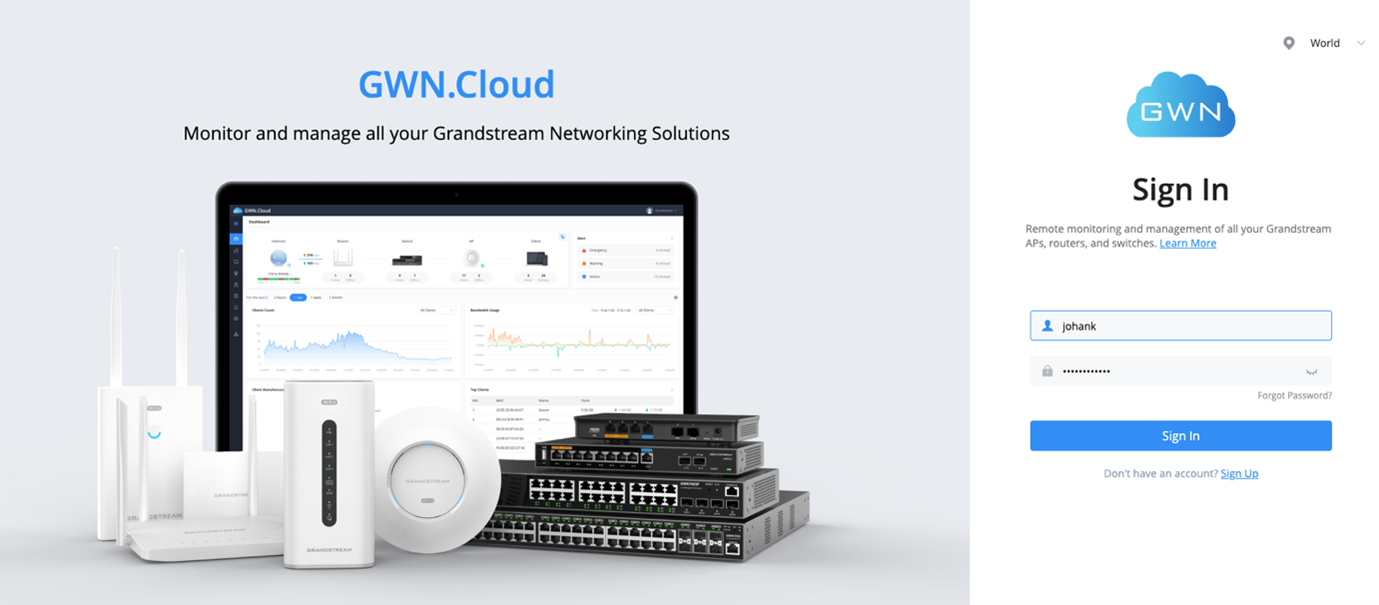
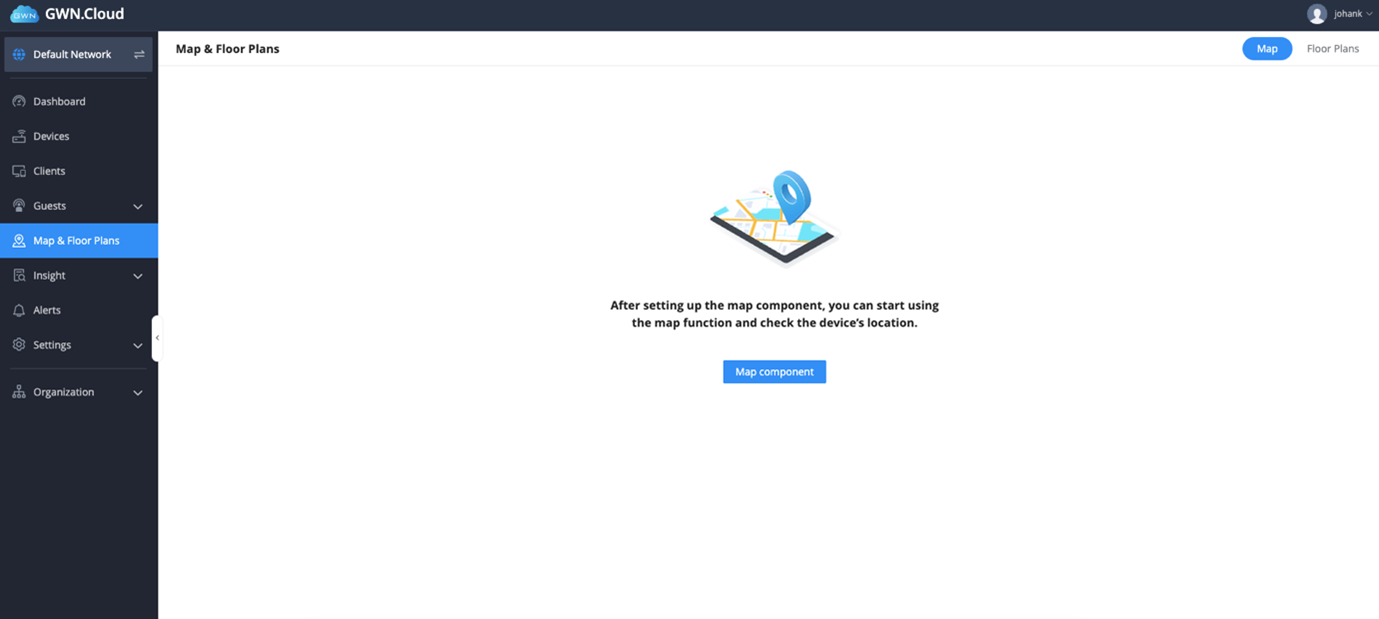
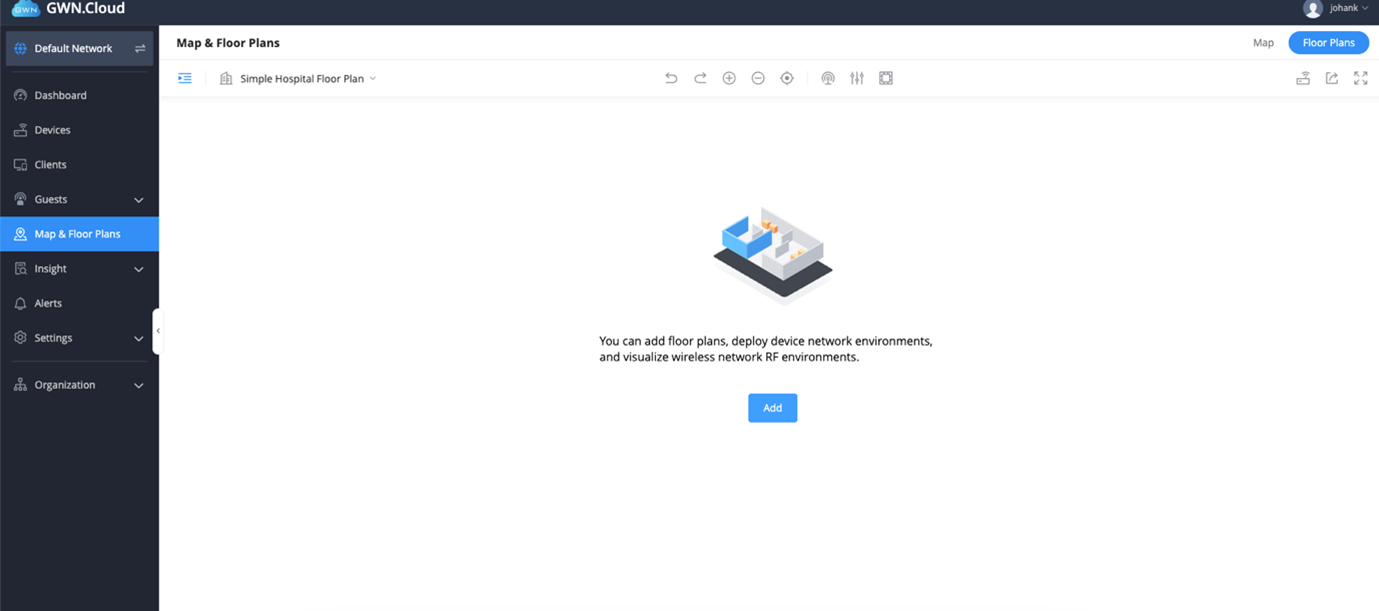
2. Click on add new floor plan.
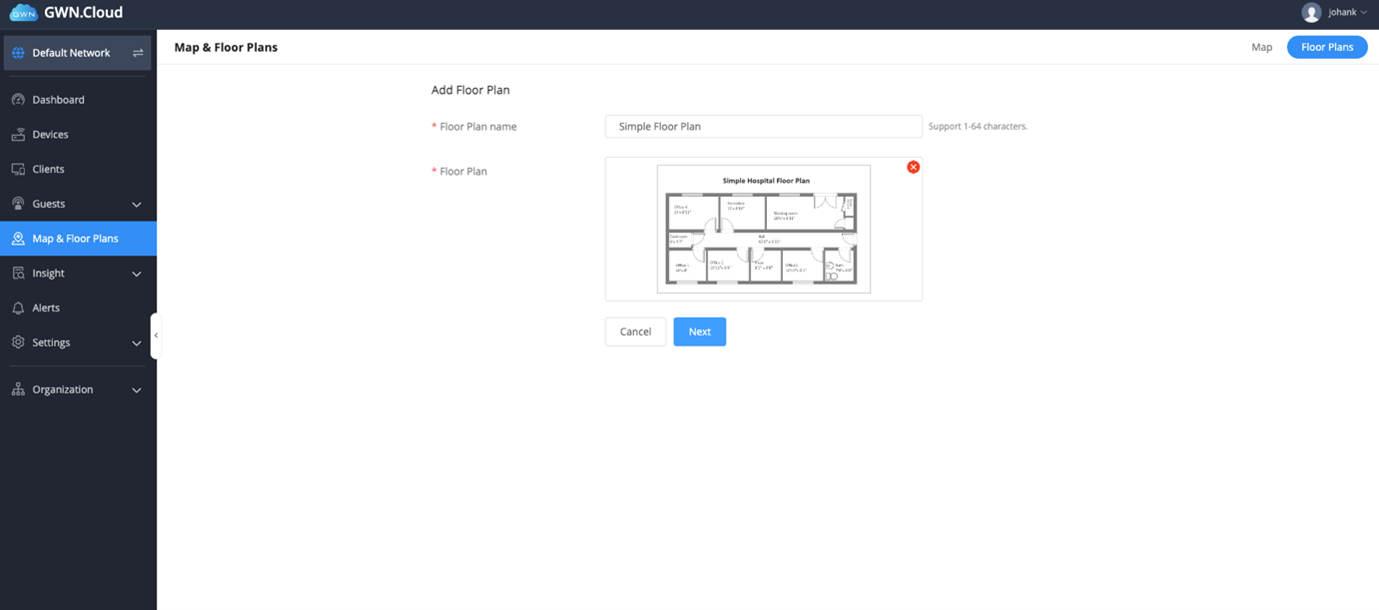
3. Add a floor plan name and upload the image, either JPG, PNG, or BMP
4. Set the scale on the floor plan.
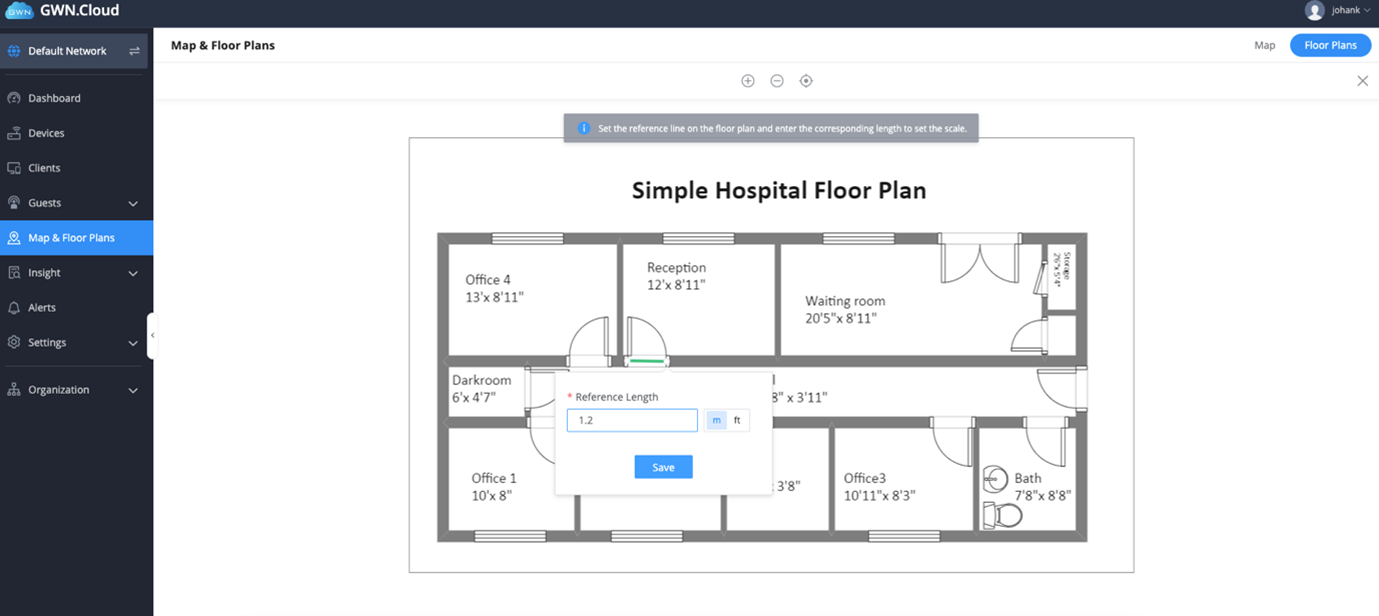
5. Next, add walls based on the material – this will ensure that attenuation is added to the floor plan.
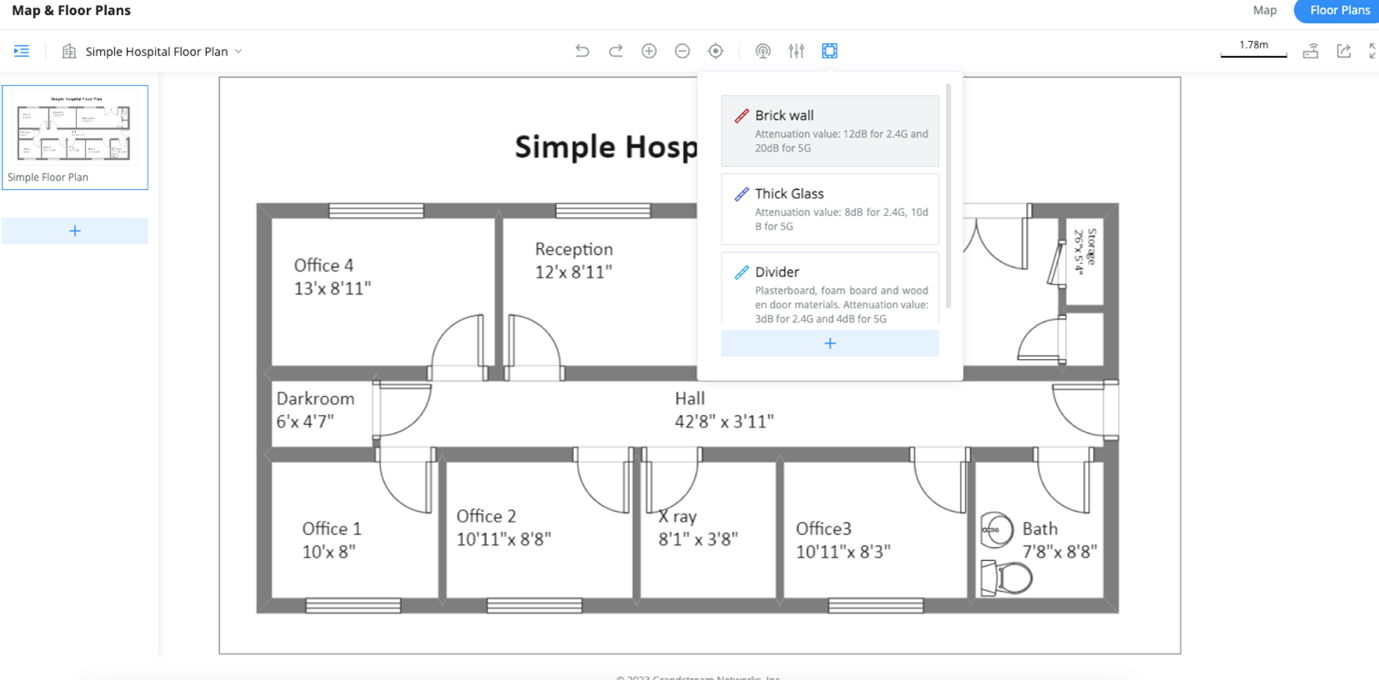
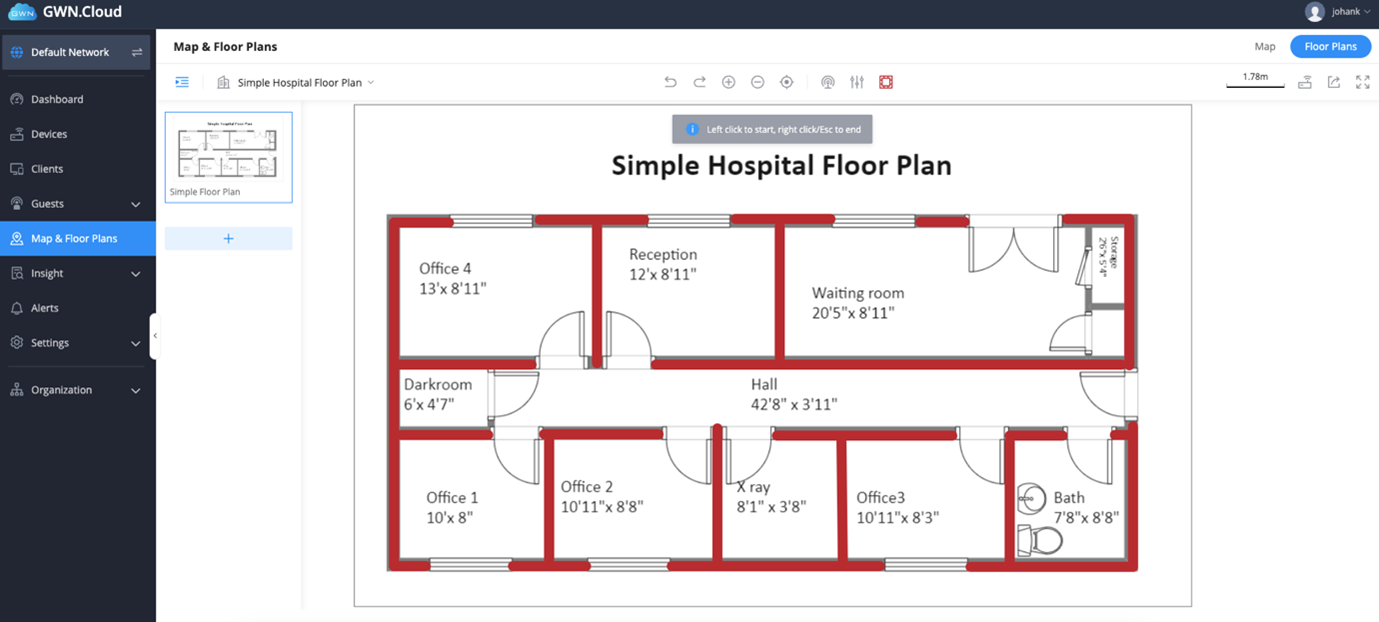
6. Next, add the Access Points by clicking on device > Virtual Devices > AP and select the AP of your choice. You can place multiple units based on deployment requirements.
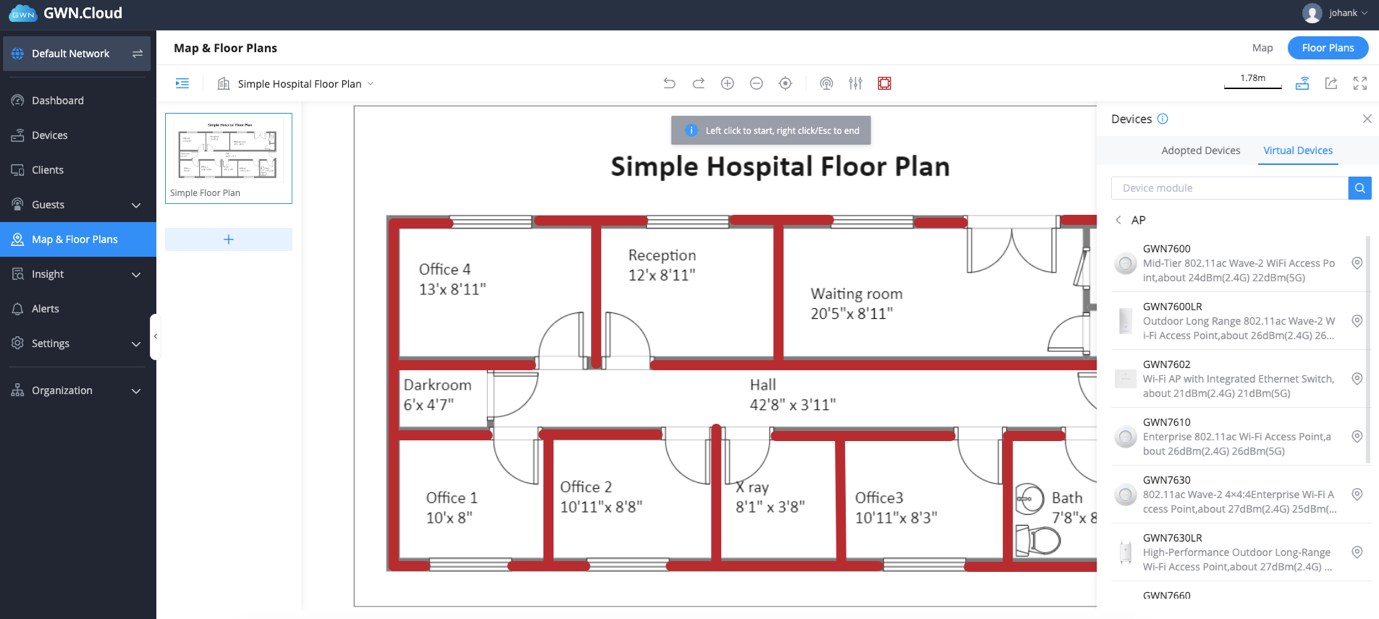
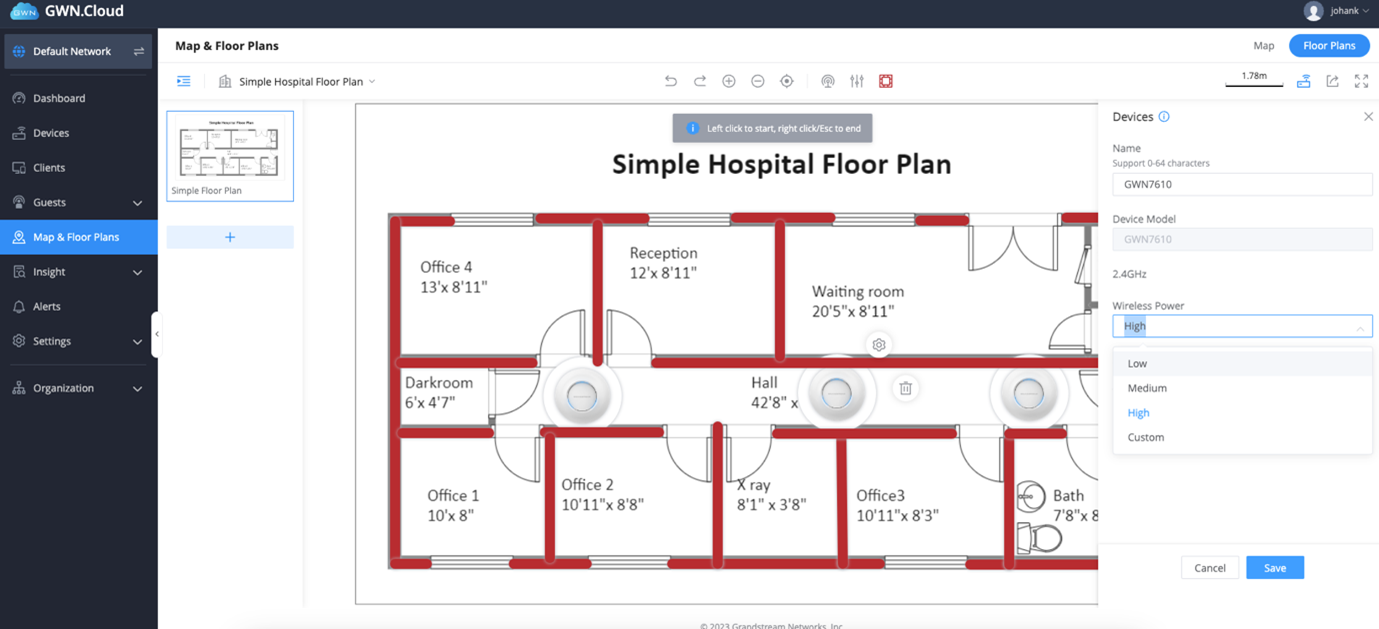
7. You can also change settings on the device, such as changing the Wi-Fi power between, High, Medium, Low, or Custom.

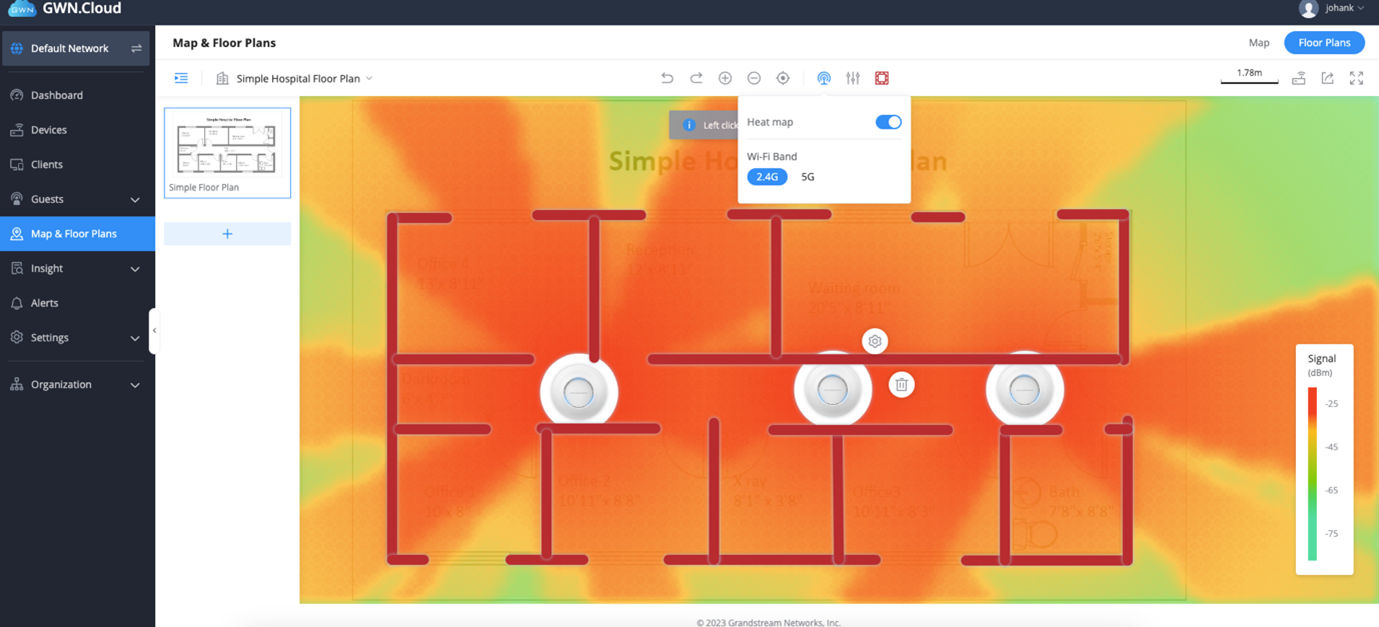
8. Next, you can navigate to Heatmap, enable Heatmap, and select the band to see potential dead zones based on AP placement.
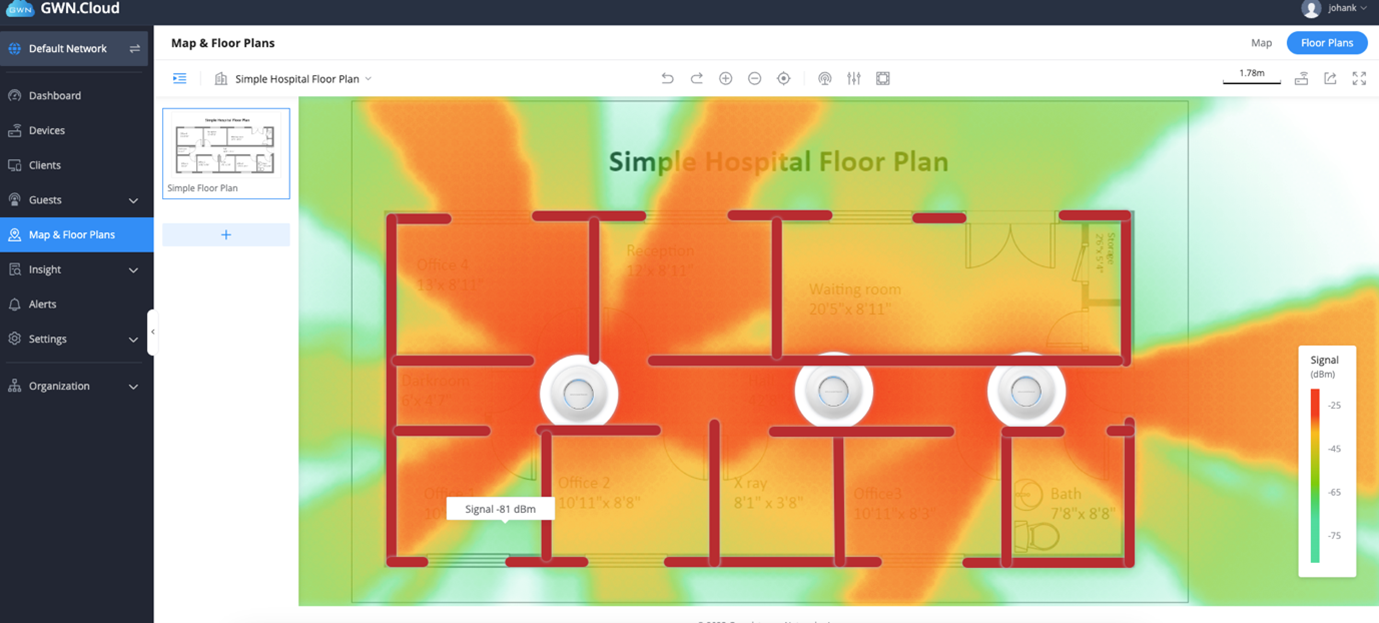
9. You can left-click on the heatmap for an estimate of the RSSI.
To integrate with Google Maps, you will require a Google Maps API key. You can follow the link on GWN.Cloud that will take you directly to the Google Maps platform to obtain an API key.
This is a nice tool to use for any new project planning and allows you to show your customers the expected coverage area. For existing sites, you can follow the same process as above, and instead of placing virtual Access Points, choose from the existing Access Point list.
Get your GWN solution directly on miro.co.za, or if you need help please get in touch with us at sales@miro.co.za or 012 657 0960.


Comments
View Comments