
Shopping Cart
There are no more items in your cartProvisioning Yeastar Cloud PBX instances from the YCM platform
- Gerhard Janse van Rensburg
- Technical Tips & Guides
- 2 likes
- 2064 views
- 0 comments
This Tech Tuesday, we're diving into Yeastar Central Management (YCM) to simplify your cloud PBX provisioning. YCM streamlines creating and managing P-Series Cloud PBX instances, saving you time and effort.
You can define parameter details like PBX name, plan, extensions, call recording, and region in a few clicks. Specify access control, user notifications, and system options all from a single pane of glass.
Prerequisites:
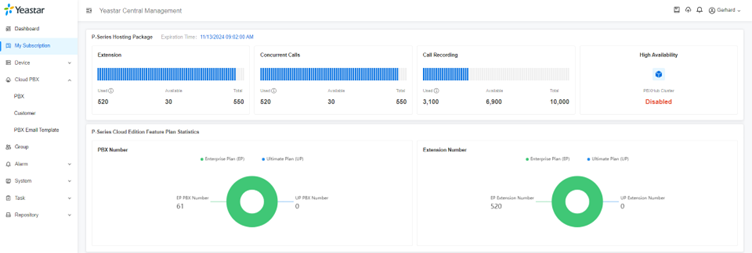
You will need an active Yeastar P-Series Cloud Edition (PCE) Package subscription with enough available extension and concurrent call capacity to accommodate your new PBX instance. You can confirm this by heading to the “My Subscription” section on your Yeastar Central Management Dashboard.
Guide Start:
How to create a new P-Series Cloud PBX
- Log in to your Yeastar Central Management (YCM) portal,
- Go to Cloud PBX > PBX.
- Click Add to create a new P-Series Cloud PBX instance.
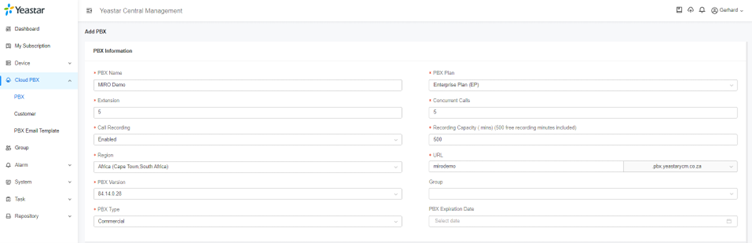
In the PBX Information section, fill in the following information:
- PBX Name - Enter a name to help you identify the PBX.
- PBX Plan - Select Enterprise Plan (EP).
- Extension - Set the number of extensions you would like to assign to this PBX.
- Concurrent Calls - Set the maximum number of concurrent calls allowed on this PBX.
- Call Recording - Set whether to enable the Call Recording feature for the PBX.
- Recording Capacity (mins) - Set the recording capacity in minutes – Each PBX includes 500 free call recording minutes. If you set this to a higher value than 500 the additional minutes will be deducted from your subscribed to extension capacity.
- Region - Select the hosting region closest (geographically) to where the PBX will be used.
- URL - Enter the URL prefix in the text field, the suffix cannot be customised per PBX. This will be the FQDN for the PBX used for registration and management.
- Supported characters: numbers, letters, and hyphens.
- PBX Version - Select the firmware version that the PBX will provision with.
- Group - Select an existing group from the drop-down menu. If there are no groups available, you will need to create them in the group section in your YCM portal before assigning them to your instance.
- PBX Type - Select the PBX type, by default the PBX will be commercial but you can change it to a trial instance for demos and evaluations. A trial instance can easily be converted to a commercial later.
- PBX Expiration Date – Set the expiration date of the PBX, this can be used to serve as a billing reminder for recurring subscriptions. Admins will be notified of the expiration date on the management portal. If the PBX expires it will continue to operate until it is manually stopped via YCM.
In the Customer Information section, select one or more users to receive PBX activation emails once the PBX has been provisioned.
To select an existing customer:
- Click Add
- In the drop-down list of Customer Name, select a customer by scrolling through the list or by searching for the user and click on the username
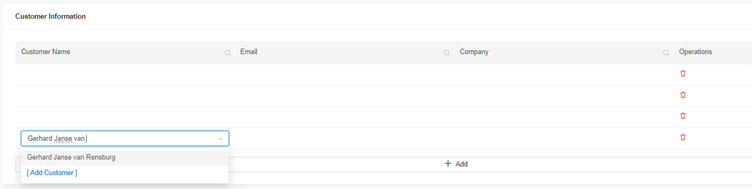
To add a new customer:
- Click Add
- In the drop-down list of Customer Names, select Add Customer.
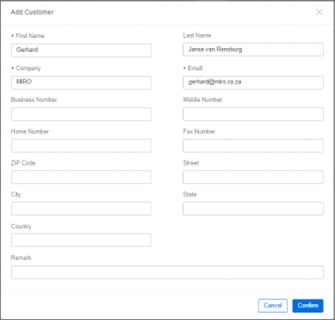
- Fill in customer information, and note the mandatory fields marked with an asterisk.
- Click Confirm.
The customer is added and synchronized to the Customer list (Path: Cloud PBX > Customer).

In the Option section, configure the following system options for the PBX as needed.
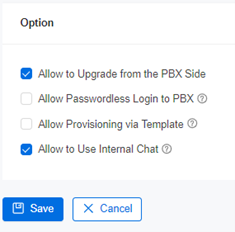
Allow to Upgrade from the PBX Side – Enabled by default.
To prevent PBX administrators from upgrading firmware from the PBX management portal, disable this option.
- Allow Passwordless Login to PBX – Disabled by default. To allow passwordless login to the PBX from Yeastar Central Management, enable this option.
- Allow Provisioning via Template – Disabled by default. To allow the PBX to be provisioned via a template, enable this option, then select a template from the Provisioning Template drop-down list (templates are synchronised with Repository > Provisioning Template)
- Allow to Use Internal Chat - Enabled by default. If you don't need users to use the internal chat feature on their Linkus UC clients, you can disable this option.
- Click Save.
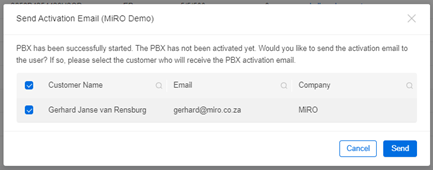
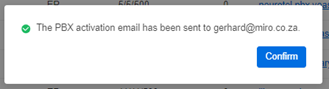
The last step is sending activation emails to the PBX administrator/s.
From your Yeastar Central Management portal go to Cloud PBX > PBX.
Select an unactivated PBX, click on the ellipsis then select Send Activation Email from the drop-down list.

For more information, please get in touch with us at sales@miro.co.za or 012 657 0960.
Comments
View Comments