
Shopping Cart
There are no more items in your cart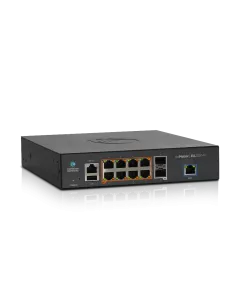
07|Networking|Switches - PoE|Layer 2
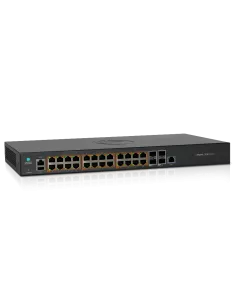
Cambium cnMatrix 10P PoE Switch | CB-CNM-EX2010-P

R20,233.10 (Incl. VAT)
Order-on-Demand
Cambium Networks cnMatrix switches are sleek, compact and pack a powerful punch in regards to their switching capabilities. The cnMatrix range of PoE and non-PoE switches offer a wide array of exciting features that enhance and support Cambium’s entire portfolio.
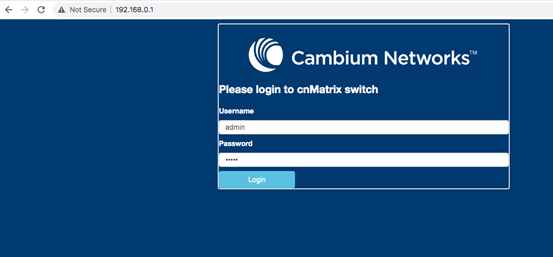
In this quick configuration guide, we will show you how to log into the switch on its default configuration, how to upgrade the firmware of the device using cnMaestro as well as how to perform basic VLAN tagging.
The cnMatrix switches respond to the default IP address of 192.168.0.1 with the default username and password combination of admin/admin. Remember to make sure that you are connected to the management port of the switch to access the WEBGUI.
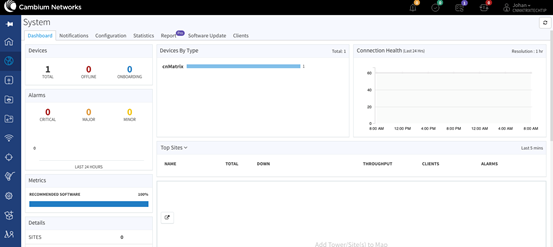
Once logged in, the system information screen will be displayed with the information CNS Software version. Our switch is currently on version
3.0.1-r4. Although you can upgrade the firmware of the switch using a TFTP Server, we found that upgrading the firmware of the switch with cnMaestro to be much more convenient.
Simply open your cnMaestro account, click on onboard device and onboard using the serial number, enter the device serial number and click on onboard. You will be prompted to approve.
Please Note: The switch must have internet connectivity during the onboarding.
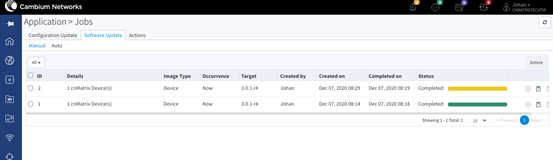
Once onboarded – you can click on monitor network > Click on the active devices number.
From the devices list select switches.
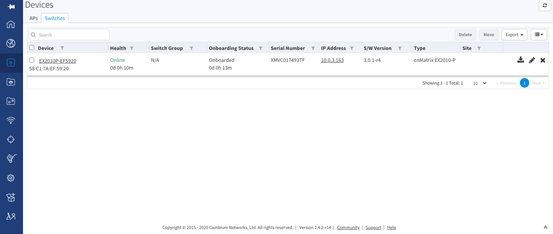
Click on the device.
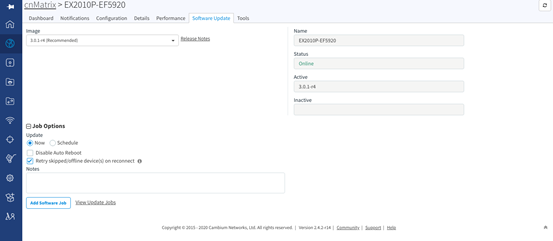
Select the ‘software’ update. You will notice that cnMaestro does indicate the recommended firmware version. You can simply then click on add software job and wait for the device to be upgraded to the latest firmware
To add VLAN’s to the switch, you can log back into the WEBGUI and Layer 2 Management > Static VLANS.
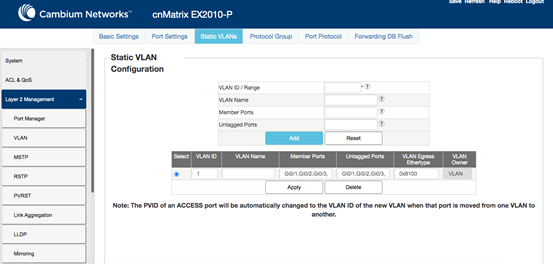
For this example we want VLAN100 to be tagged on port 8 of the cnMatrix switch as this will be used for our cnPilot Wi-Fi Access point to hand out an IP address range for all Wi-Fi connected clients.
1. Ensure that port 8 is removed from the default VLAN 1 on both tagged and untagged ports. Once removed, simply click on apply.
2. Add the new VLAN information as follow:
a. VLAN ID: 100
b. VLAN Name: WiFi
c. Tagged Ports: Gi0/8
3. Click Apply.
Click here to keep an eye out for our upcoming Cambium Networks live or online training.
This item is available for shipping or collection from our Centurion branch.
This item is available for shipping or collection from our branch.

Comments
View Comments