
Shopping Cart
There are no more items in your cartSimplify SNOM IP Phone Onboarding with Yeastar’s Auto Provision
- Johan Koekemoer
- Technical Tips & Guides
- 6 likes
- 2469 views
- 0 comments
Yeastar Auto Provisioning is a time-saving feature that helps you manage and deploy IP phones centrally on Yeastar P-Series Cloud Edition. The process of configuring and managing IP phones is simplified, which makes the deployment and management of devices faster and more convenient.
For P-Series Cloud Auto Provisioning, admins can use RPS (Redirection and Provisioning Service) which allows for remote provisioning of SIP endpoints without the need for complicated network configuration.
Most SNOM SIP phones support Auto Provision through RPS but you can refer to the Auto Provisioning - Supported Devices list to make sure your phones support this method.
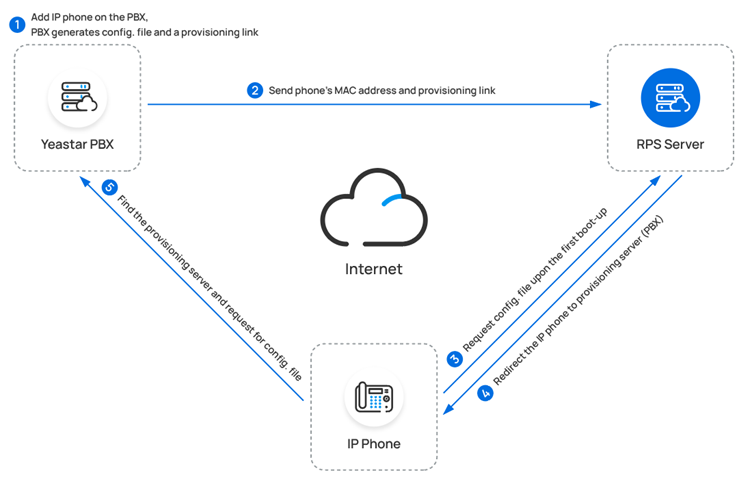
Below is an illustration of how RPS Auto Provisioning is implemented in Yeastar P-Series Cloud, which can be used to identify and troubleshoot any possible problems with Auto Provisioning.
Adding an auto configuration file for a phone in P-Series Cloud PBX:
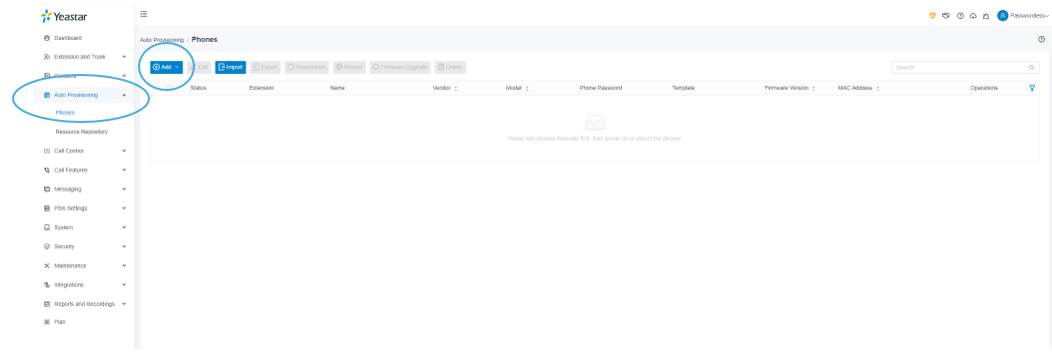
- Log into the Yeastar P-Series Cloud PBX interface
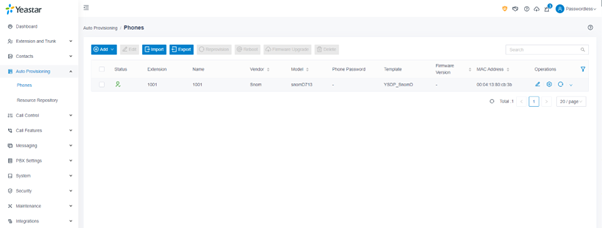
- Navigate to Auto Provisioning > Phones and click on add to add a new phone.
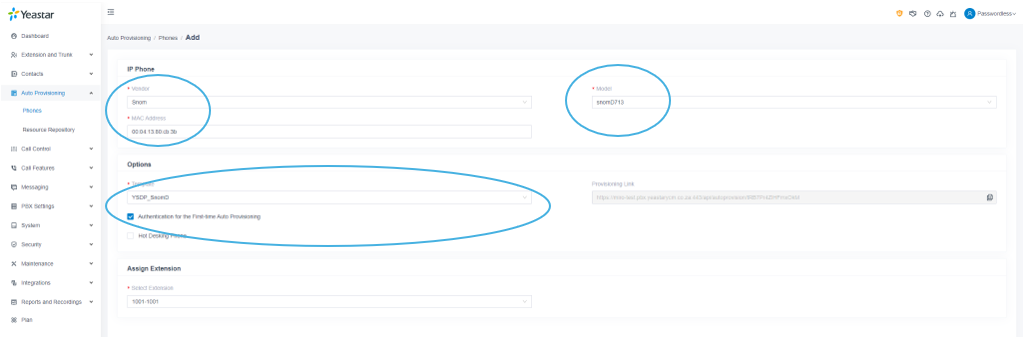
In the IP Phone window enter the required information:
- Vendor Select the vendor (in our setup we will select SNOM)
- Model: Choose the model of the phone (in our setup we are using a D713)
- MAC Address: Enter the MAC address of the phone without using ‘:’ as the separator.
*Tip: You can find the MAC address of the phone on the box or at the back of the unit. Alternatively, you can reach out to us for the MAC address with the TAX Invoice.
In the options section at the bottom of the window:
- You can use the default plate provided by Yeastar which will allow changing the basic settings of the phone or you can create your own template with customisation, see Create a Custom Auto Provisioning Template
- The provisioning link is generated automatically, this can be used to manually direct a phone to the PBX for provisioning, since our SNOM D713 handset supports RPS we will not need to do this.
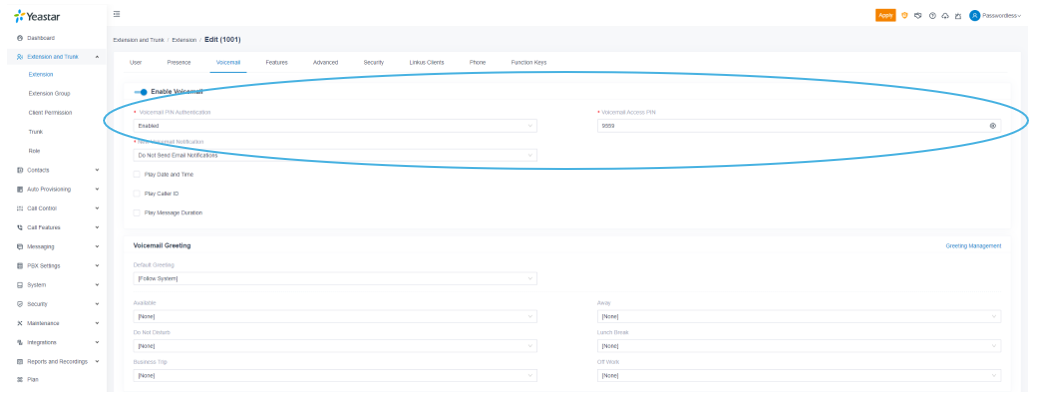
- Authentication for the first-time Auto Provisioning: When you enable this feature users will be prompted to enter the extension and voicemail PIN before Auto Provisioning will start.
- We recommend enabling this option as it adds an extra layer of security.
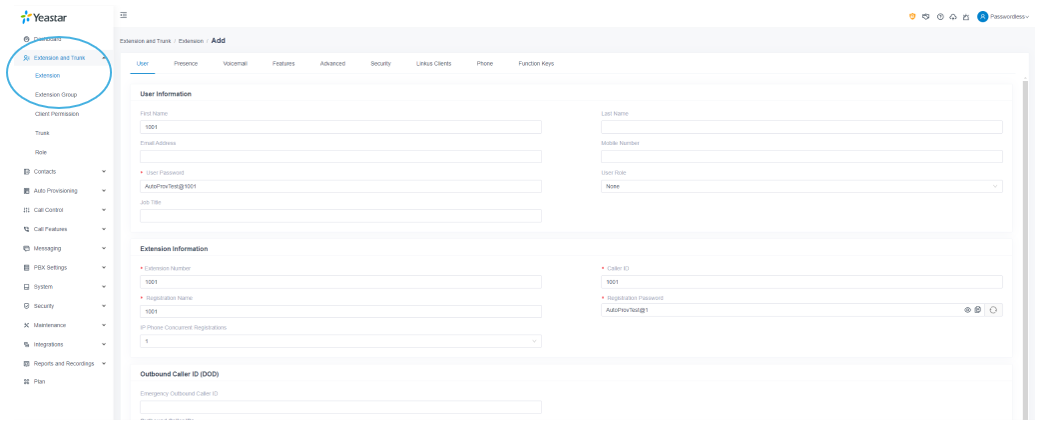
- You can find/change the voicemail PIN in the voicemail tab under the settings for the relevant extension. - Select the extension you would like to assign to this phone from the Assign Extension drop-down and click save.
Setting up the phone for Auto Provisioning:
- Ensure that your phone is in factory default state, if the phone is already configured manually, it will not request a config file from RPS.
- Power on the phone and connect it to a network with Internet access.
- Wait for the phone to boot up and prompt for credentials, enter the credentials.
- The Auto-Provisioning template will be uploaded to the phone, and it should register to the PBX, you can confirm this by checking the status in the P-Series Cloud interface.
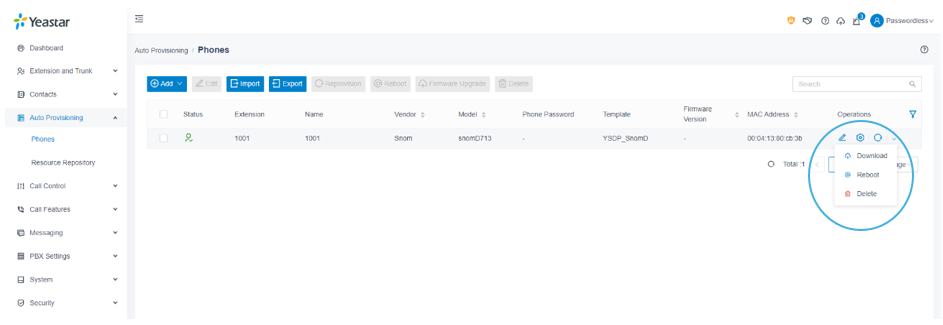
The phone will need to be rebooted which can be done from the operon dropdown in the PBX interface. Once completed, the phone is provisioned and ready to be used.
Don't forget to book your spot of our upcoming Yeastar webinar.
Need assistance? Contact us at technical@miro.co.za
Comments
View Comments