
Shopping Cart
There are no more items in your cartUniFi Protect: AI Overview and Setup Guide
- Johan Koekemoer
- Technical Tips & Guides
- 1 likes
- 27041 views
- 0 comments

Ubiquiti has added several new, exciting features to UniFi Protect 3.0. These include:
- Facial recognition through their AI range of cameras.
- Viewing of up to 4 camera streams simultaneously.
- Setting up users to have viewing rights only (previously admin-level users only).
- Google Drive integration for offsite backups.
- LPR (License Plate Recognition) for motorbikes on camera firmware 4.0.7.39
We will look at a simple set-up guide to configure UniFi Protect with Smart Detections including Face Recognition powered by the AI range of cameras.
UniFi Protect is part of the UniFi ecosystem but it is limited to certain embedded devices. This ensures the highest levels of security of the system, allows them to integrate features quickly and ensures interoperability with other components of the UniFi ecosystem like Network and Identity.
Let’s examine a list of compatible hardware needed to run UniFi Protect with Face Recognition. First, we will need an appliance.
We have several options here, but the scope of your installation will determine the choices you make for your appliance:
Cloud Gateways:
- Ubiquiti UniFi - Dream Machine, Pro-version with 8 ports (UB-UDM-PRO)
- Ubiquiti UniFi - Dream Machine Special Edition with USG & UProtect-Ready (UB-UDM-SE)
- Ubiquiti UniFi - Dream Wall (UB-UDW)
- Ubiquiti UniFi - Dream Router (UB-UDR)
- Ubiquiti UniFi Ultra - Cloud Gateway (UB-UCG-ULTRA)
- Ubiquiti UniFi – Express (UB-UX-EXP)
NVRs:
- Ubiquiti UniFi Protect - Network Video Recorder NVR Pro (HDDs not included) [UB-UVC-UNVR-PRO]
- Ubiquiti UniFi Protect - 4 Bay Network Video Recorder NVR (HDDs not included) [UB-UVC-UNVR]
Cloud Key:
- Ubiquiti UniFi - Cloud Key, Gen2 Plus, with 1TB HDD (UB-UCK-PLUS)
Once the appliance has been chosen, you will need compatible cameras.
The Smart Detection features are supported by the entire range of AI cameras, but UniFi Protect Face Recognition is not supported by the 360o variants. This is due to image distortions necessary to create a 360o image.
The Face Recognition compatible cameras include:
- Ubiquiti UniFi Protect - Camera AI Bullet (UB-UVC-AI-BULLET)
- Ubiquiti UniFi Protect - Camera AI Professional (UB-UVC-AI-PRO)
- Ubiquiti UniFi Protect - Camera AI Theta with License Plate Detection (UB-UVC-AI-THETA) [360o fisheye lens not compatible]
Setup Guide:
Step 1:
Log into your UniFi Protect compatible device. I am using the UniFi Dream Wall for demonstration purposes.
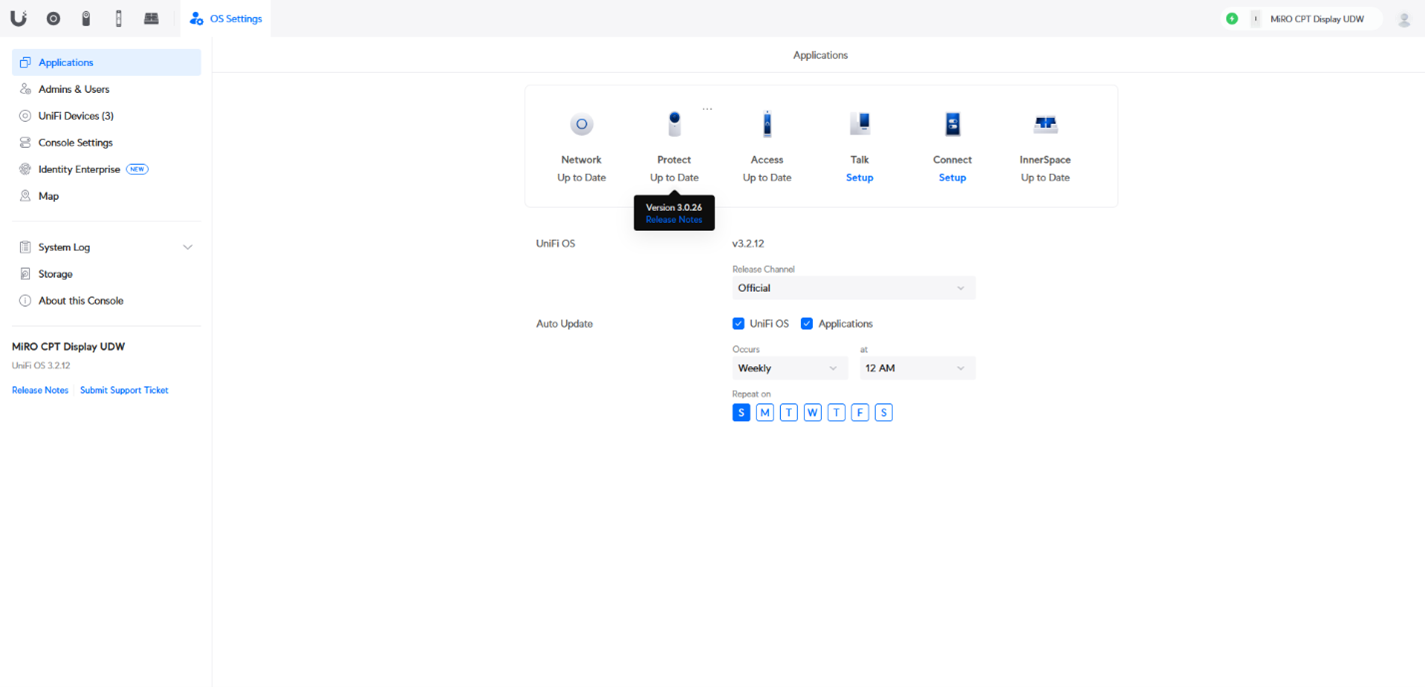
Step 2:
Navigate to the Applications Tab.
Once there, update all your applications to ensure you have the most up-to-date security and features. They will show themselves as being Up-to-Date once upgraded to the latest firmware version.
To get access to facial recognition, UniFi Protect must be version 3.0 or higher.
You can hover over the tooltip to show the current version installed.
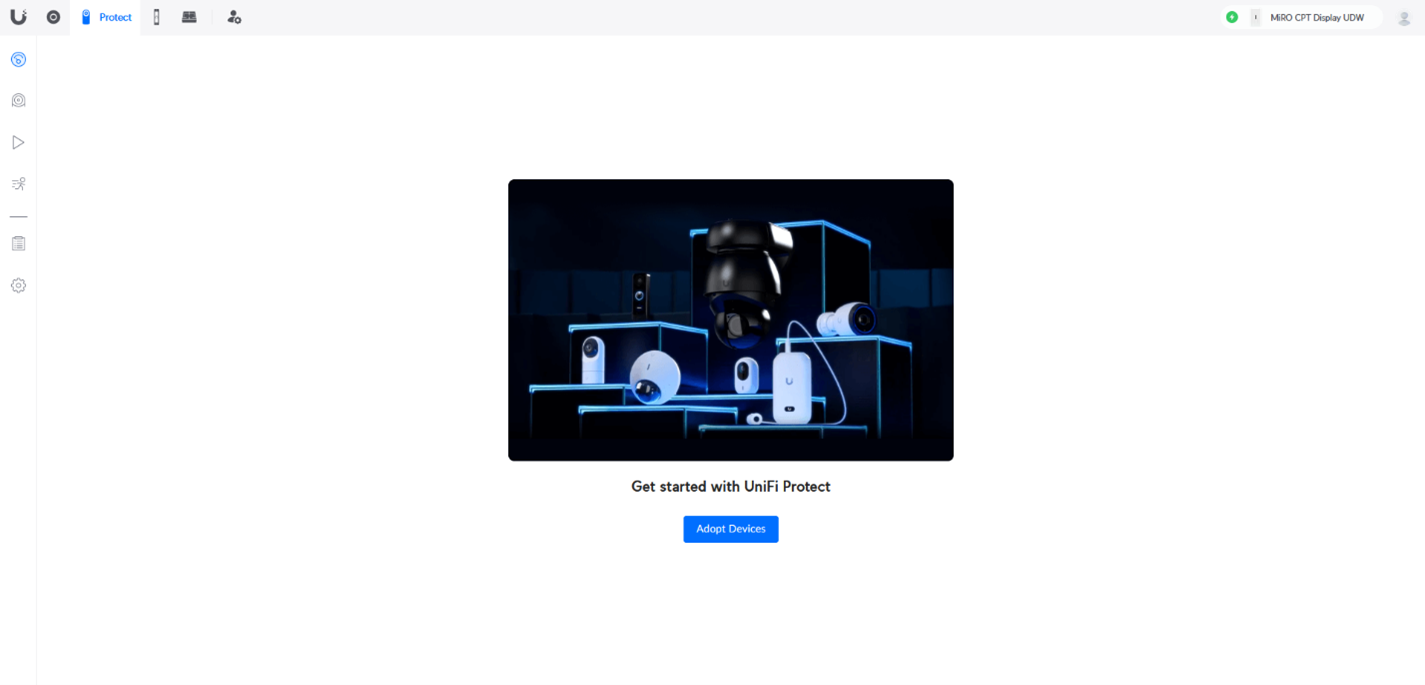
Step 3:
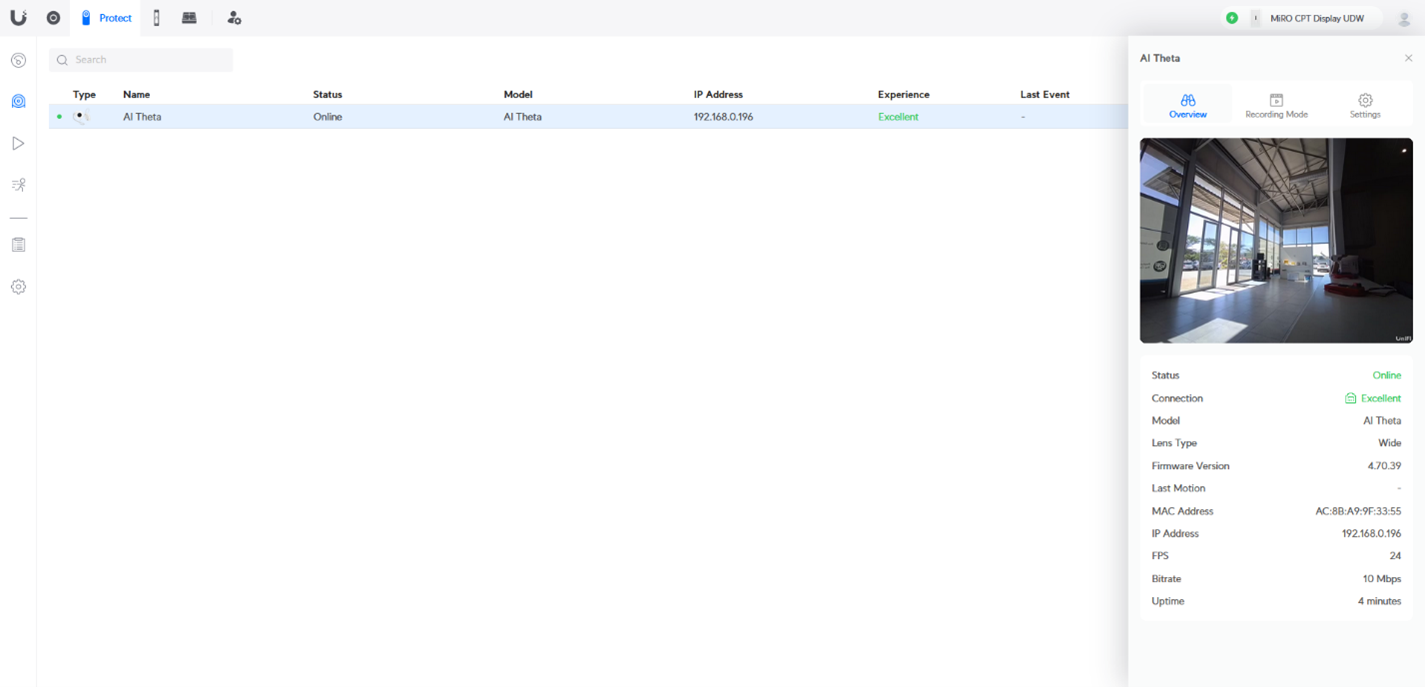
Navigate to the UniFi Protect Application within the UniFi interface.
Step 4:
All UniFi cameras connected to your network and available for adoption by UniFi Protect will be visible here, under the Devices tab.
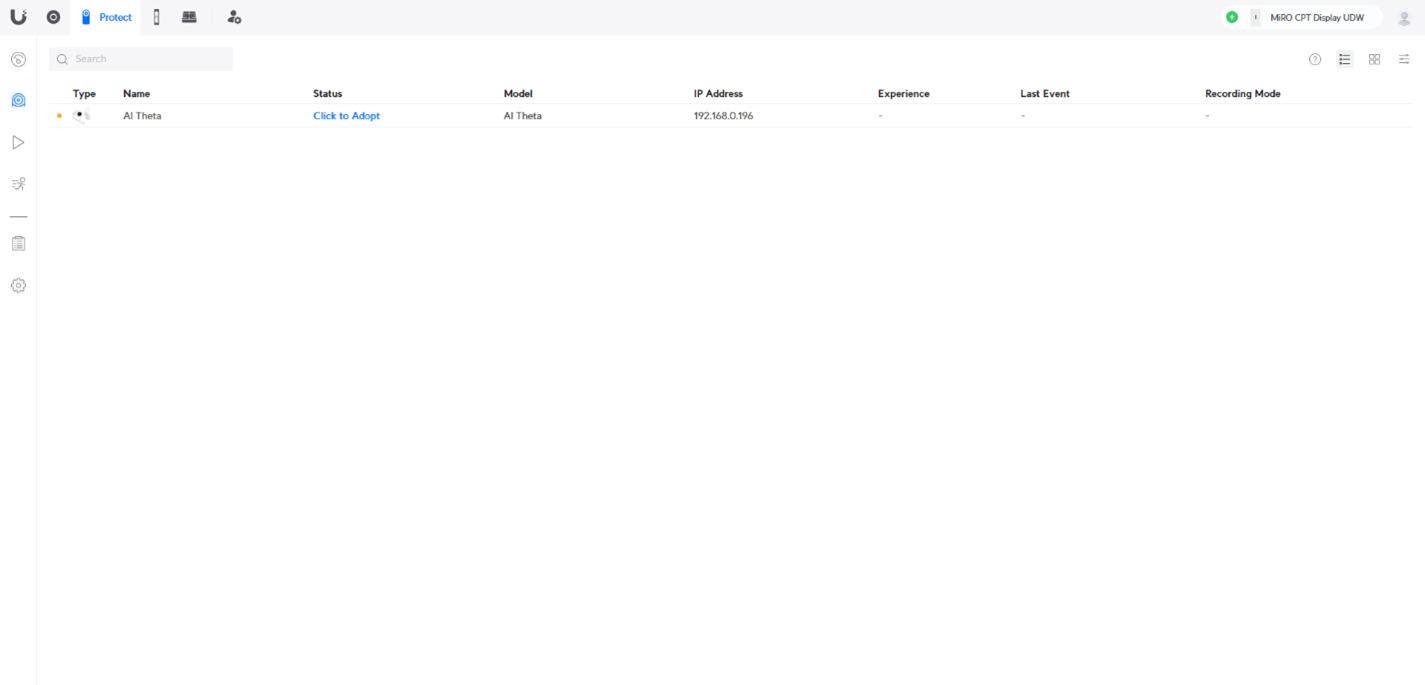
Step 5:
Click the “Click to Adopt” hyperlink and the camera will be adopted to your system.
When performing an adoption for the first time on a particular device, the device will automatically check for the latest firmware and upgrade it immediately.
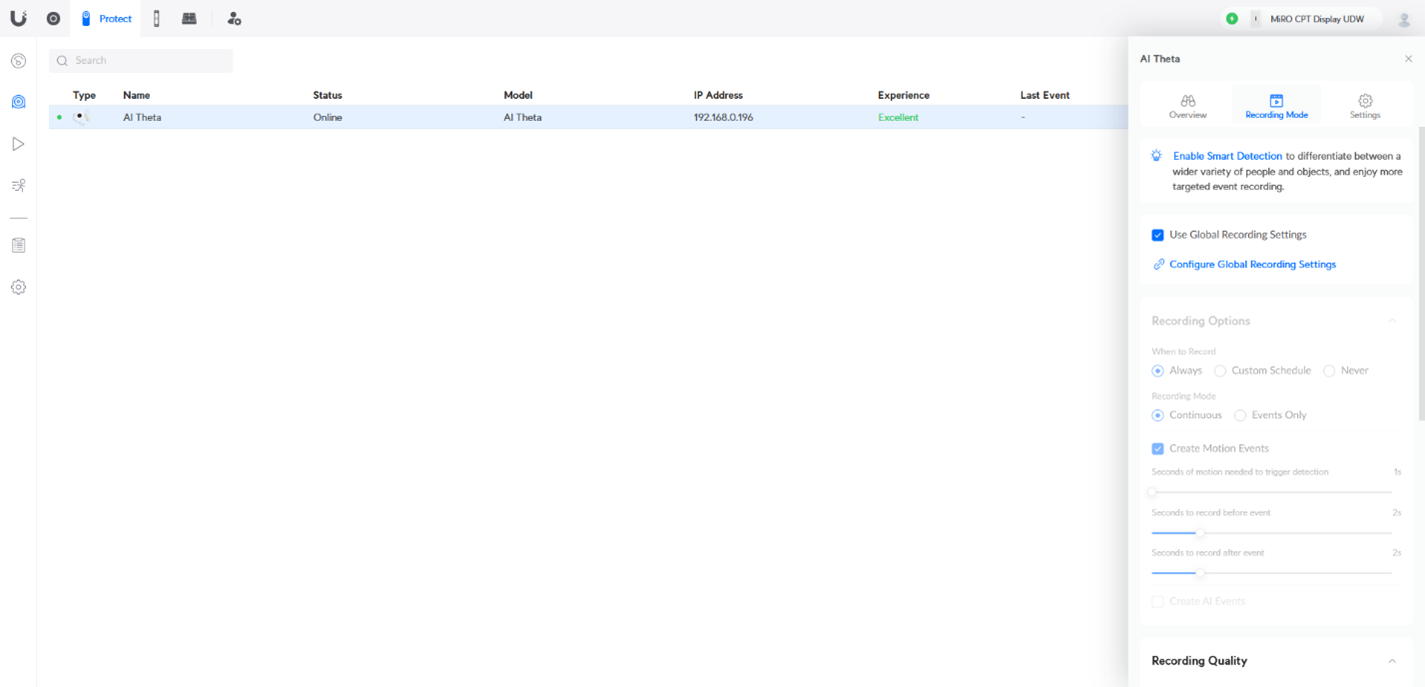
Step 6:
Once we have adopted the camera, we need to click the “Recording Mode” sub-tab.
This will give us access to the “Enable Smart Detection” option – click this hyperlink to take you to the global settings for the system.
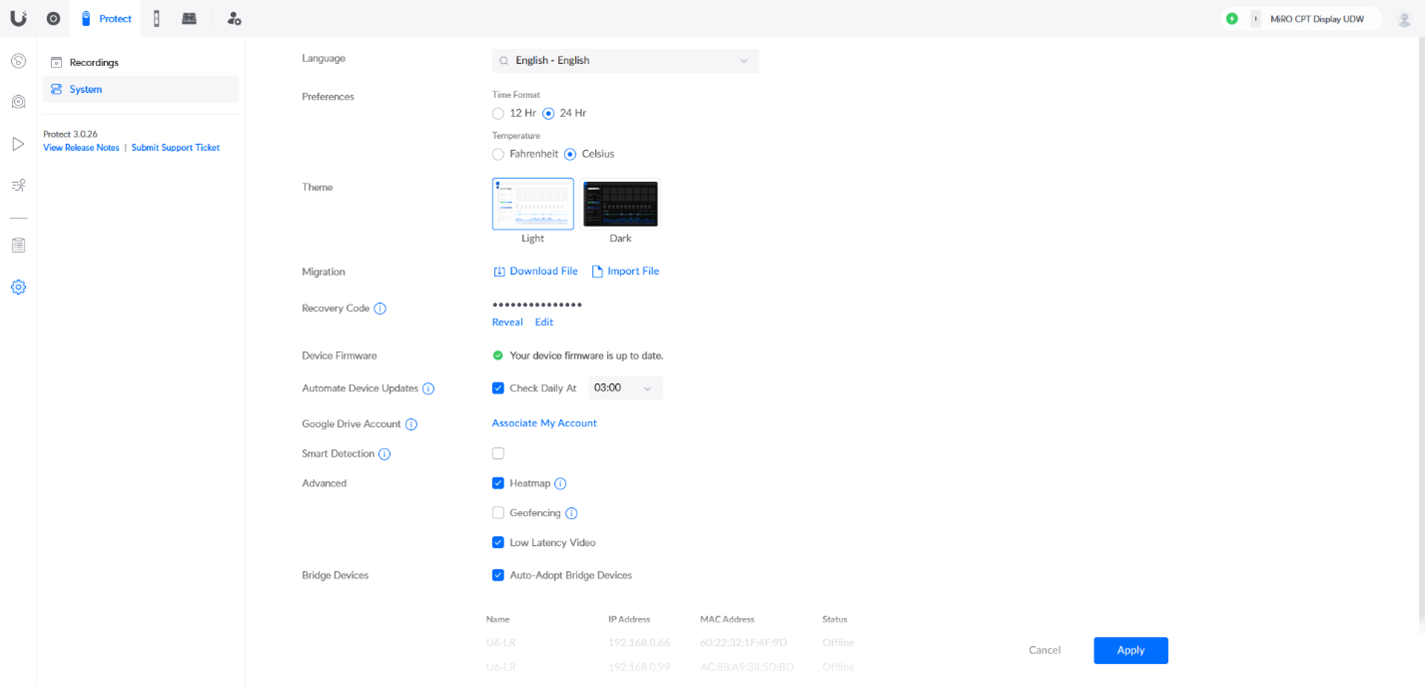
Step 7:
Here we can check on our device firmware, associate our Google Drive account for off-site backups as previously discussed, and most importantly for this guide, enable Smart Detection.
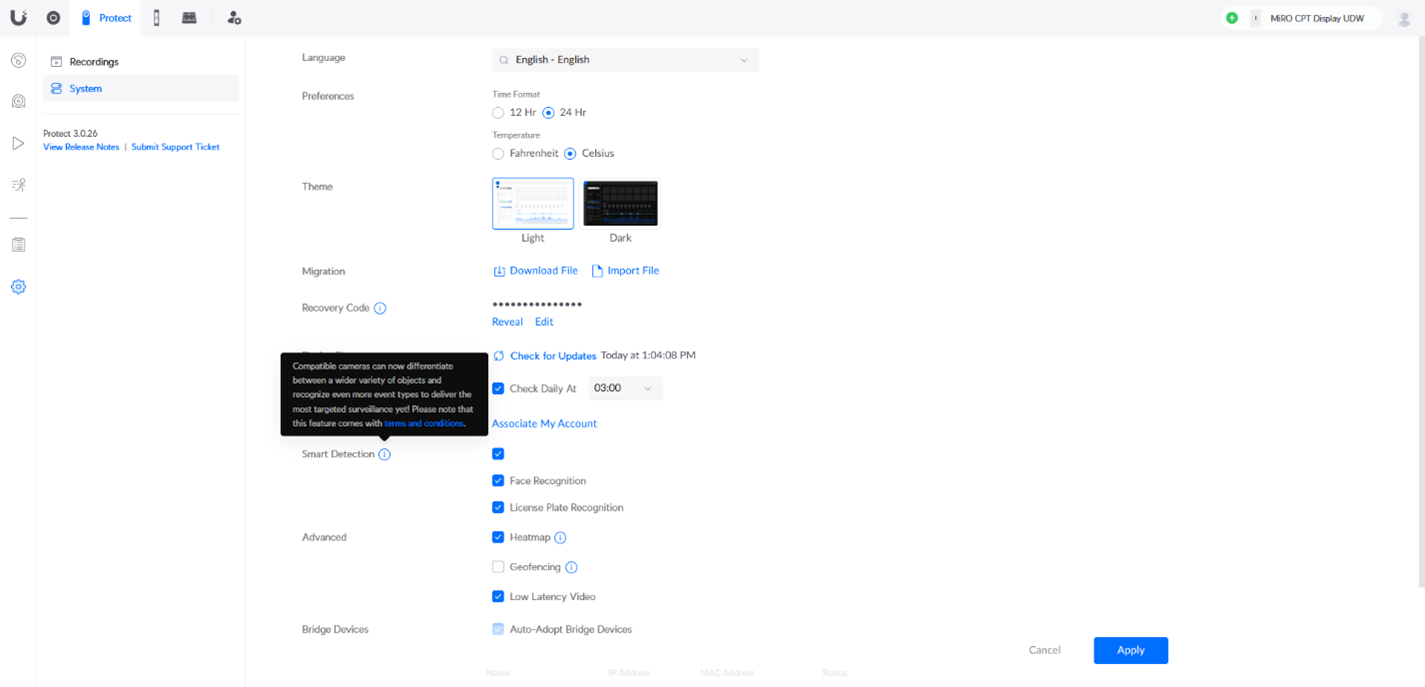
Step 8:
Customise your Smart Detection settings by selecting between Face Recognition and License Plate Recognition.
Step 9:
The Smart Detection set-up is now complete!
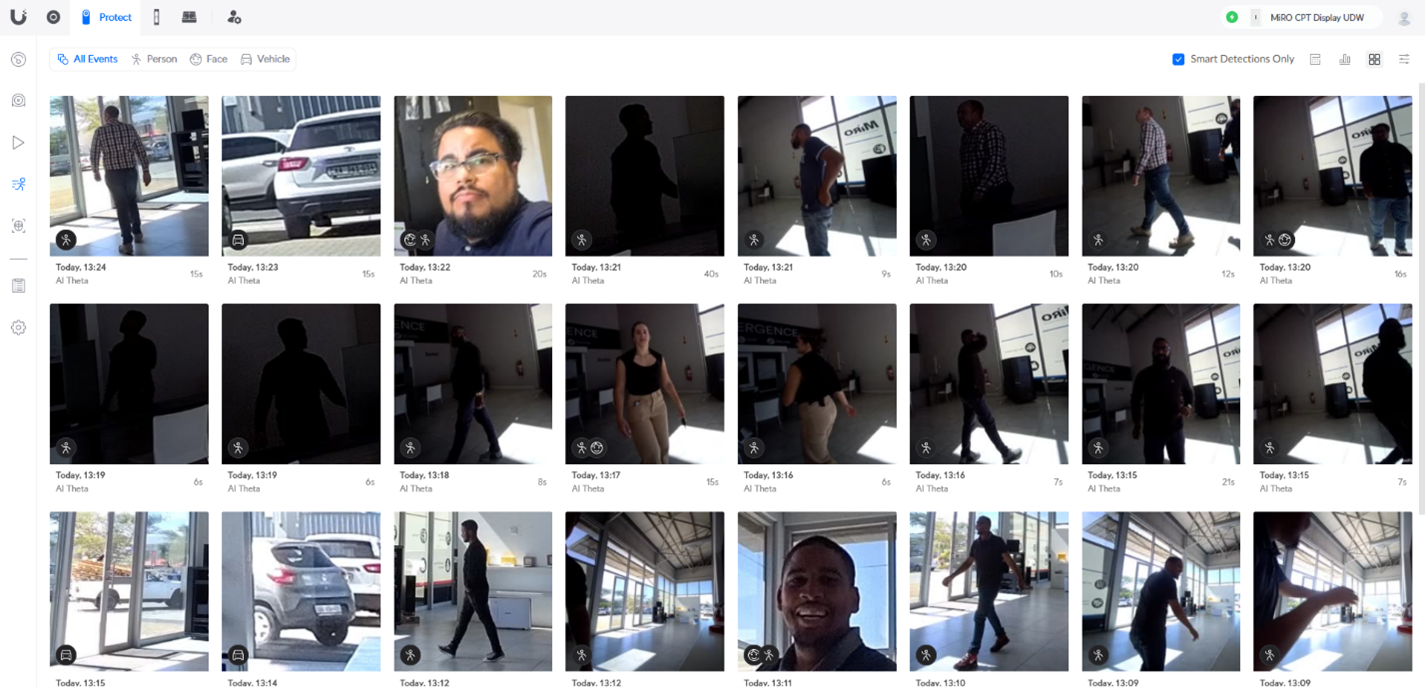
You can now navigate between all the different smart events that have been recorded on your adopted cameras. In the screenshot below, I have chosen to enable the “Smart Detections Only” option.
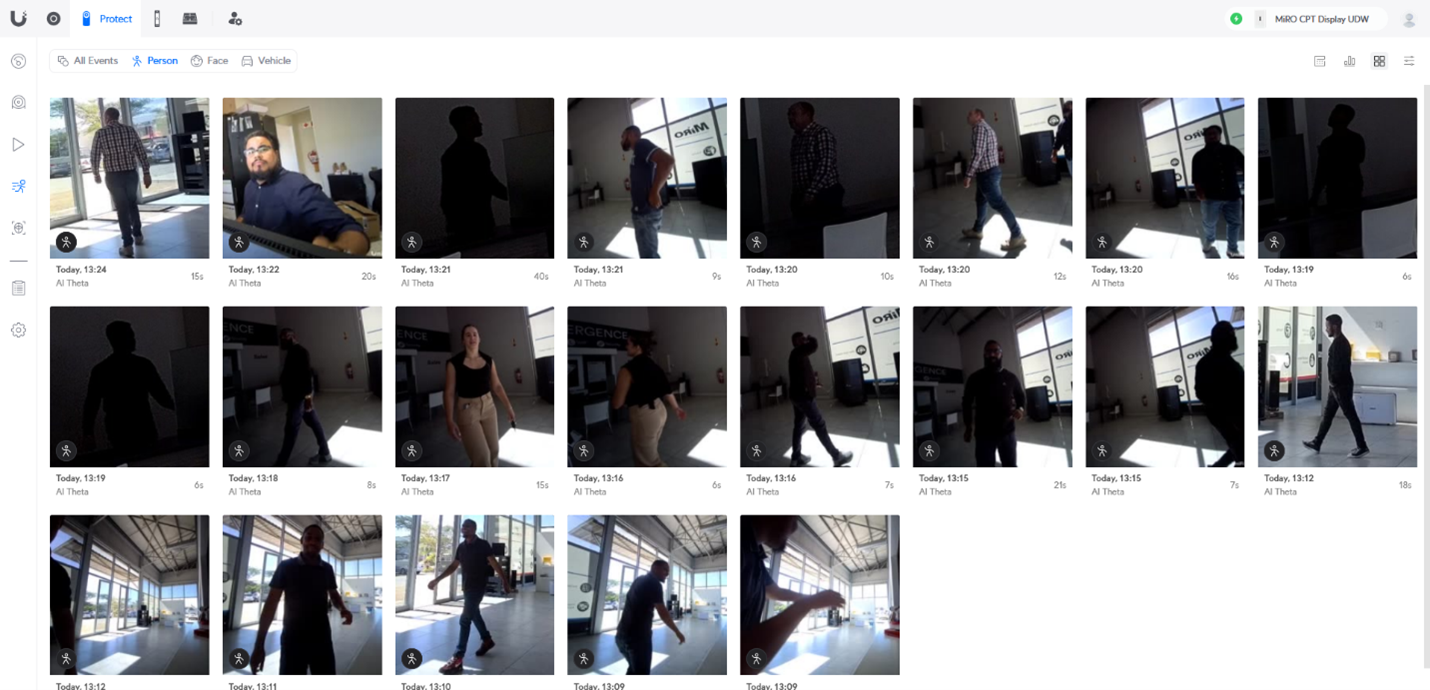
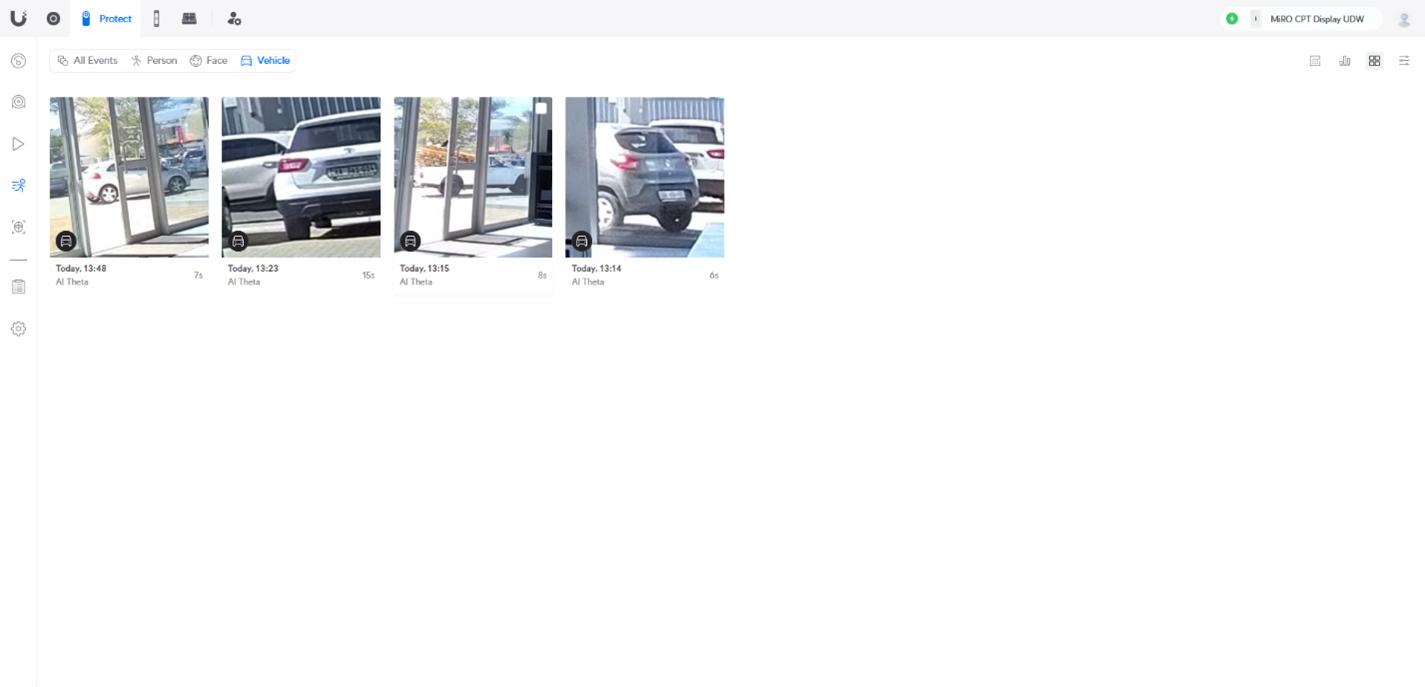
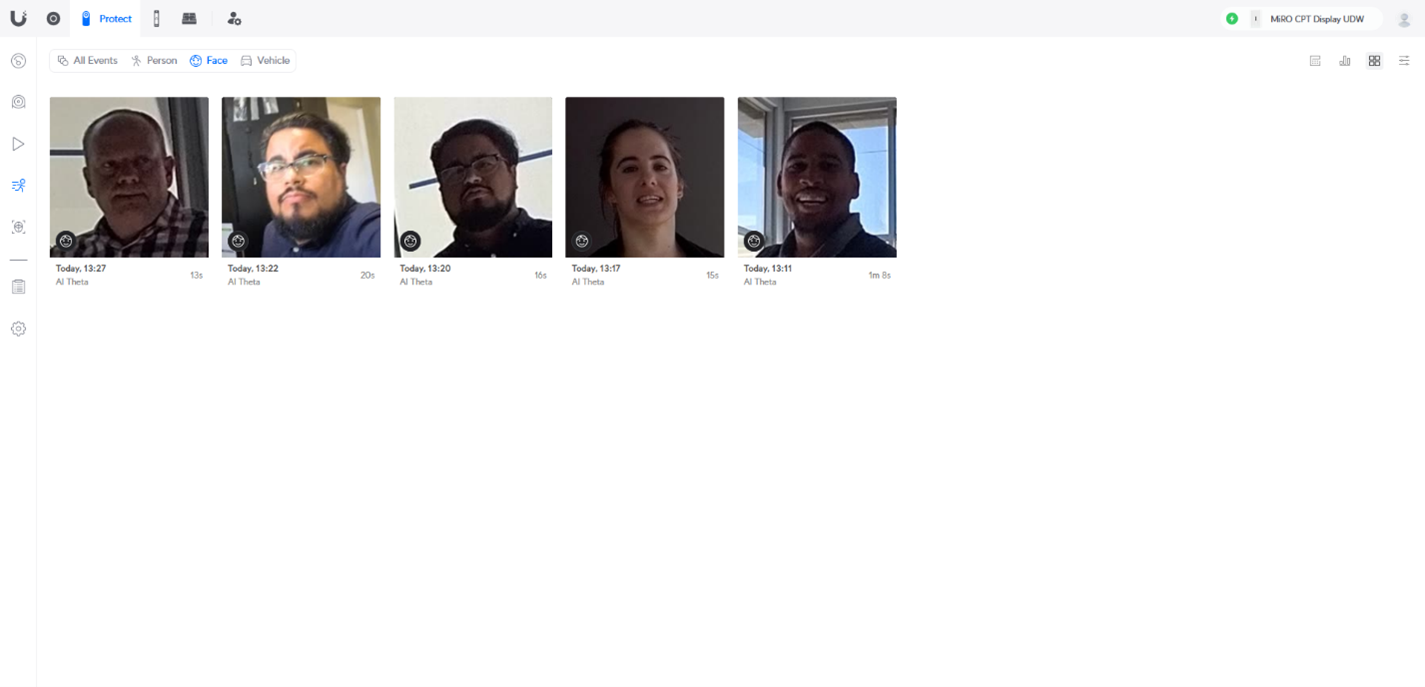
Below are the various options for Detection:
All events:
Person:
Vehicle:
Faces:
Step 10:
Once the Smart Detections have been configured and working, we can now navigate to the Recognition tab.
This will show us all the faces that our UniFi Protect system has been able to detect based on the footage captured with Smart Detection enabled.
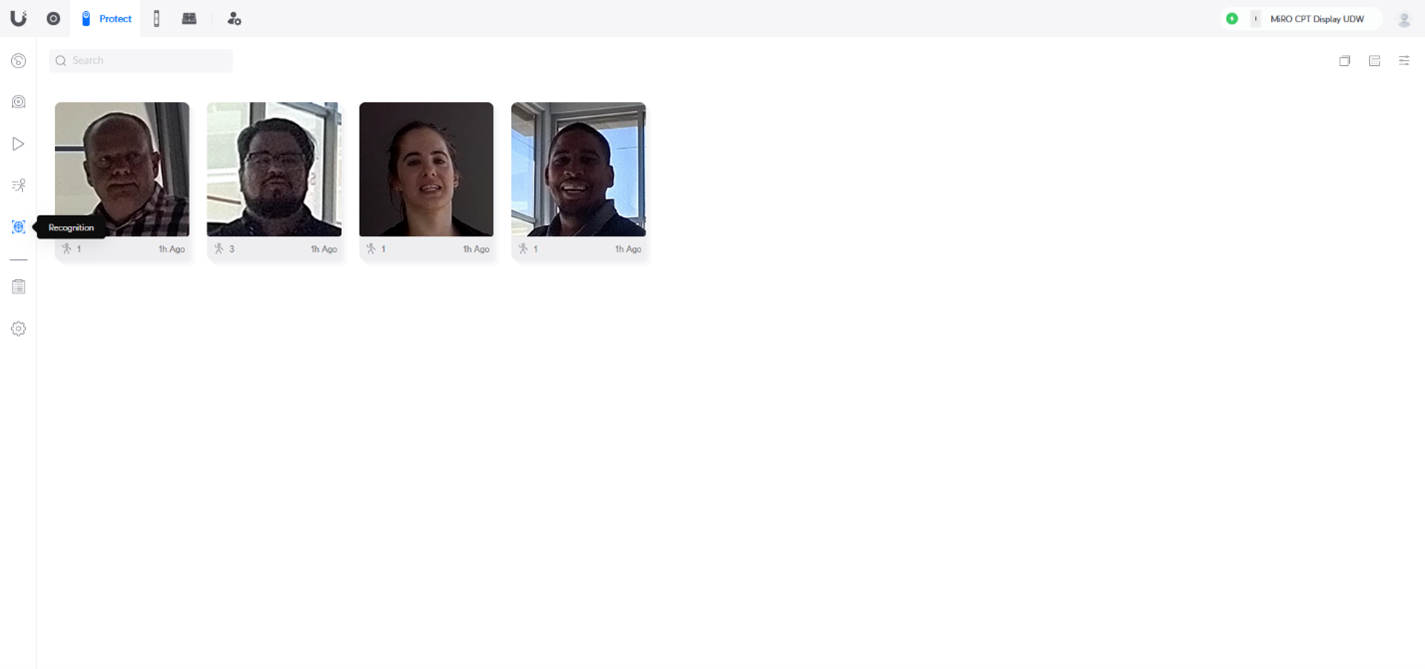
We can now click a face and add details to this person like a name and description.
If we would like to get notifications of a specific person, we can mark them as a “Person of Interest”. This gives us the option to be notified when they show up on one of our cameras.
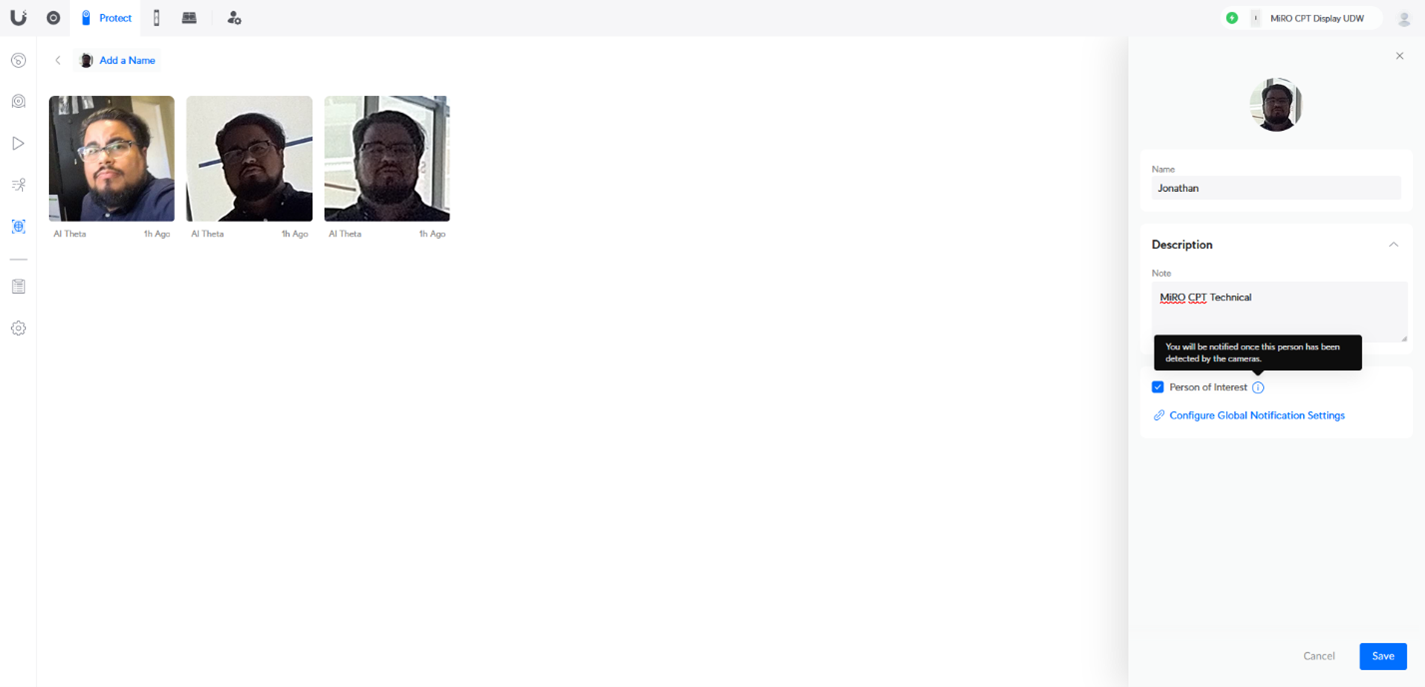
Here we can configure our global settings for people of interest as well as other detections.
We can also exclude certain devices if we so choose.
Off-site gives us the option to only be notified of people of interest once we have left the site to reduce the number of notifications we will receive.

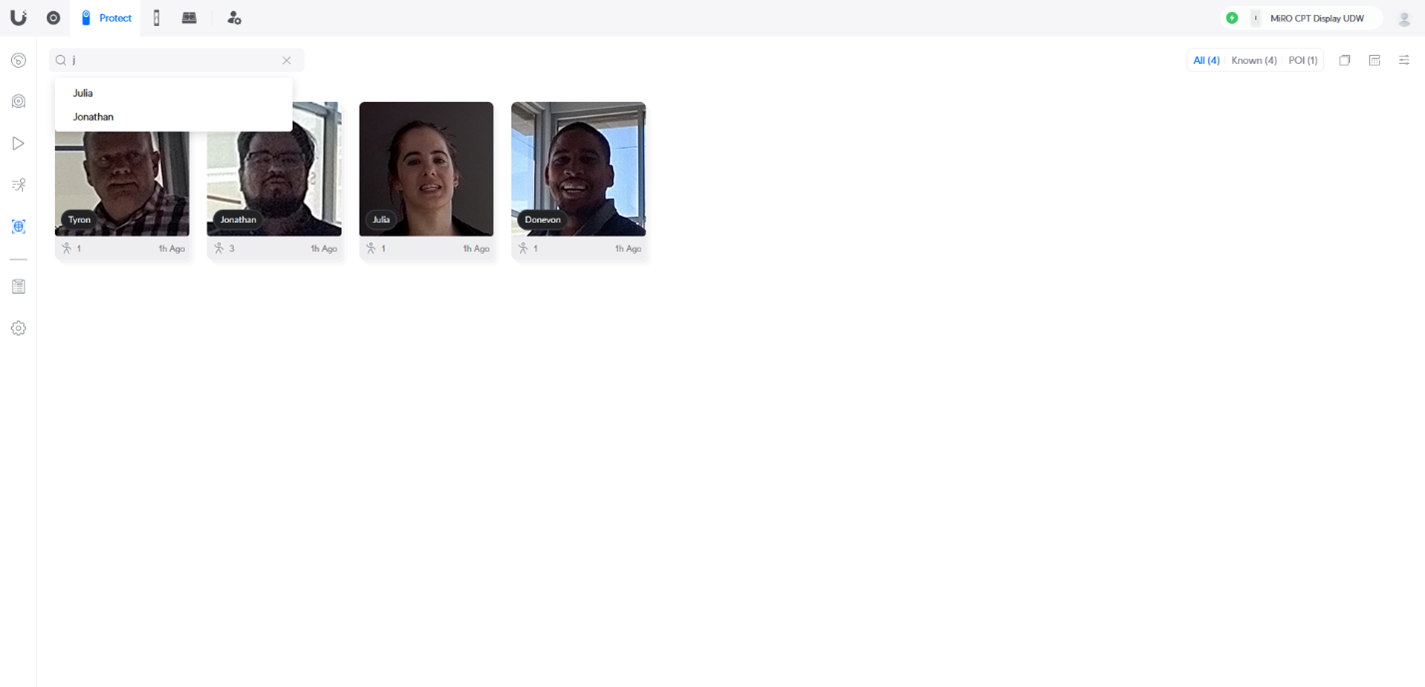
Once all the faces picked up by the Face Recognition have been named, we can search through the list by the person’s name.
We also have the option of searching manually and viewing the history of detections picked up by the camera.
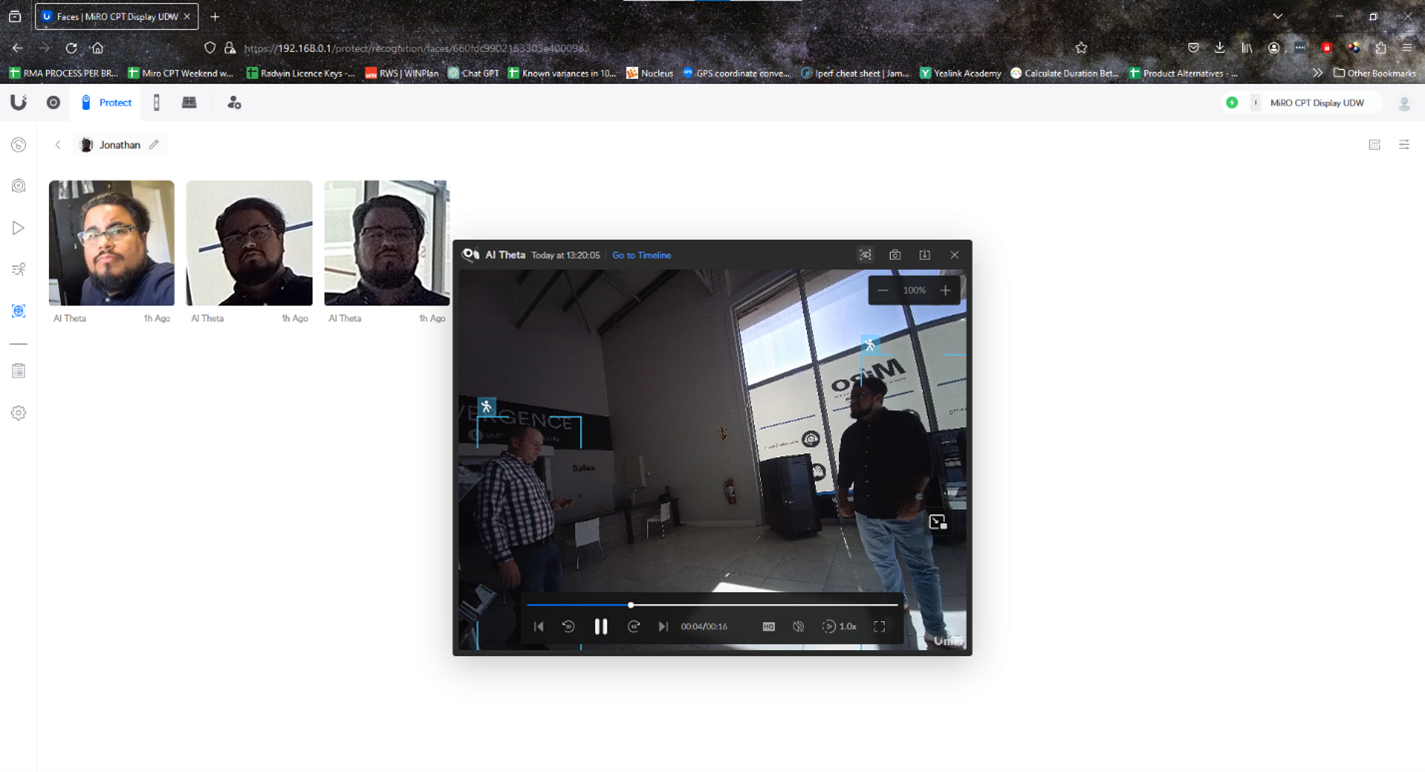
Clicking on a face will bring up all the detections for that person. Once there, we can view all the related video clips.
As you can see, the setup and operation of UniFi Protect is simple and intuitive, allowing users to monitor their sites with a great degree of confidence, security, and ease. Should you require any additional information or assistance in selecting your UniFi protect solution, please get in touch with us at sales@miro.co.za or 012 957 0960.
Comments
View Comments